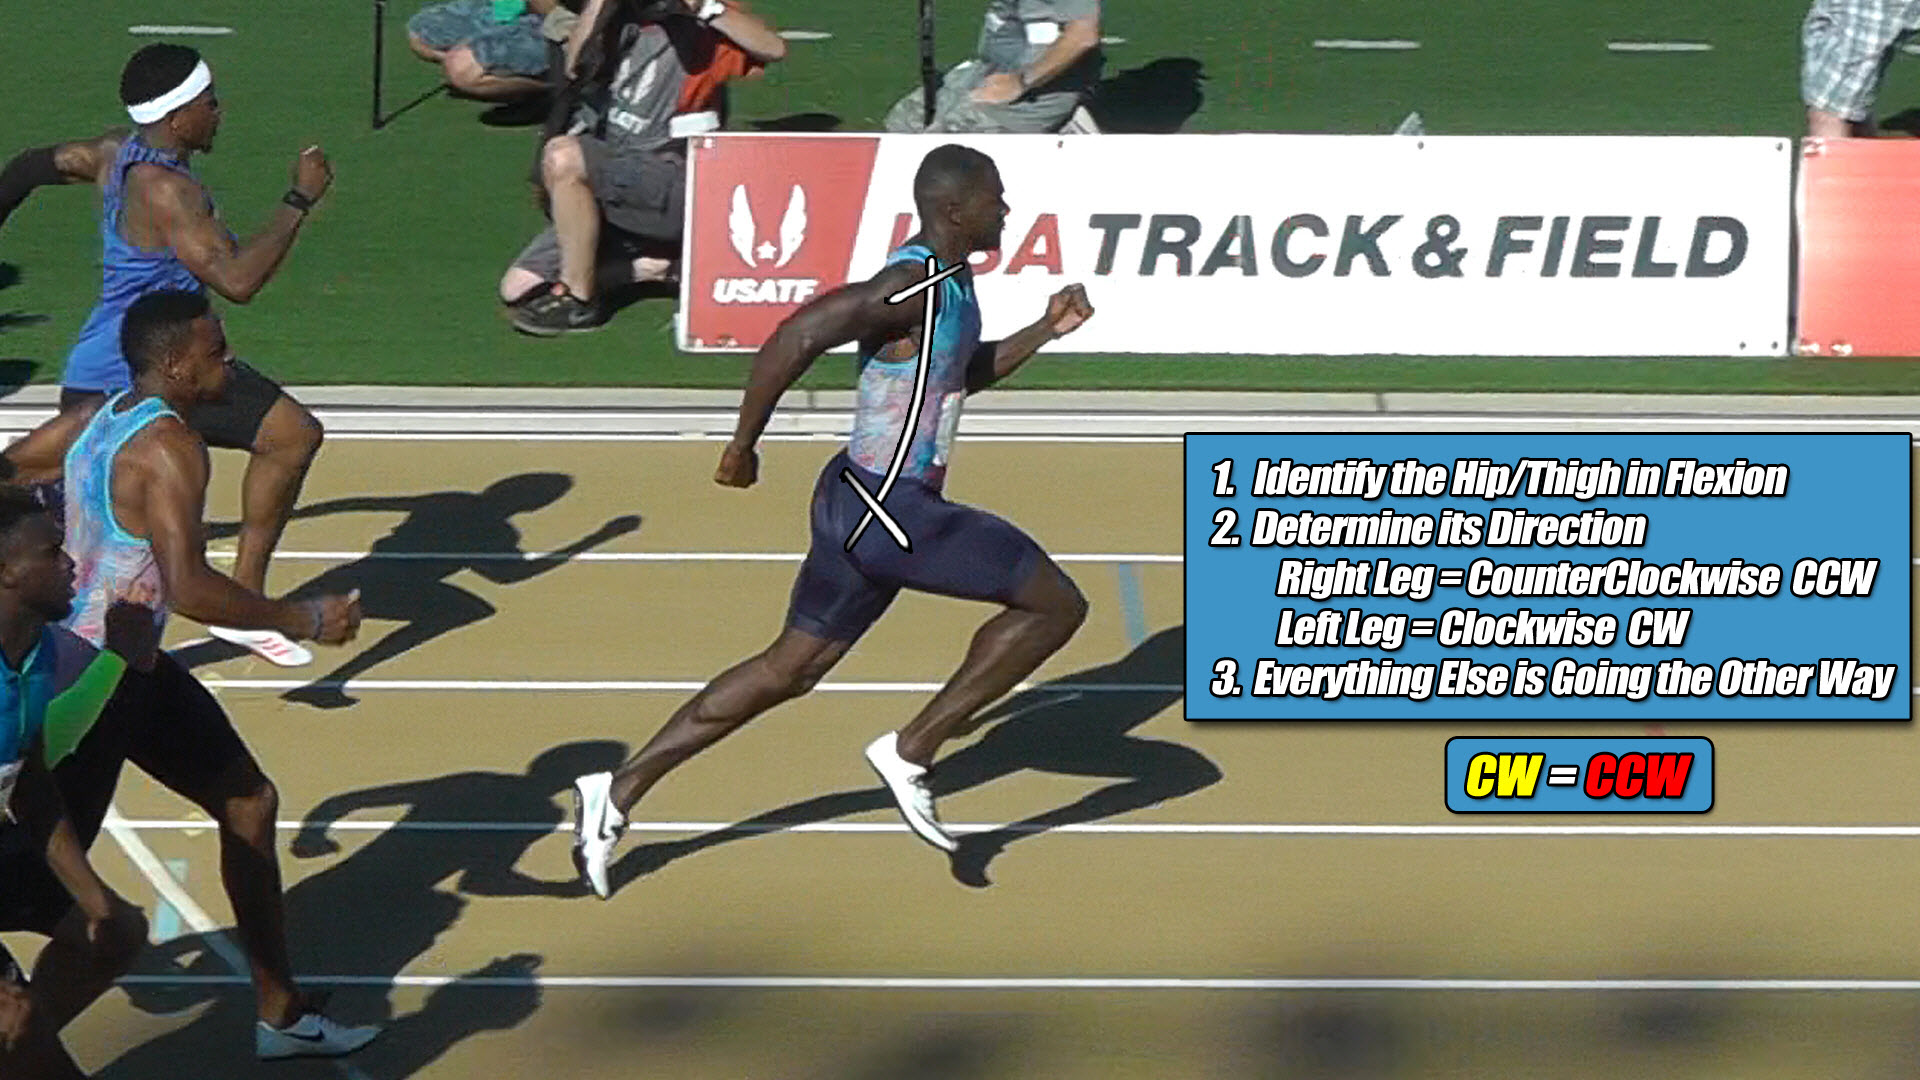
Alright, this is what it’s all about! Let’s get right to it and see if you can identify some torque patterns in action. To get things started I’m going to place my shoulder line, hip line and midline on the athlete, like this. And I’m also going to put up our familiar looking 3-step list below, to help guide us along. See Figure 12-1 below.
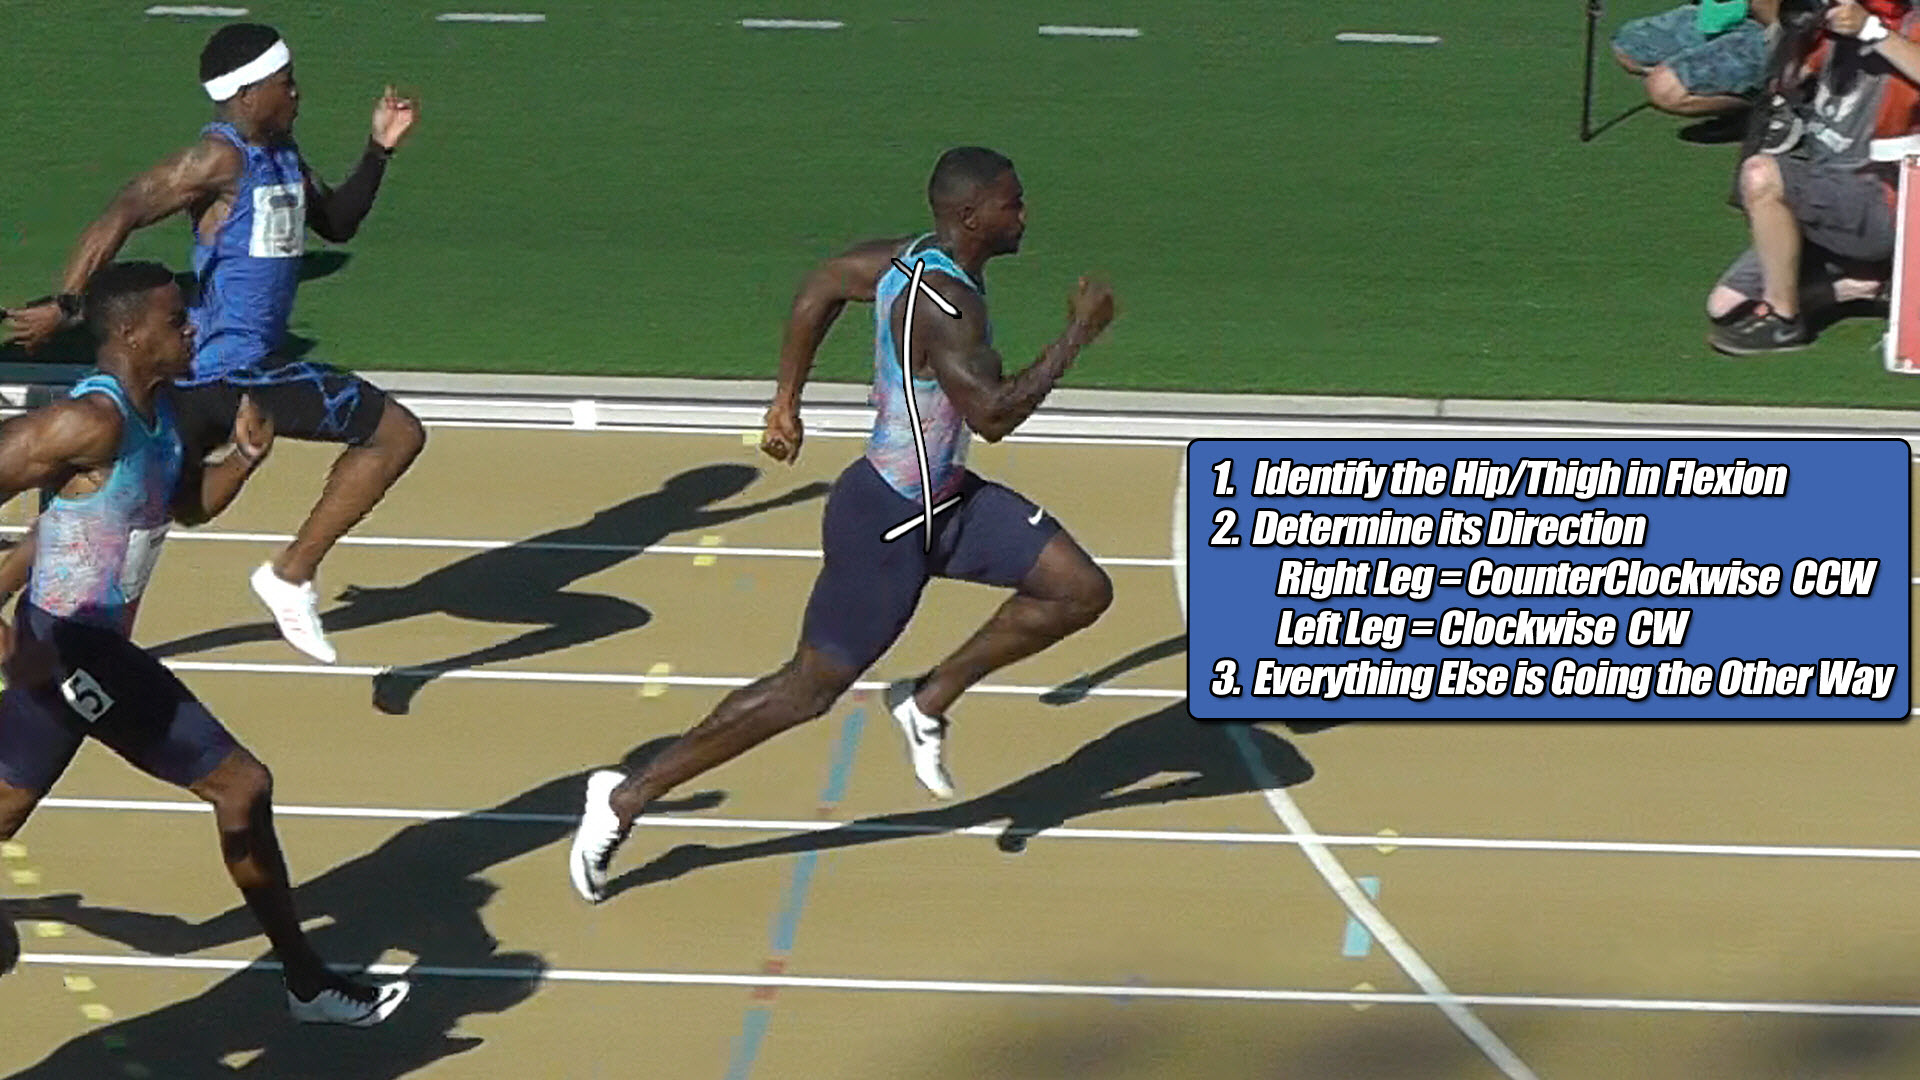
Now, referring back to Figure 12-1 above, you’ll remember that I said the hip flexors always work alone, so, that’s the very first thing you’re going to want to key in on, and that is, which hip, or, thigh is in flexion because it makes it really easy to figure out someone’s torque pattern once you do and that’s why I have it as item #1 in our list. So, knowing the hip flexors are the key, can you tell me which one of our runners’ hips or thighs is being flexed, upward, out in front of him? Is it the left one, or, right? If you said the left one, then you are correct.
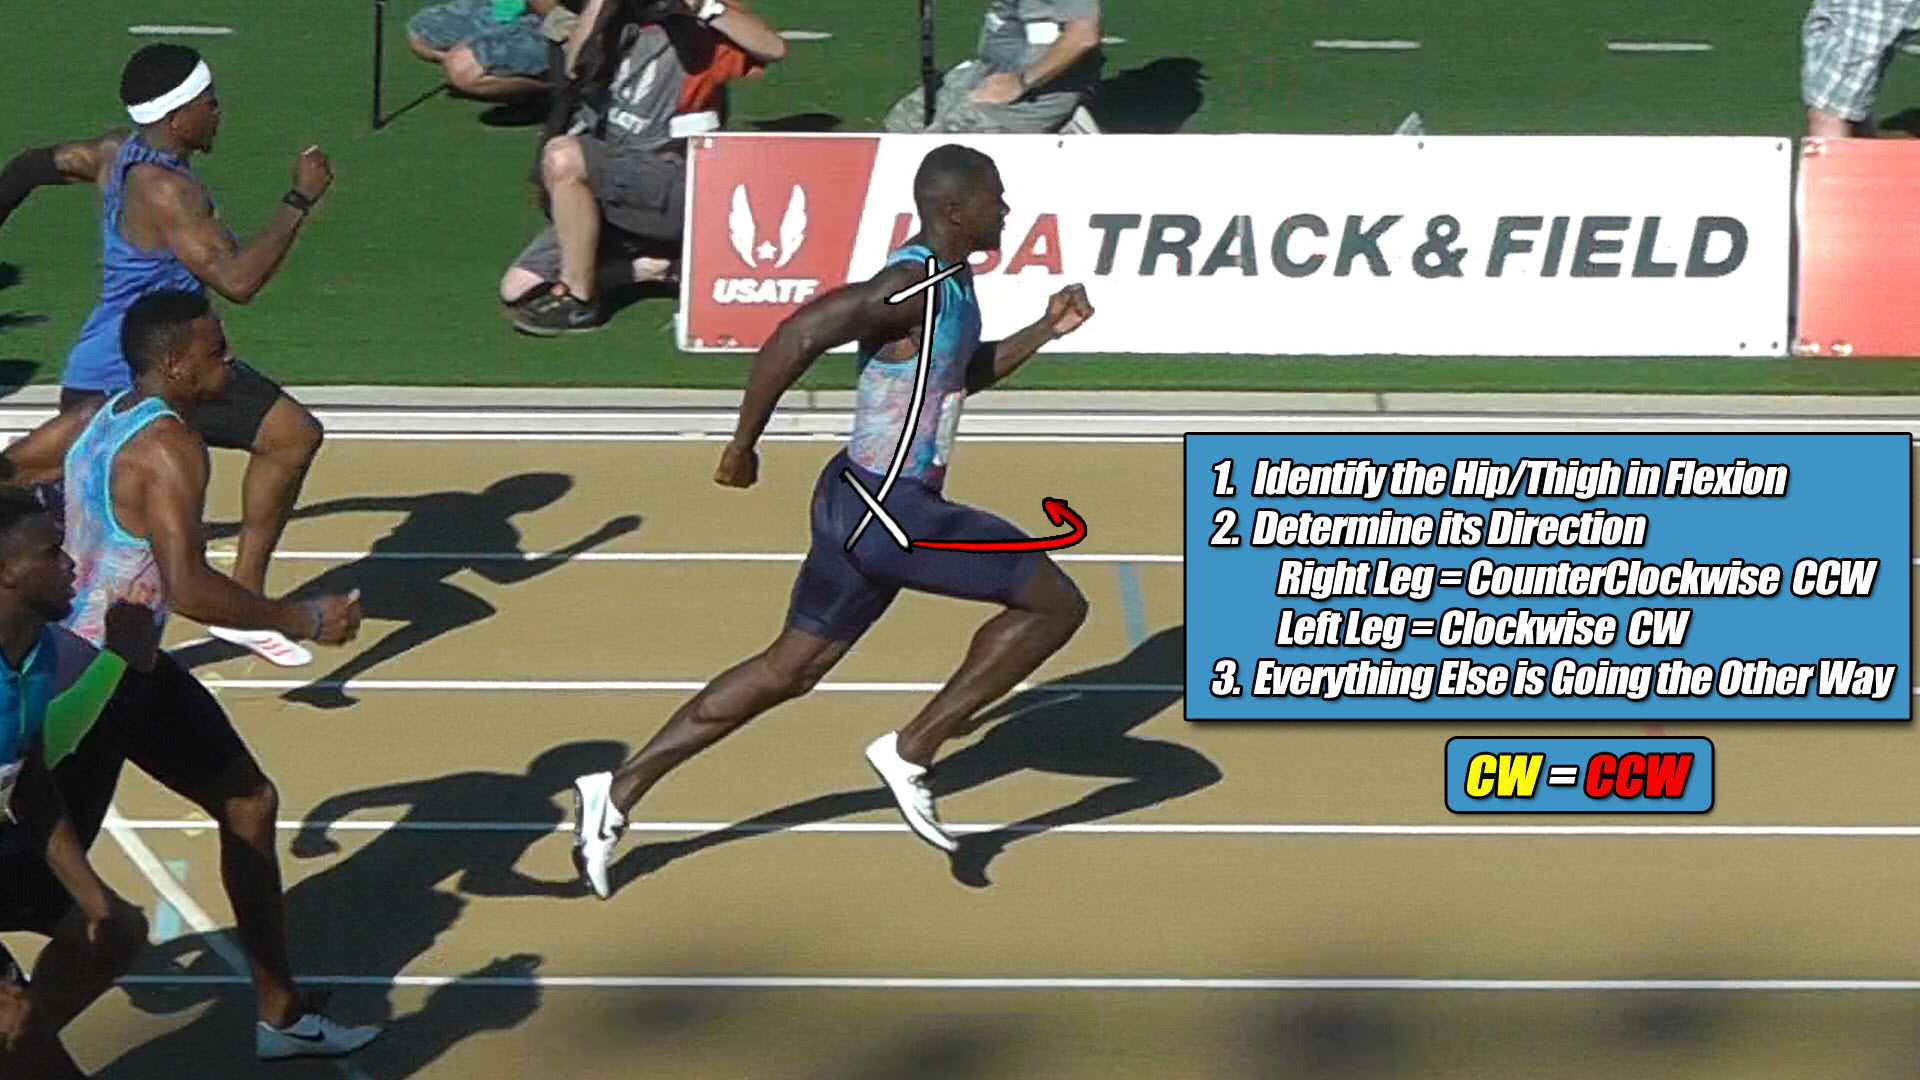
Now, once you know that, the second thing you need to do is determine its direction, and when I say determine its direction, I am referring to the direction of the same leg where the hip is flexed, which in our example here above in Figure 12-1, is his left leg. And if you look at item #2 in our table from Figure 12-1 above, can you then tell which direction the left leg always goes? If you said clockwise then you are correct yet again.
And, I’m going to draw that torque on him, now, in yellow to keep with the same color references for these torques as before where you’ll recall, everything I drew in yellow was a CW torque and everything I drew in red was a CCW torque and I’m going to put a little key down at the bottom to help remind you of that. See Figure 12-2 below.
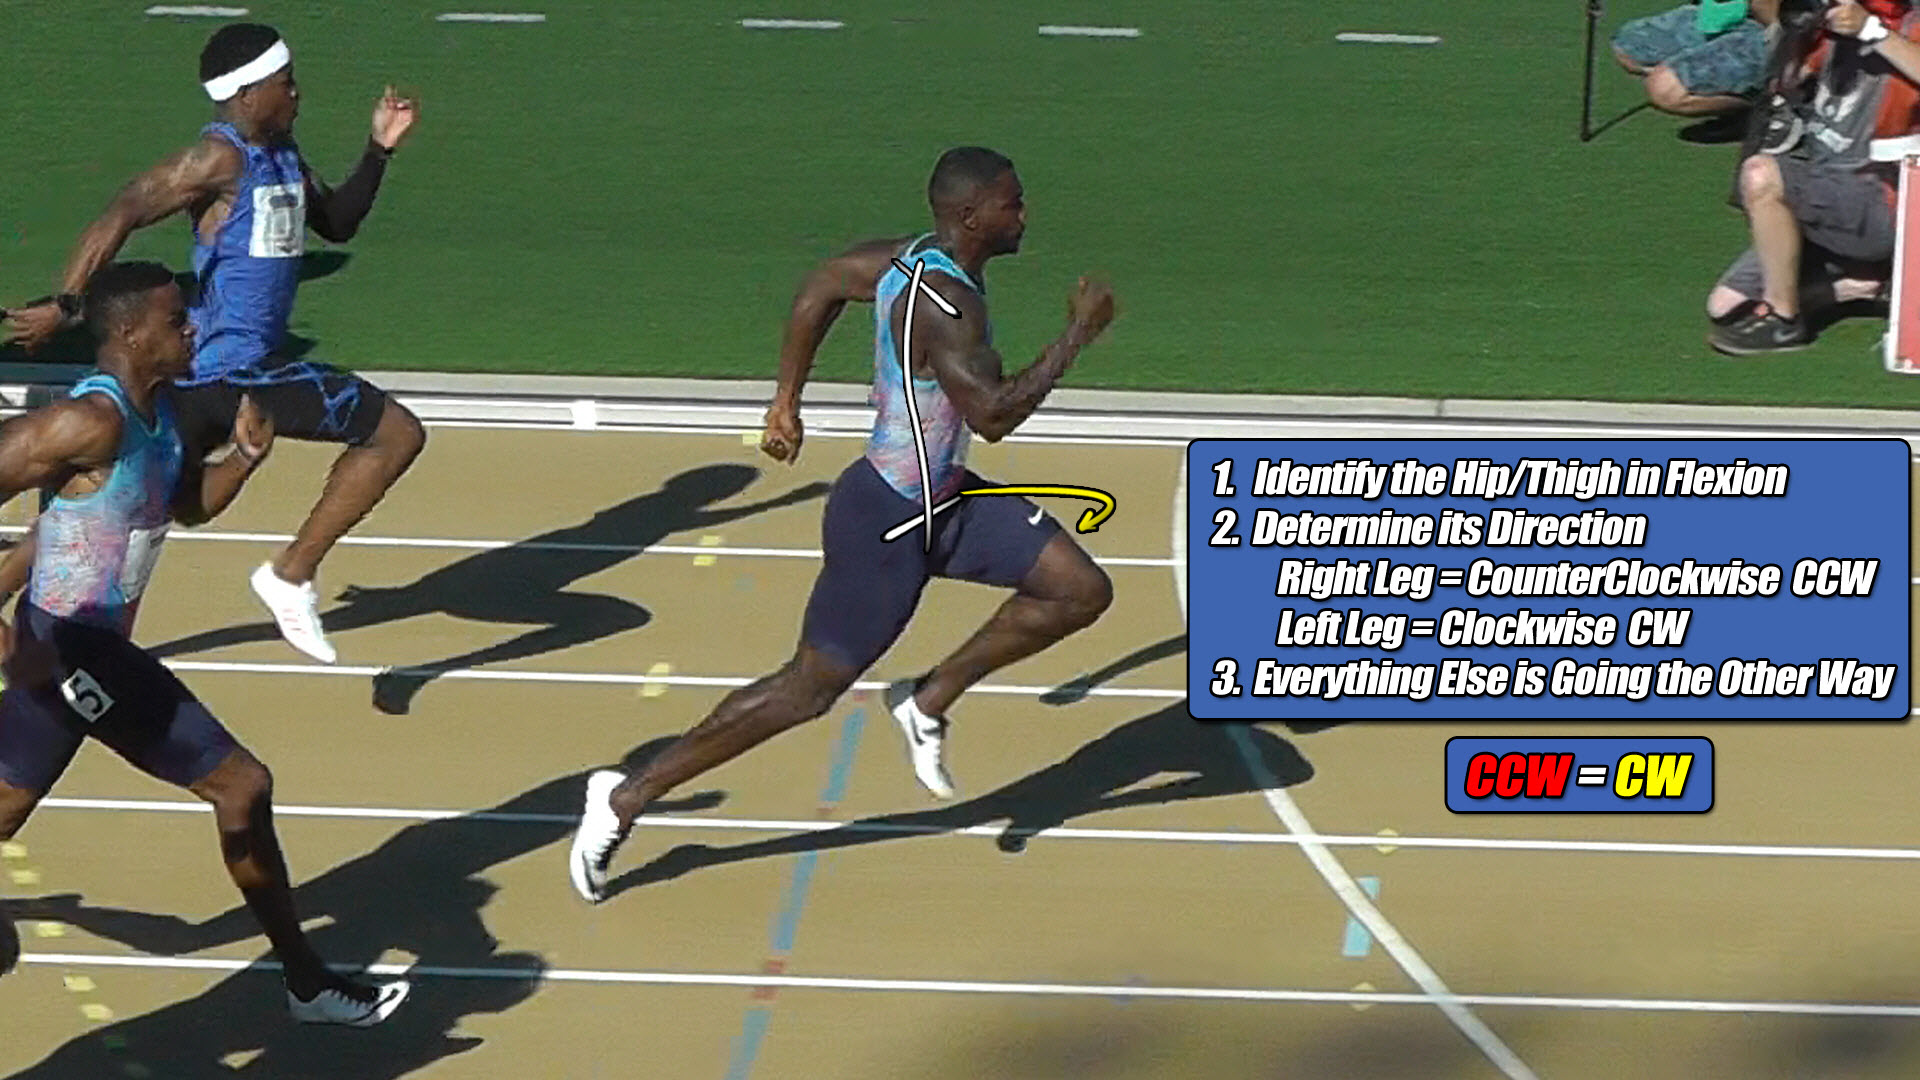
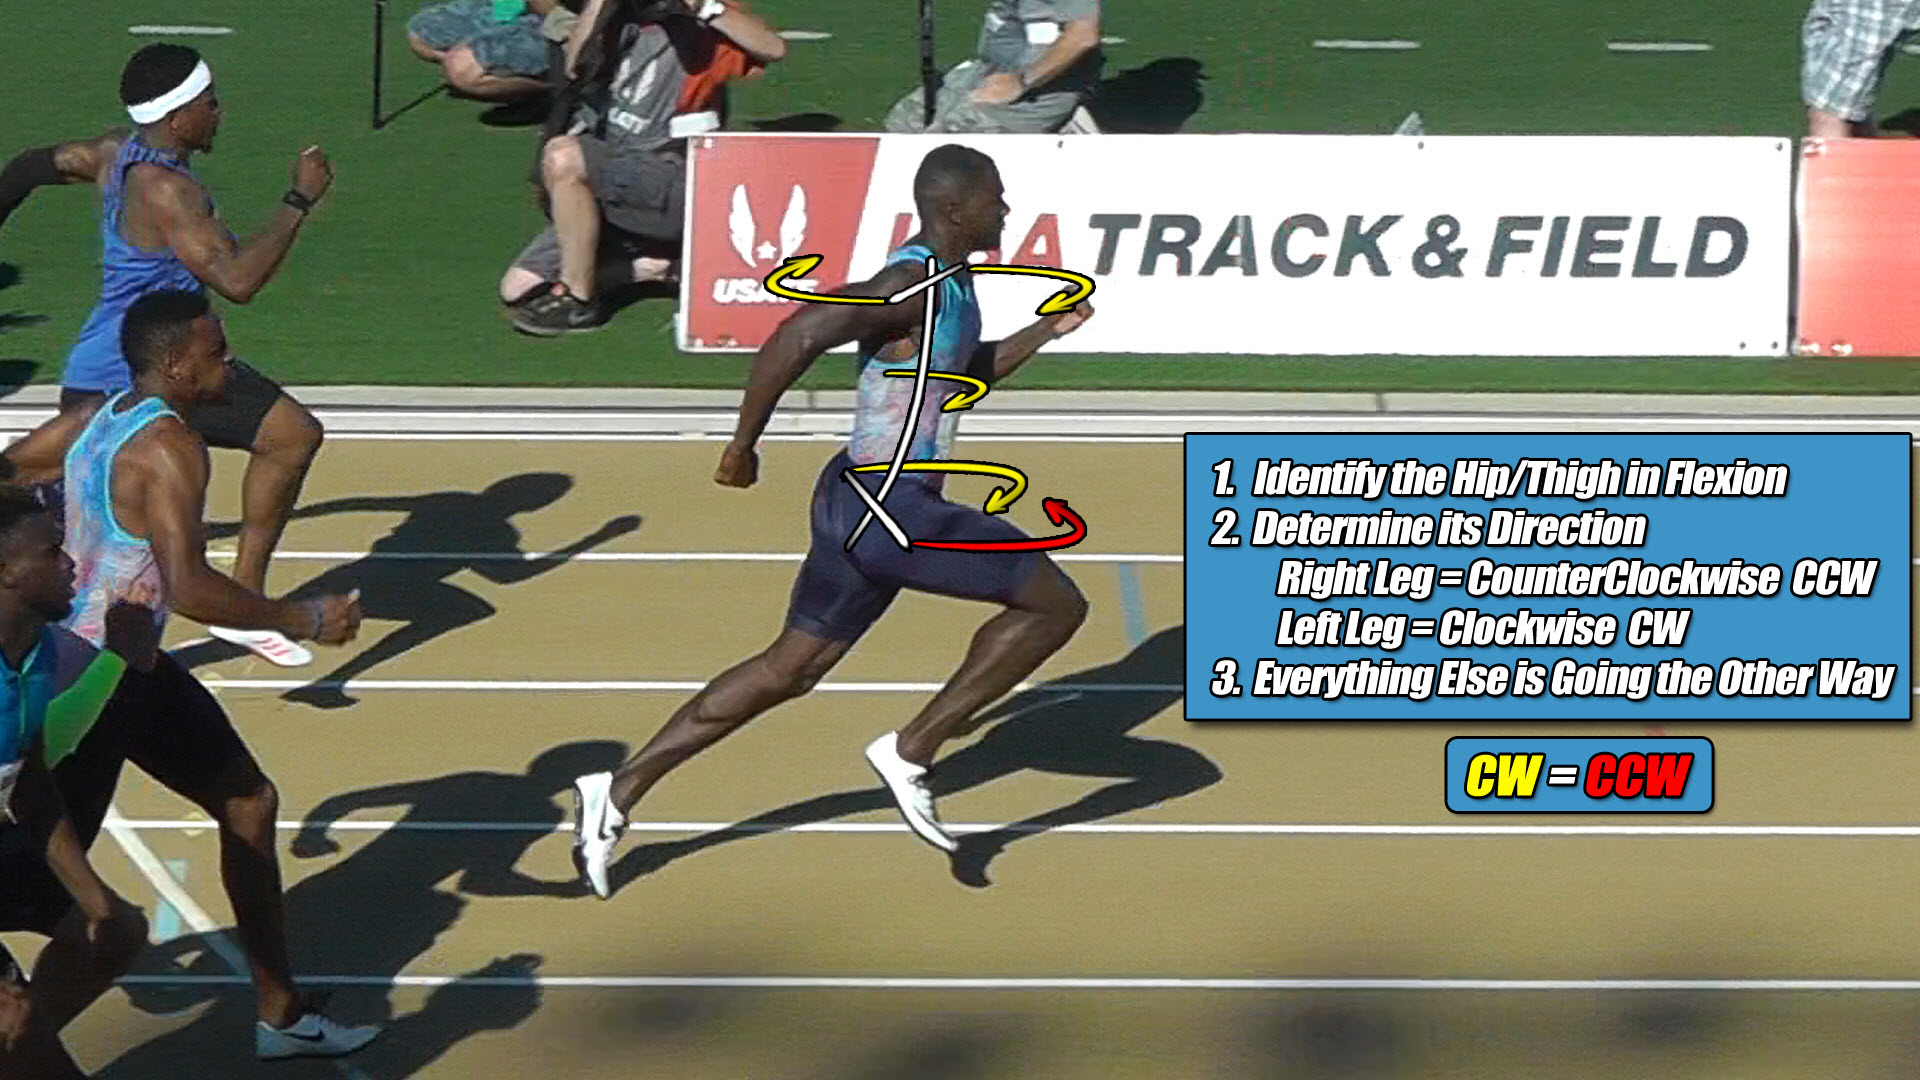
So, once we know the direction of the hip flexors, step three in our table (see Figure 12-2 above) tells us which way everything else is going, which is… what direction? If you said the other way, or more specifically, CCW, you are correct once more and let’s go ahead and draw those four torques on him now, in red. See Figure 12-3 below.
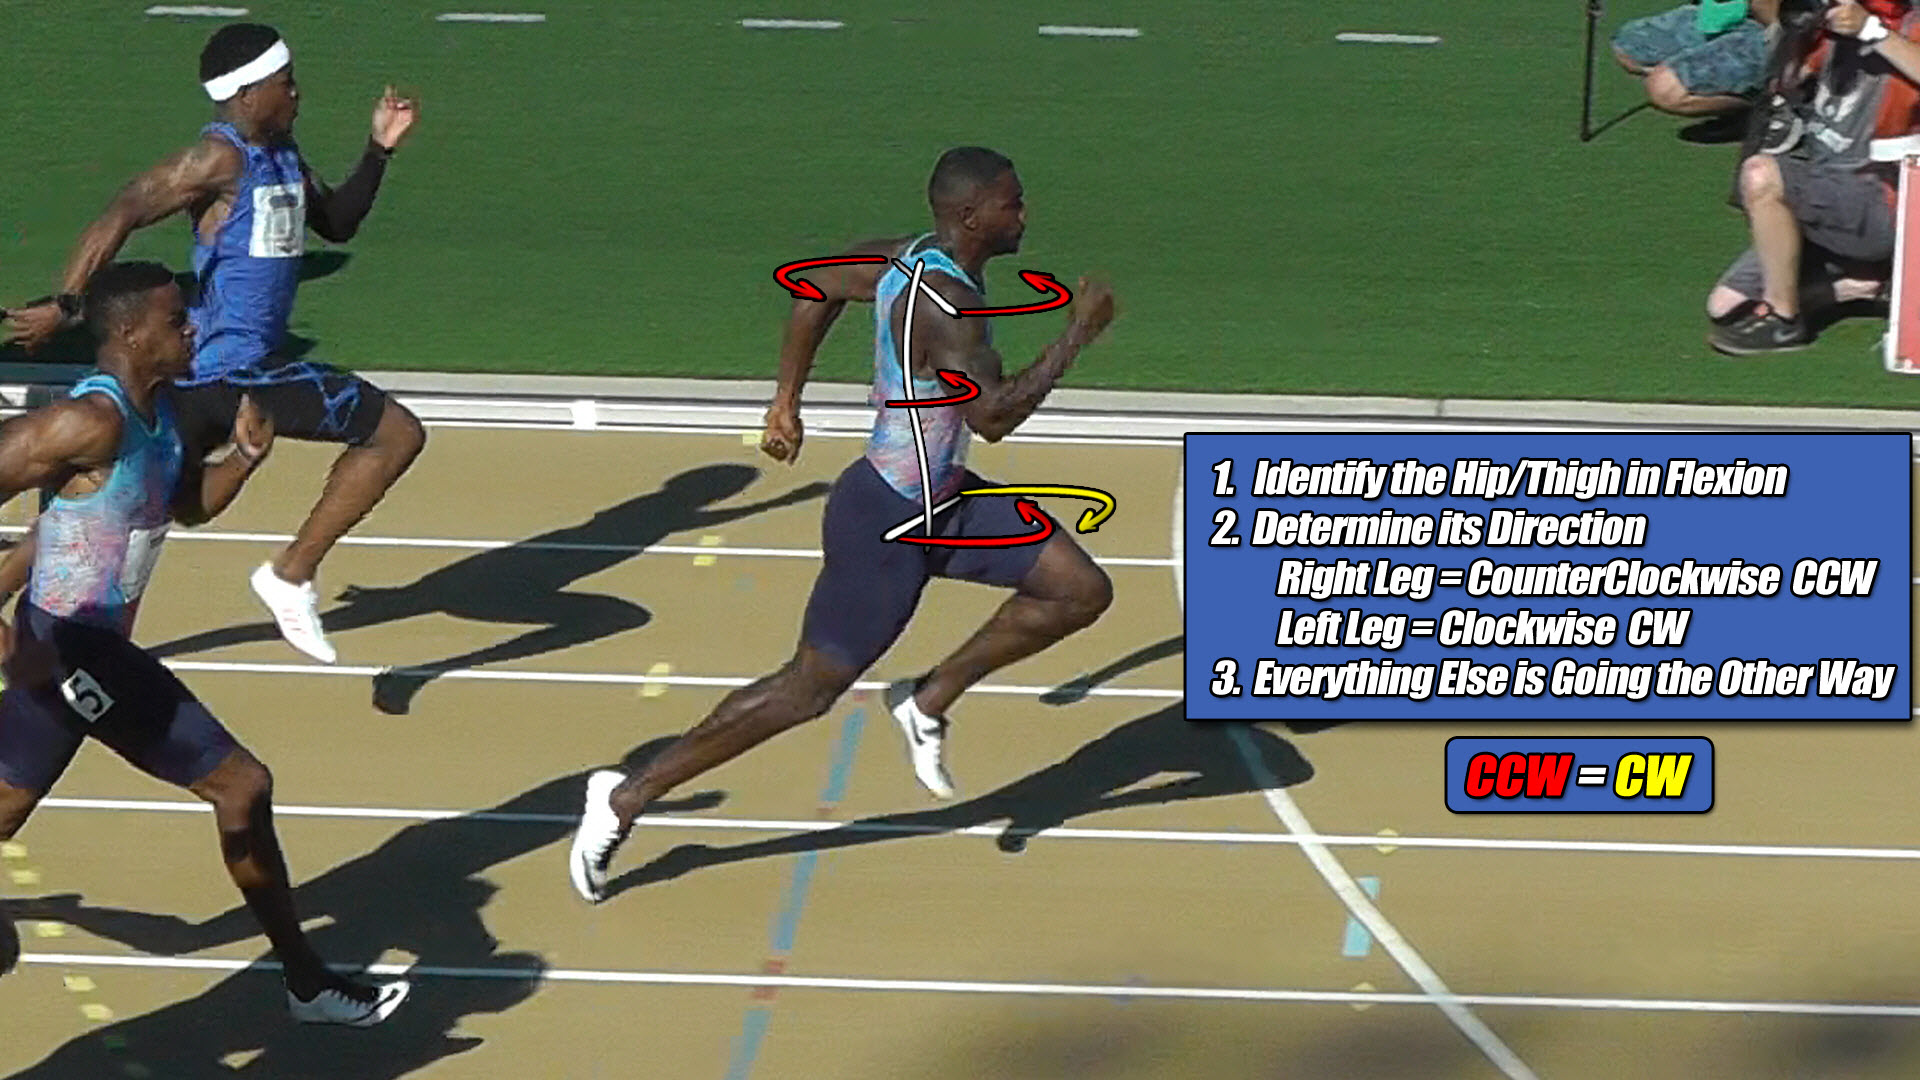
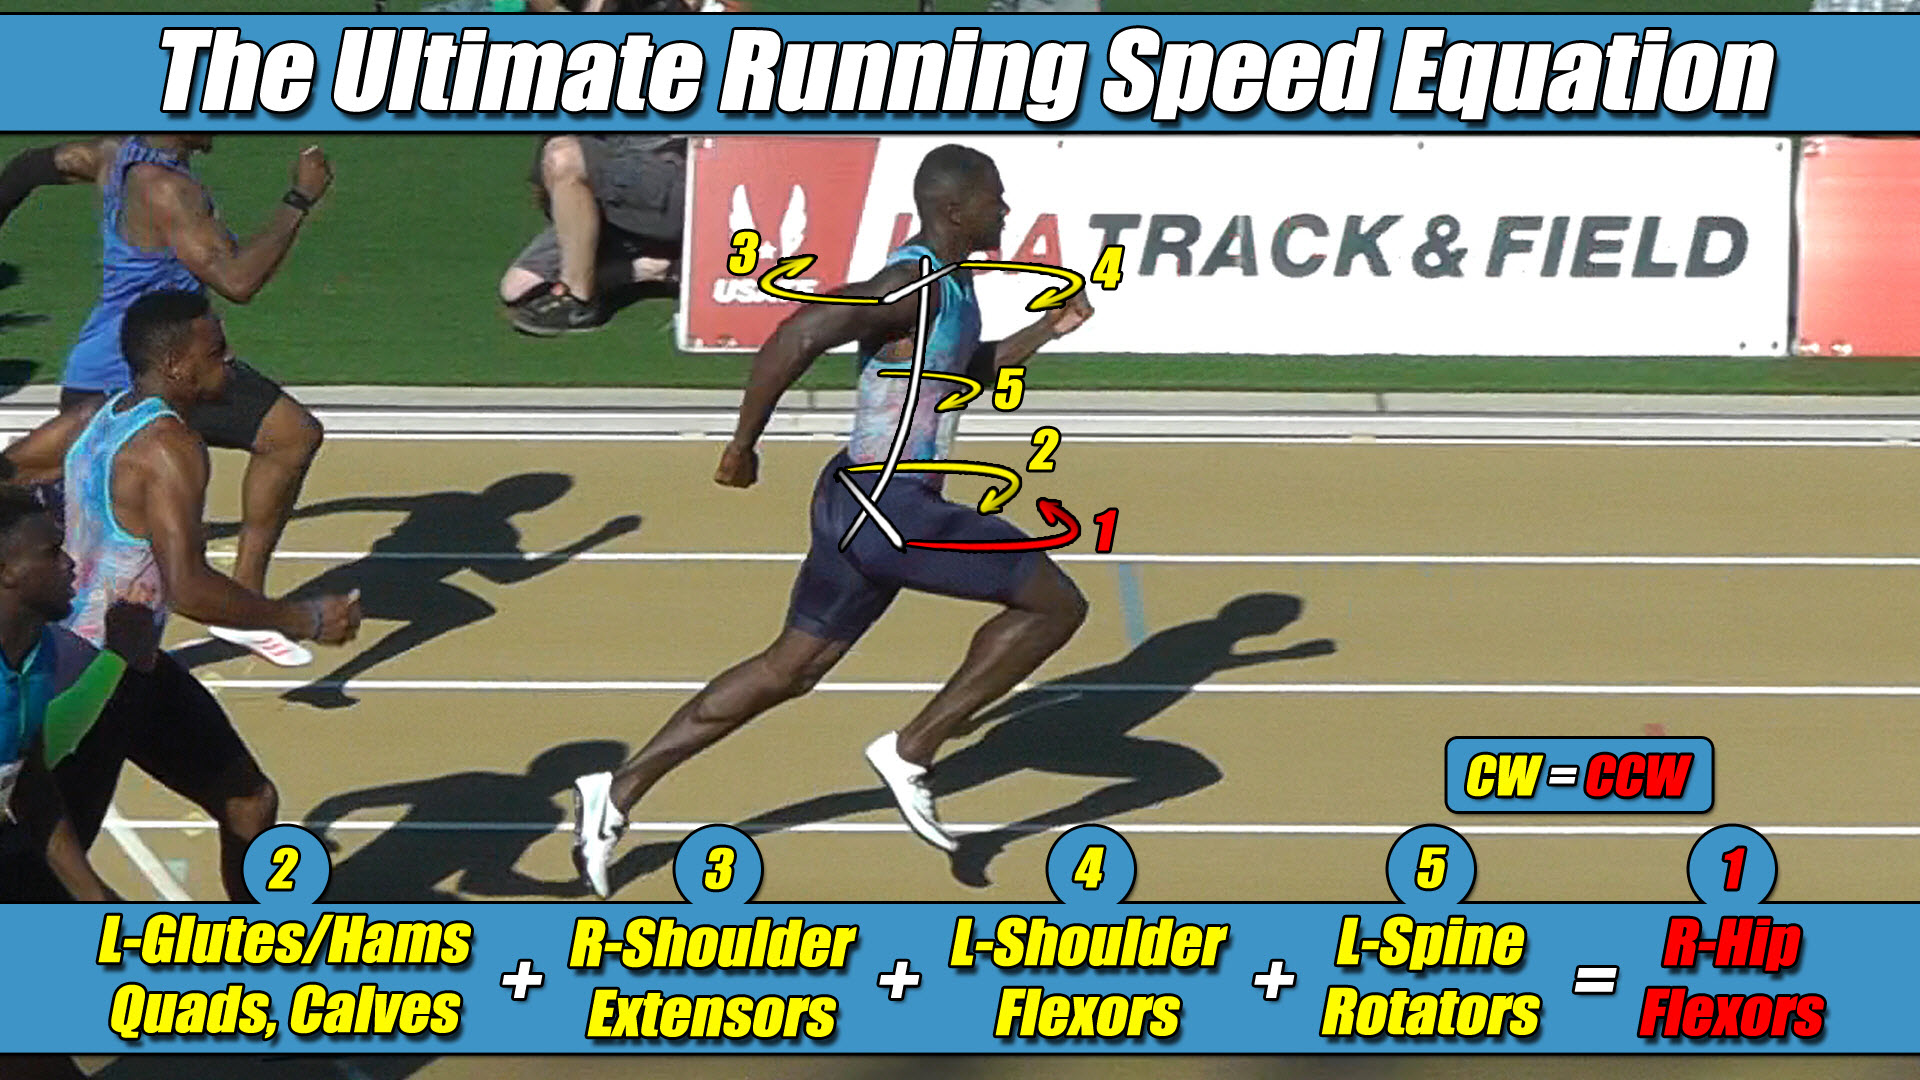
And there is your ultimate running speed equation in action for this sprinter showing you all of the muscles he is using to produce this torque pattern. Pretty simple, right? See Figure 12-4.
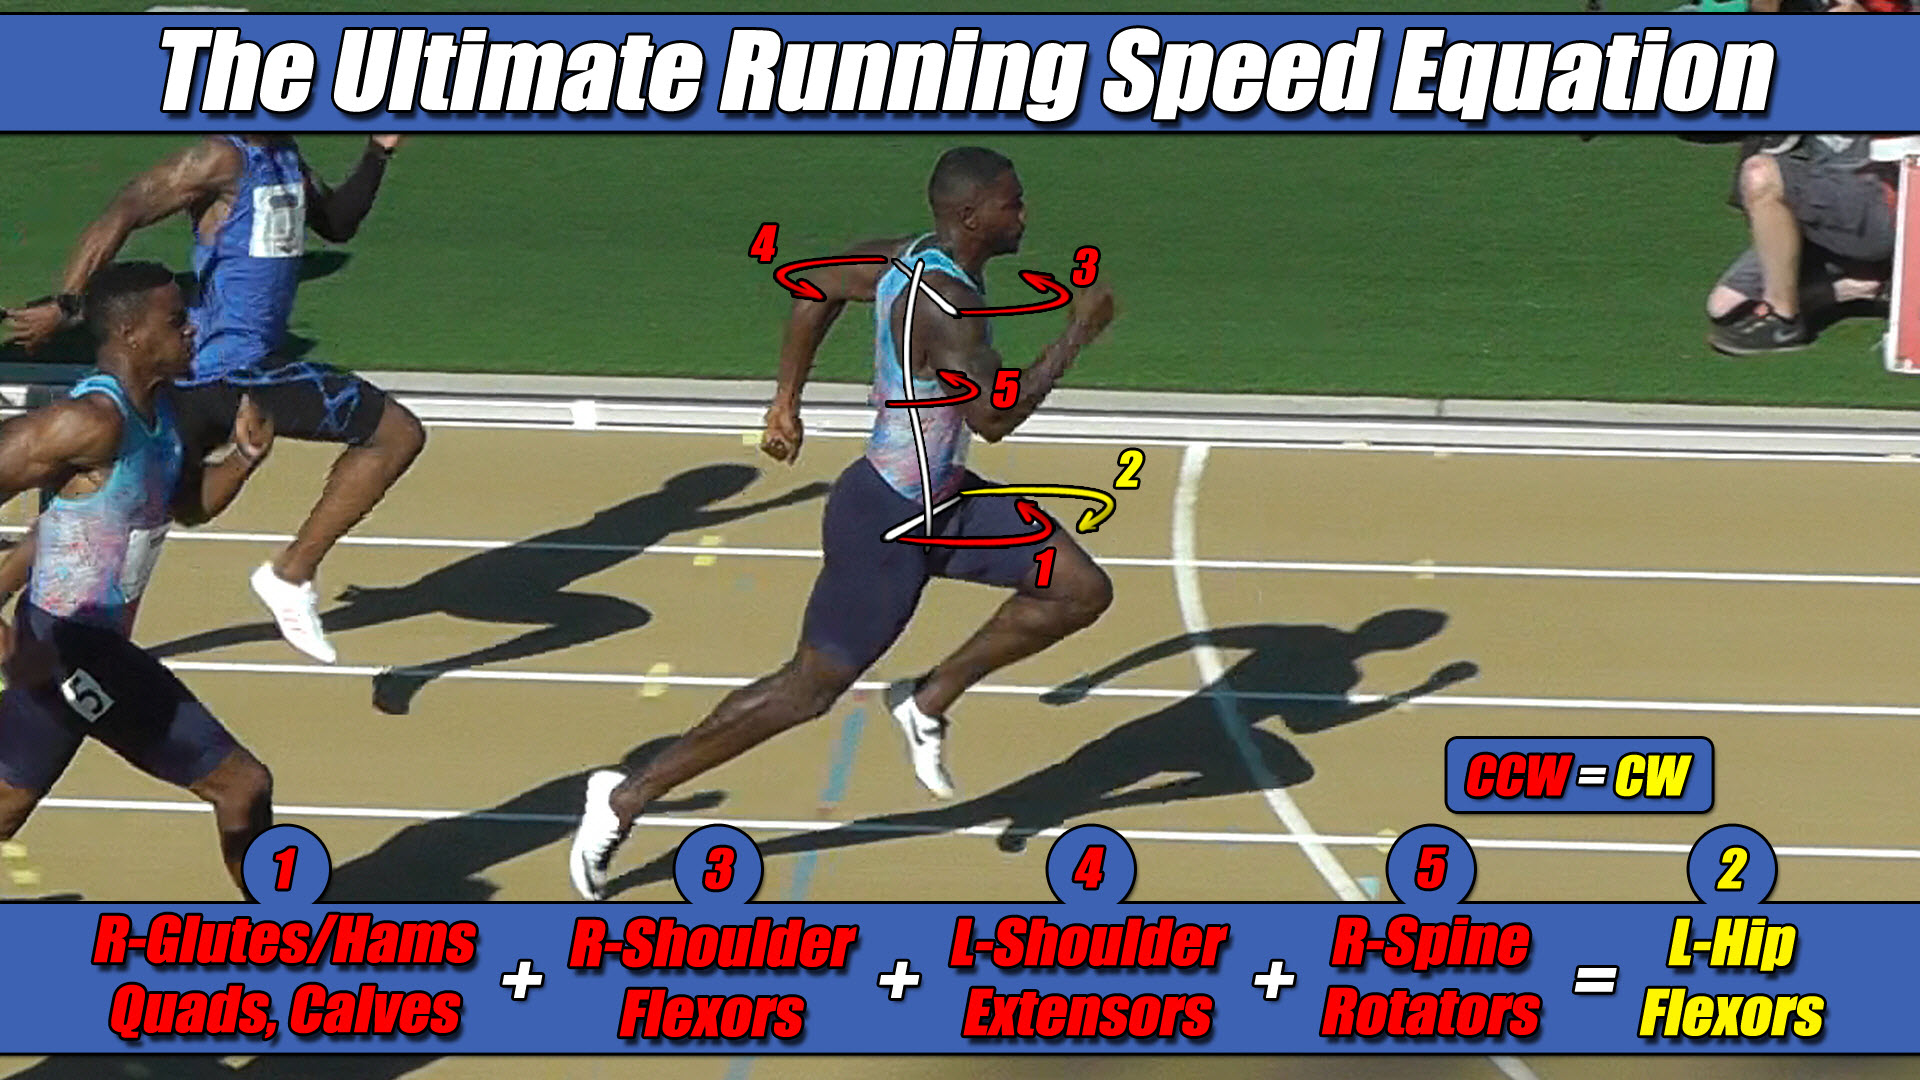
Okay, let’s advance the clip a little further to where his arms and legs are switched, such as right here, and do this again. See Figure 12-5 below.
Step 1 says to identify the hip, or, thigh that is in flexion, and, so which one is it? If you said the right one, good job.
Step 2 says to determine its direction and which way does the right leg always go? If you said, counterclockwise, you are right again, and let’s draw that on him now, this time in red. See Figure 12-6.
Step 3 says that the direction of everything else is going the other way, so, which is it…? If you said, CW, then congratulations, and let’s draw those four torques on him, now, in yellow. See Figure 12-7.
And there is the other ultimate running speed equation in action showing all of the muscles this sprinter is using to produce this torque pattern. See Figure 12-8.
So, again, these are the only two patterns of toque an athlete can be in when they run and this is the body’s way of letting you know everything you need to be working on in order to run your best. See Figure 12-9.
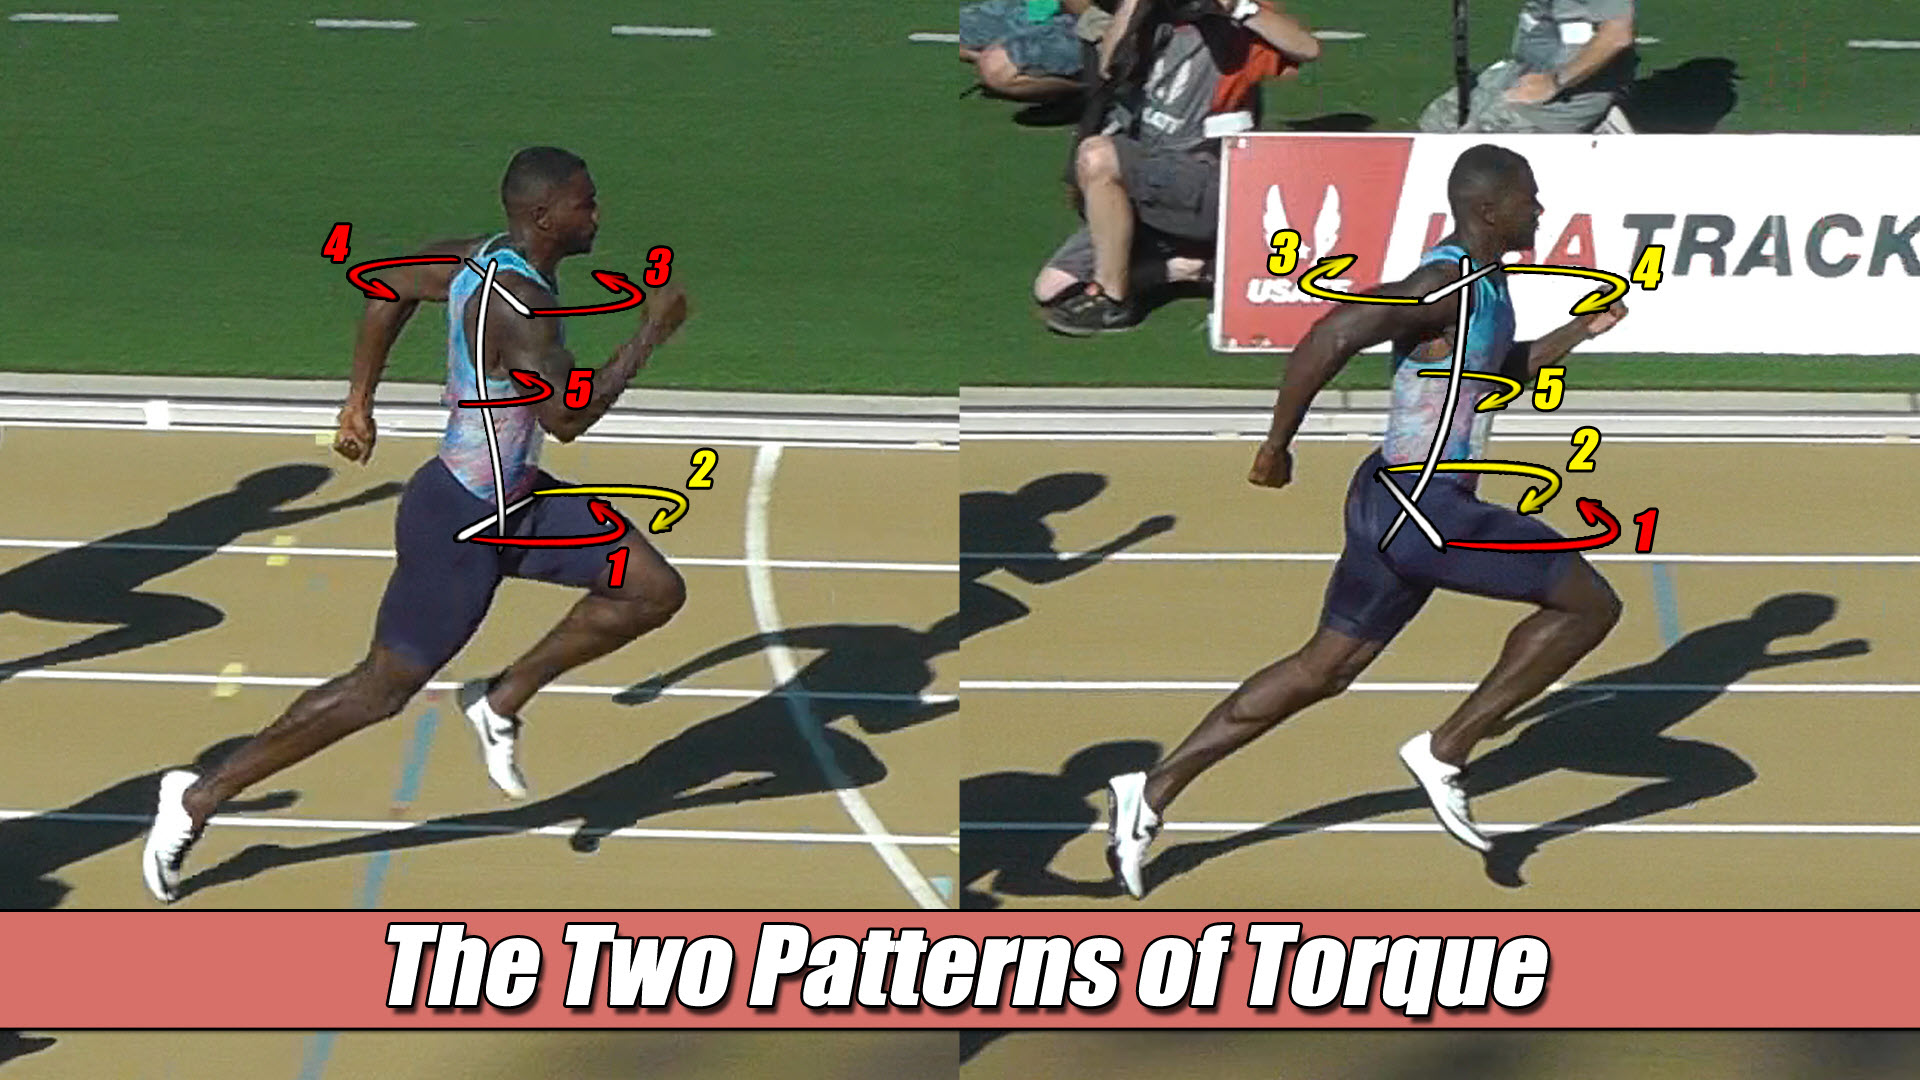
Alright, let’s see how you do with identify the athlete’s torque pattern below in Figure 12-10.
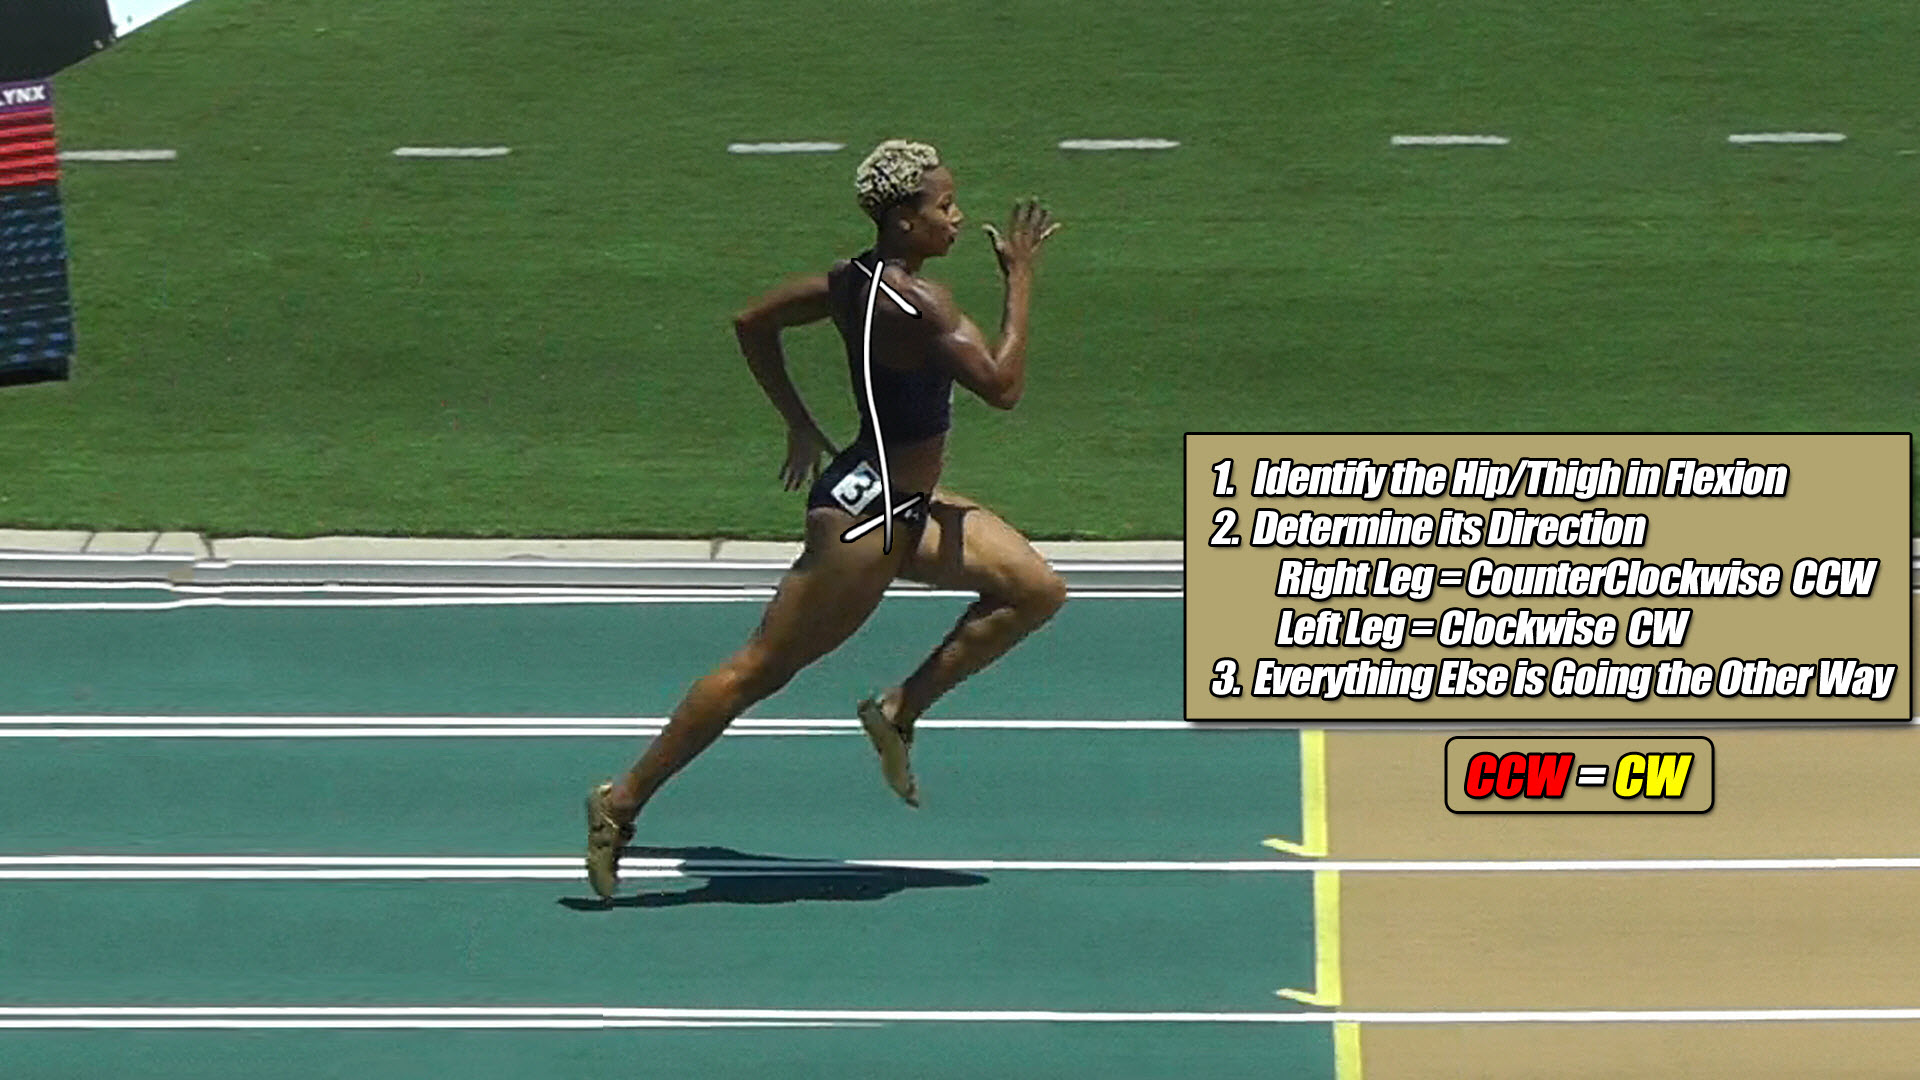
Looking at Figure 12-10 above, Step 1 says to identify the hip, or, thigh that is in flexion, and, so which one is it? If you said the left one, then, very good as you are right.
Step 2 in Figure 12-10 above says to determine its direction and which way does the left leg always go? If you said, CW, then you are right again, and let’s draw that on her now, in yellow. See Figure 12-11 below.
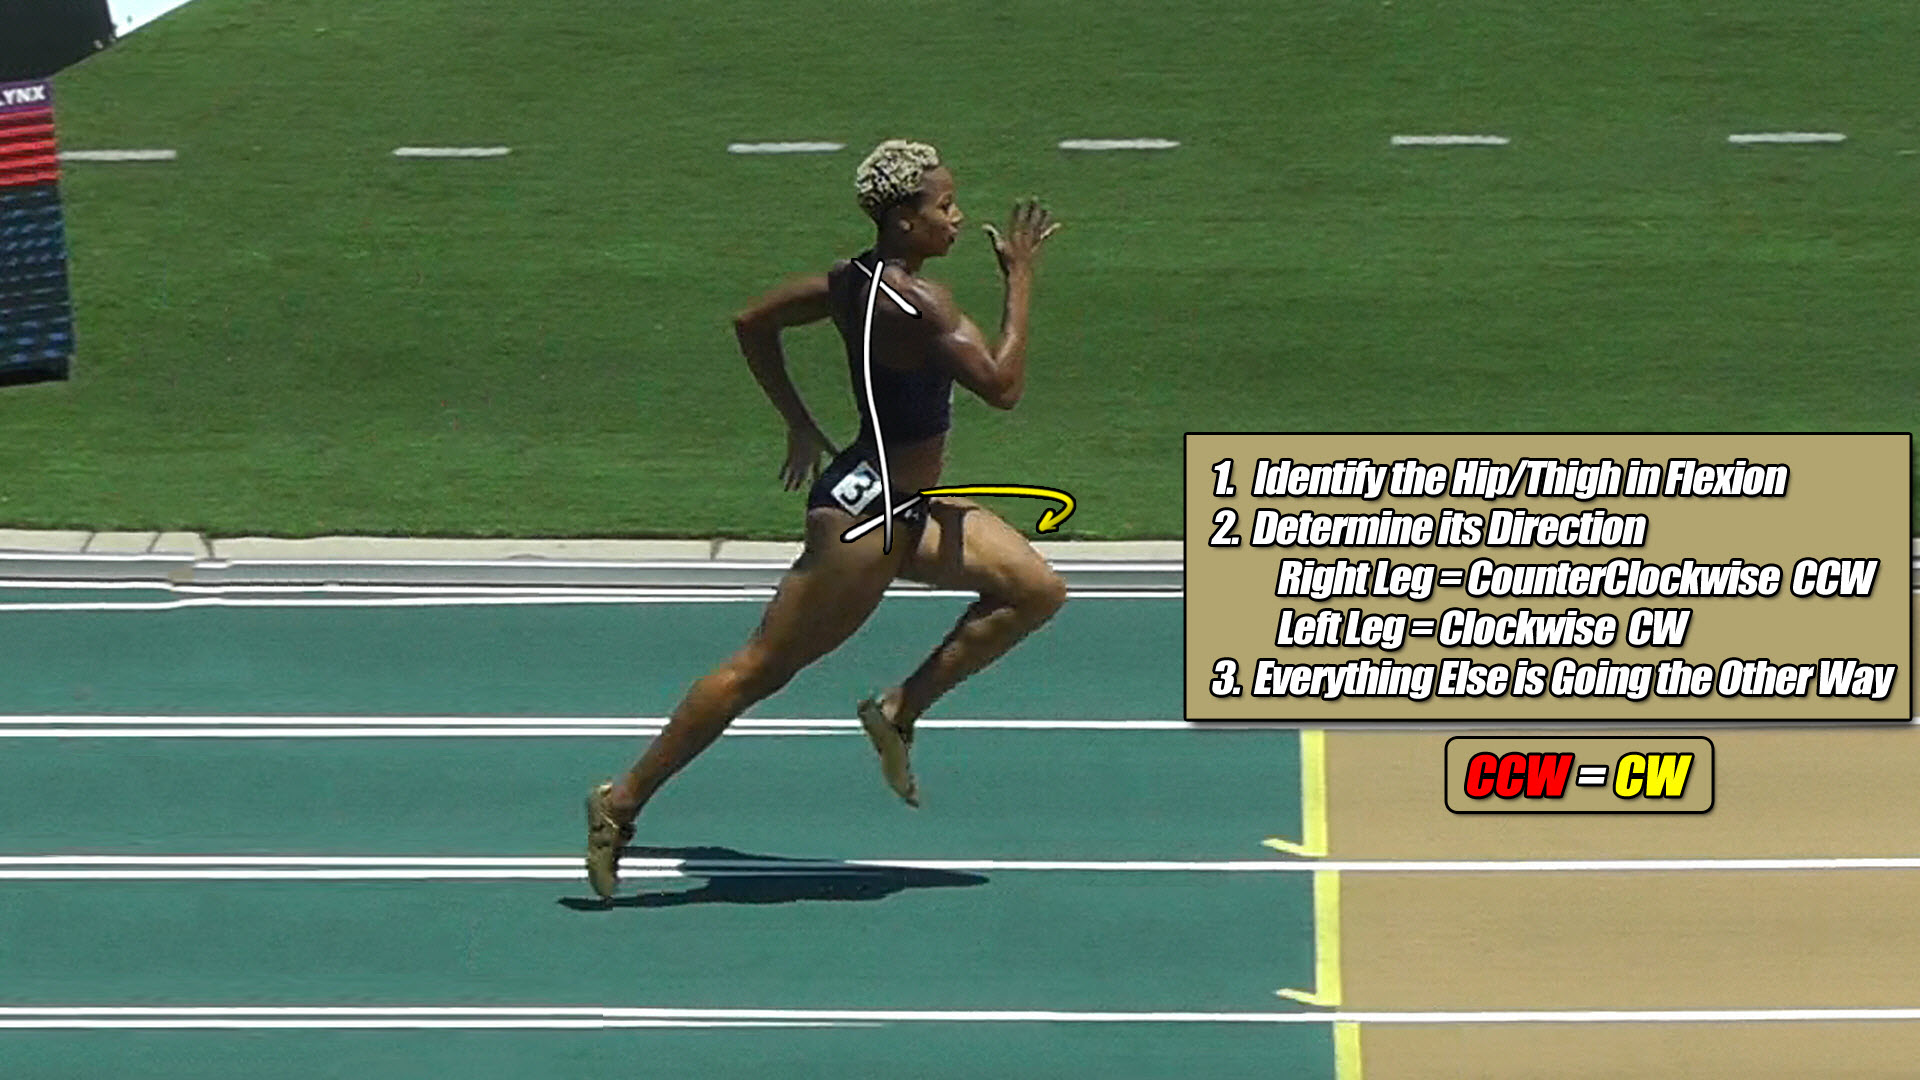
And, Step 3 in Figure 12-10 above says that the direction of everything else is going the other way, so, which is it…? If you said, CCW, then you are doing great, and let’s draw those four torques on her, in red. See Figure 12-12 below.
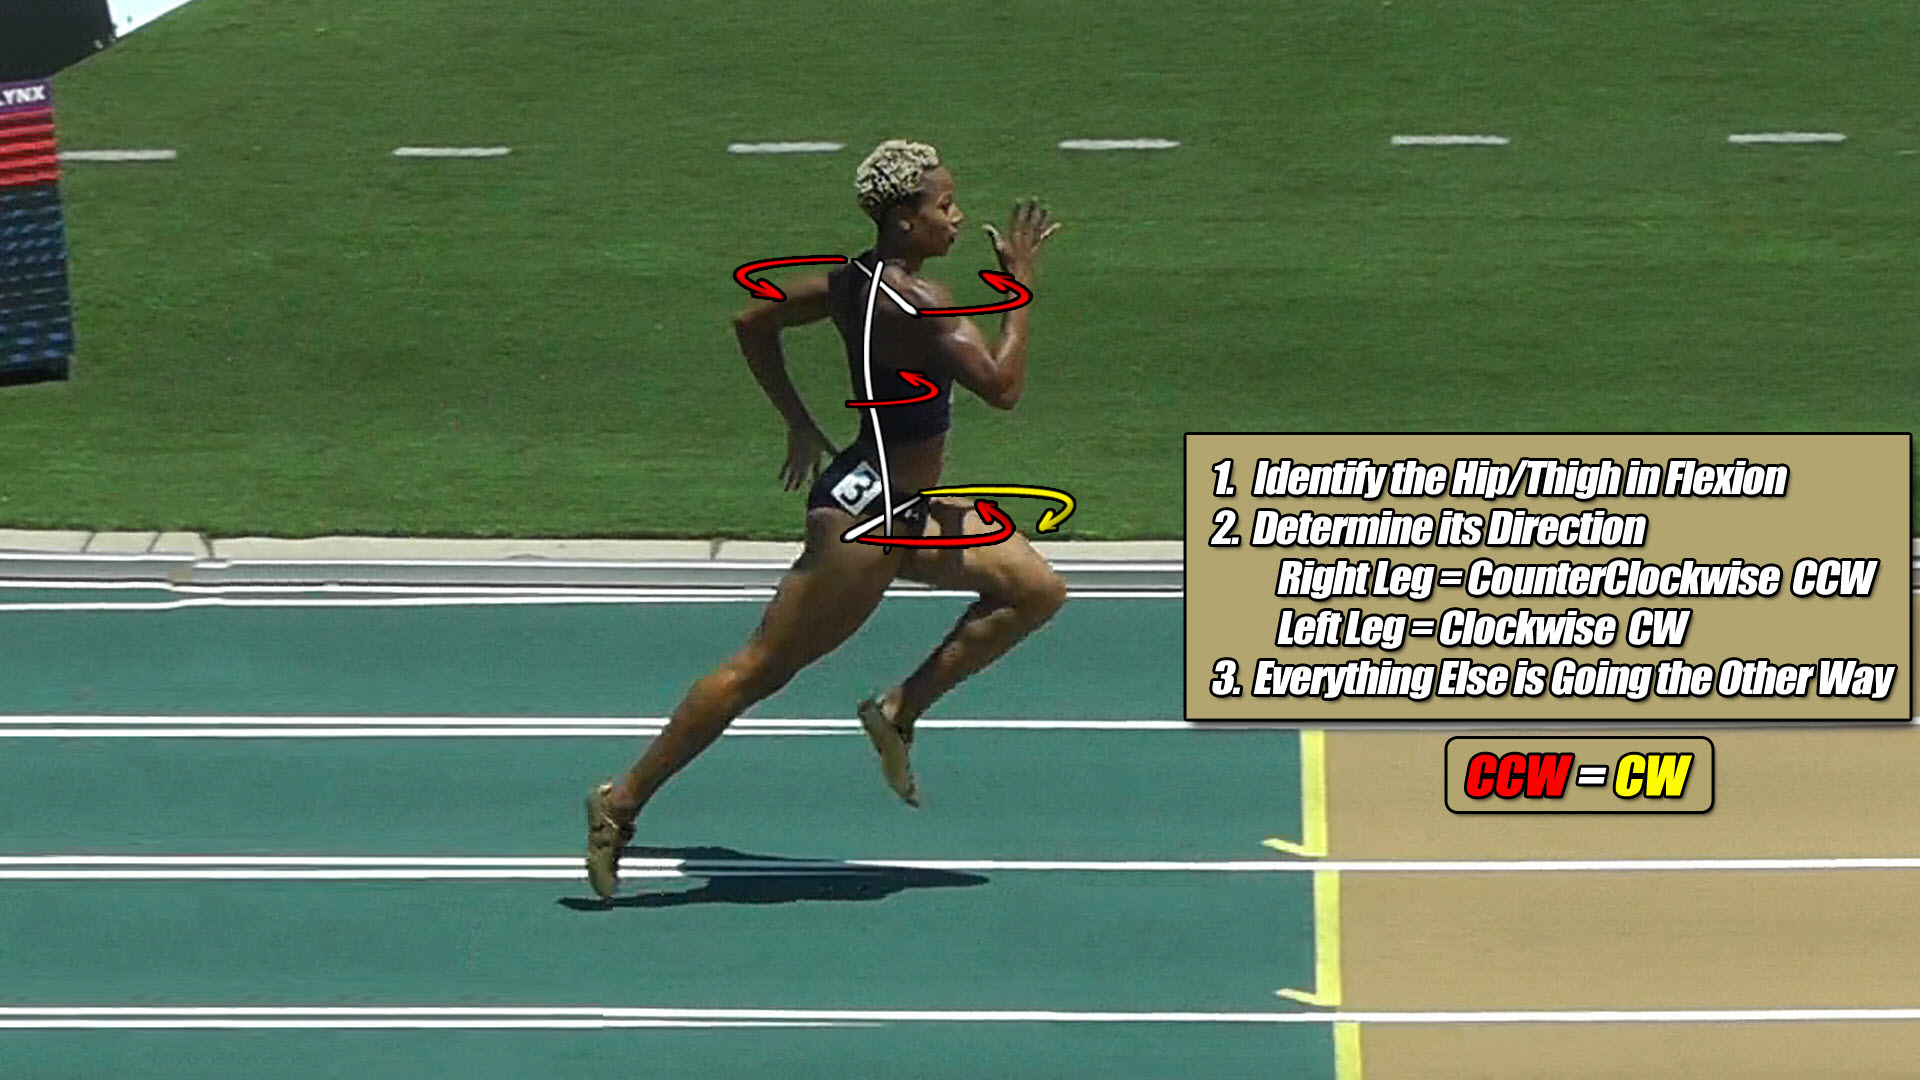
And here is your Ultimate Running Speed Equation in action, once more, for this sprinter showing you all the muscles she is using to produce this torque pattern. See Figure 12-13.
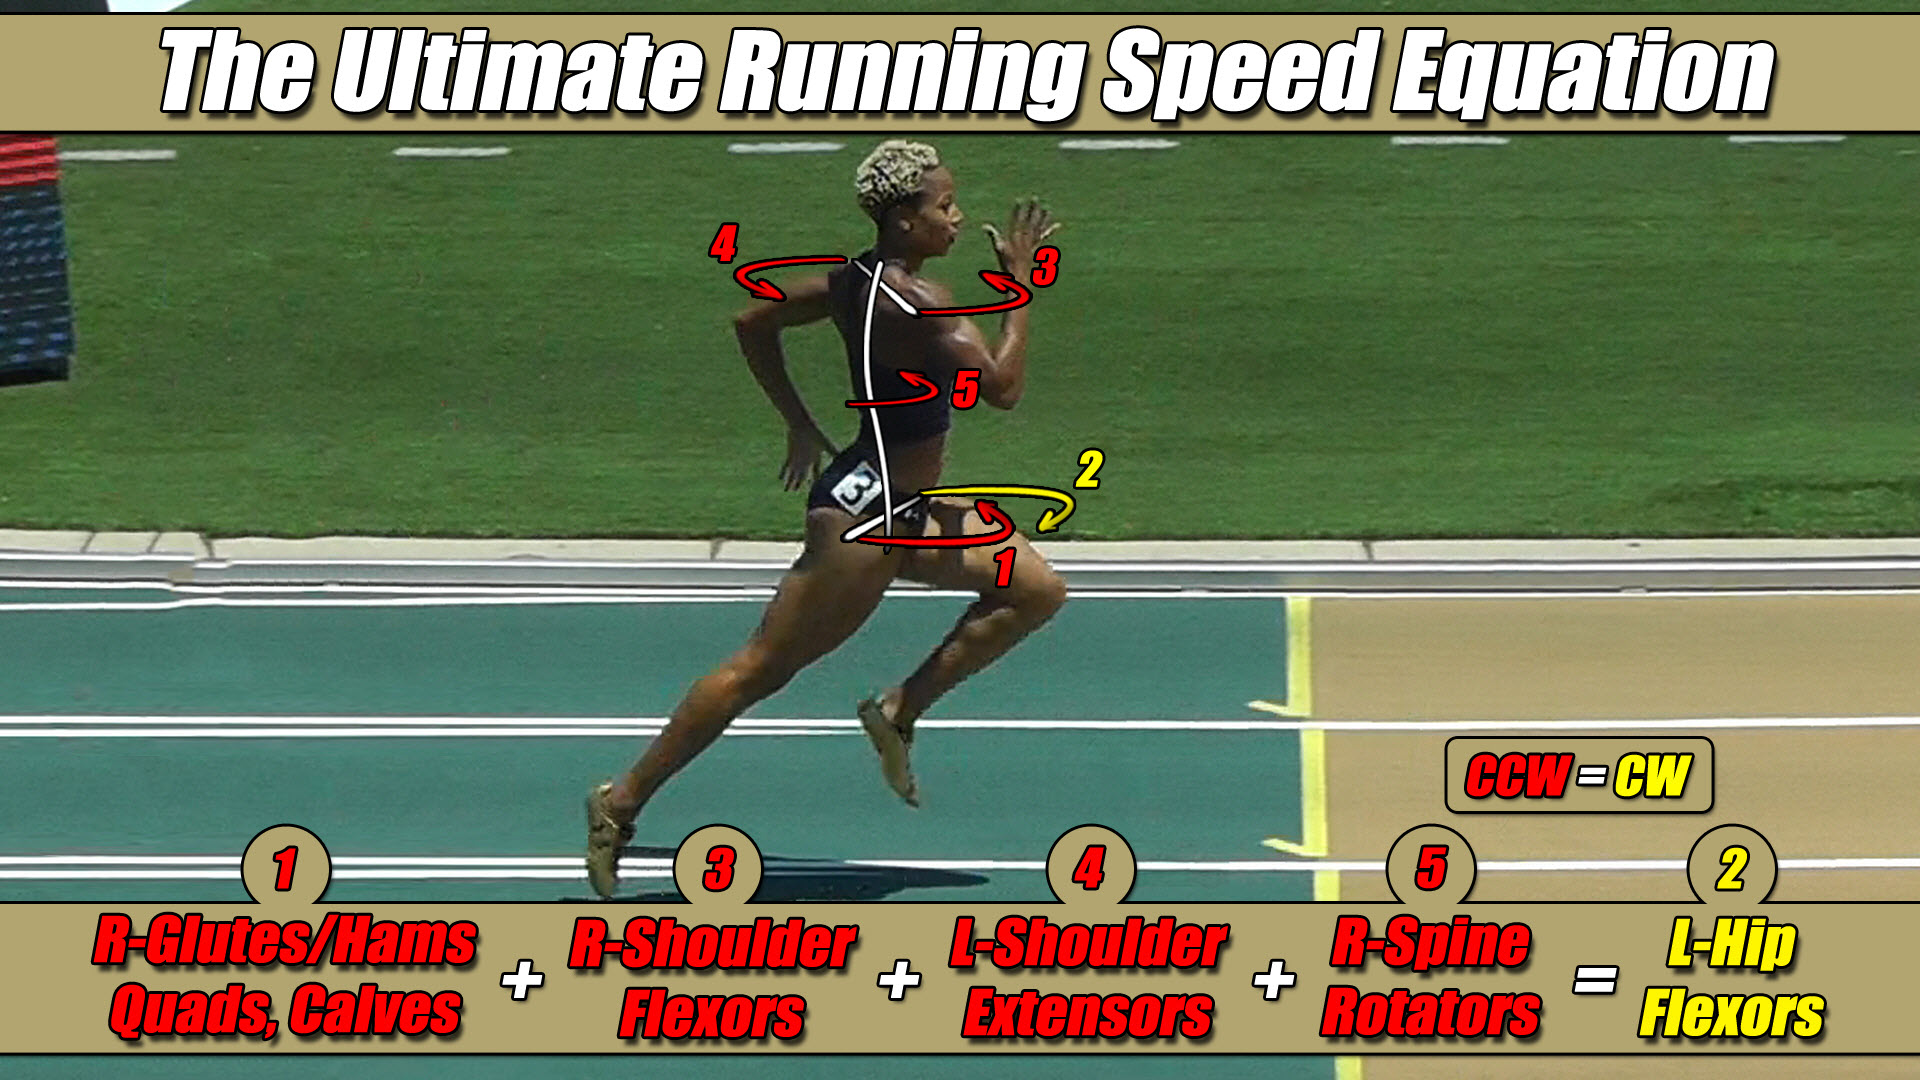
Now, before moving on to our next athlete, I want to bring up another question I get a lot when people see this Ultimate Running Speed Equation and it has to deal with the glutes/hams, quads and calves. As a group, these muscles are arguably the strongest in the body and so some people have a hard time understanding why these muscles still need additional help by the arms and torso to help counter the torque produced by the hip flexors.
And the reason is in order for the glutes/hams, quads and calves to produce torque they need to overcome the weight of the entire body to do so since all of its weight is on the same leg where these muscles are contracting and you can see that above in Figure 12-13 where the athlete is resting on her right leg. Whereas the hip flexors, working alone in the other direction, only have to overcome the weight where they are active to produce their own torque as seen by her left leg that is off the ground.
So, it’s typically much easier for the hip flexors to thrust faster and harder thereby producing a much stronger torque than the glutes/hams, quads and calves because they have less weight to overcome. But, let’s not forget, these muscles need exercise, too, and if they are very weak which is the case for a lot of people I speak with, then they will actually be the limiting factor in how fast someone can run.
This is why The Ultimate Running Speed Equation is so important to see and understand because it lets you know everything you need to be working on at the gym to not only get faster but to improve your endurance as well.
For this next athlete seen in Figure 12-14 below, I’m going to make things just a bit more challenging for you by not drawing the shoulder line, hip line, and midline on her and this is because I want you to start relying more on your own ability to see these torque patterns, without too much of my help.
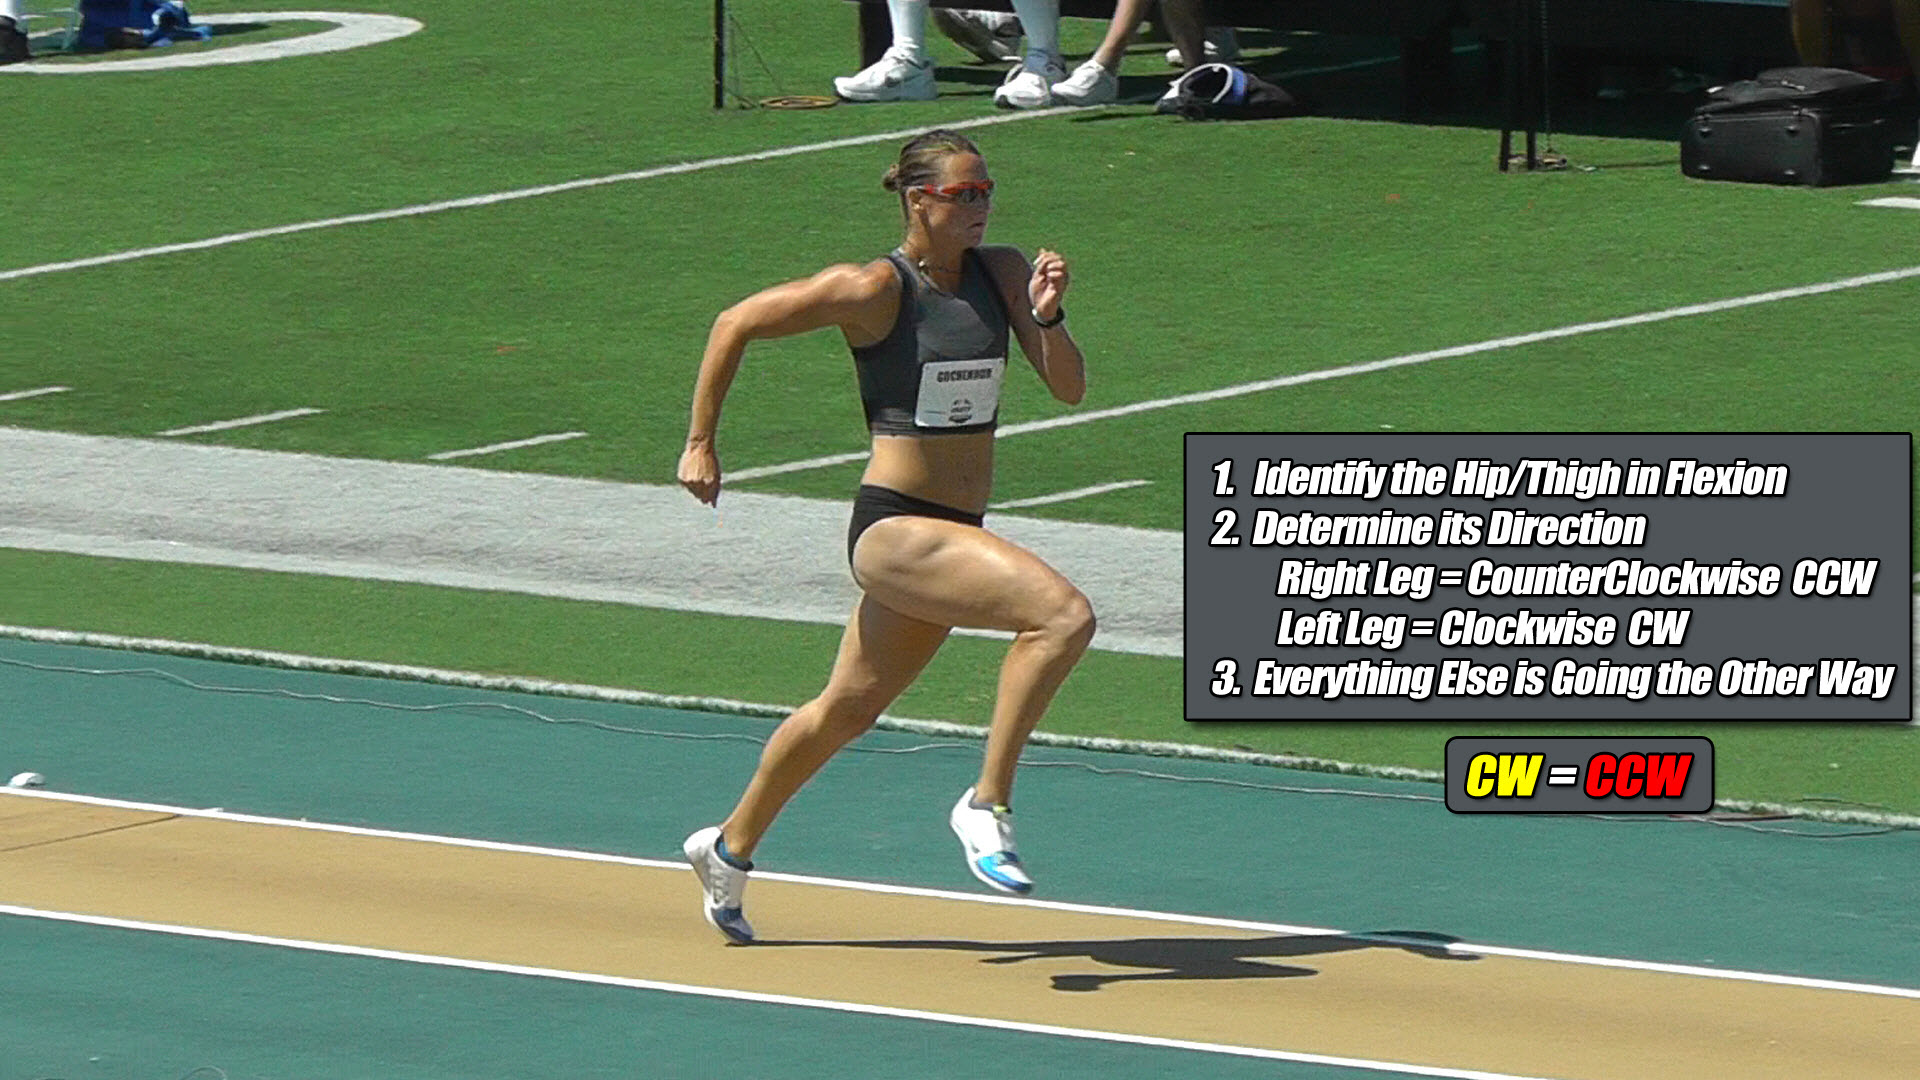
So, again, no lines are being drawn on this athlete and with that let’s move forward to Step 1 which says to identify the hip, or, thigh that is in flexion, and, so which one is it? The left one or the right? If you said the right one, then you are correct.
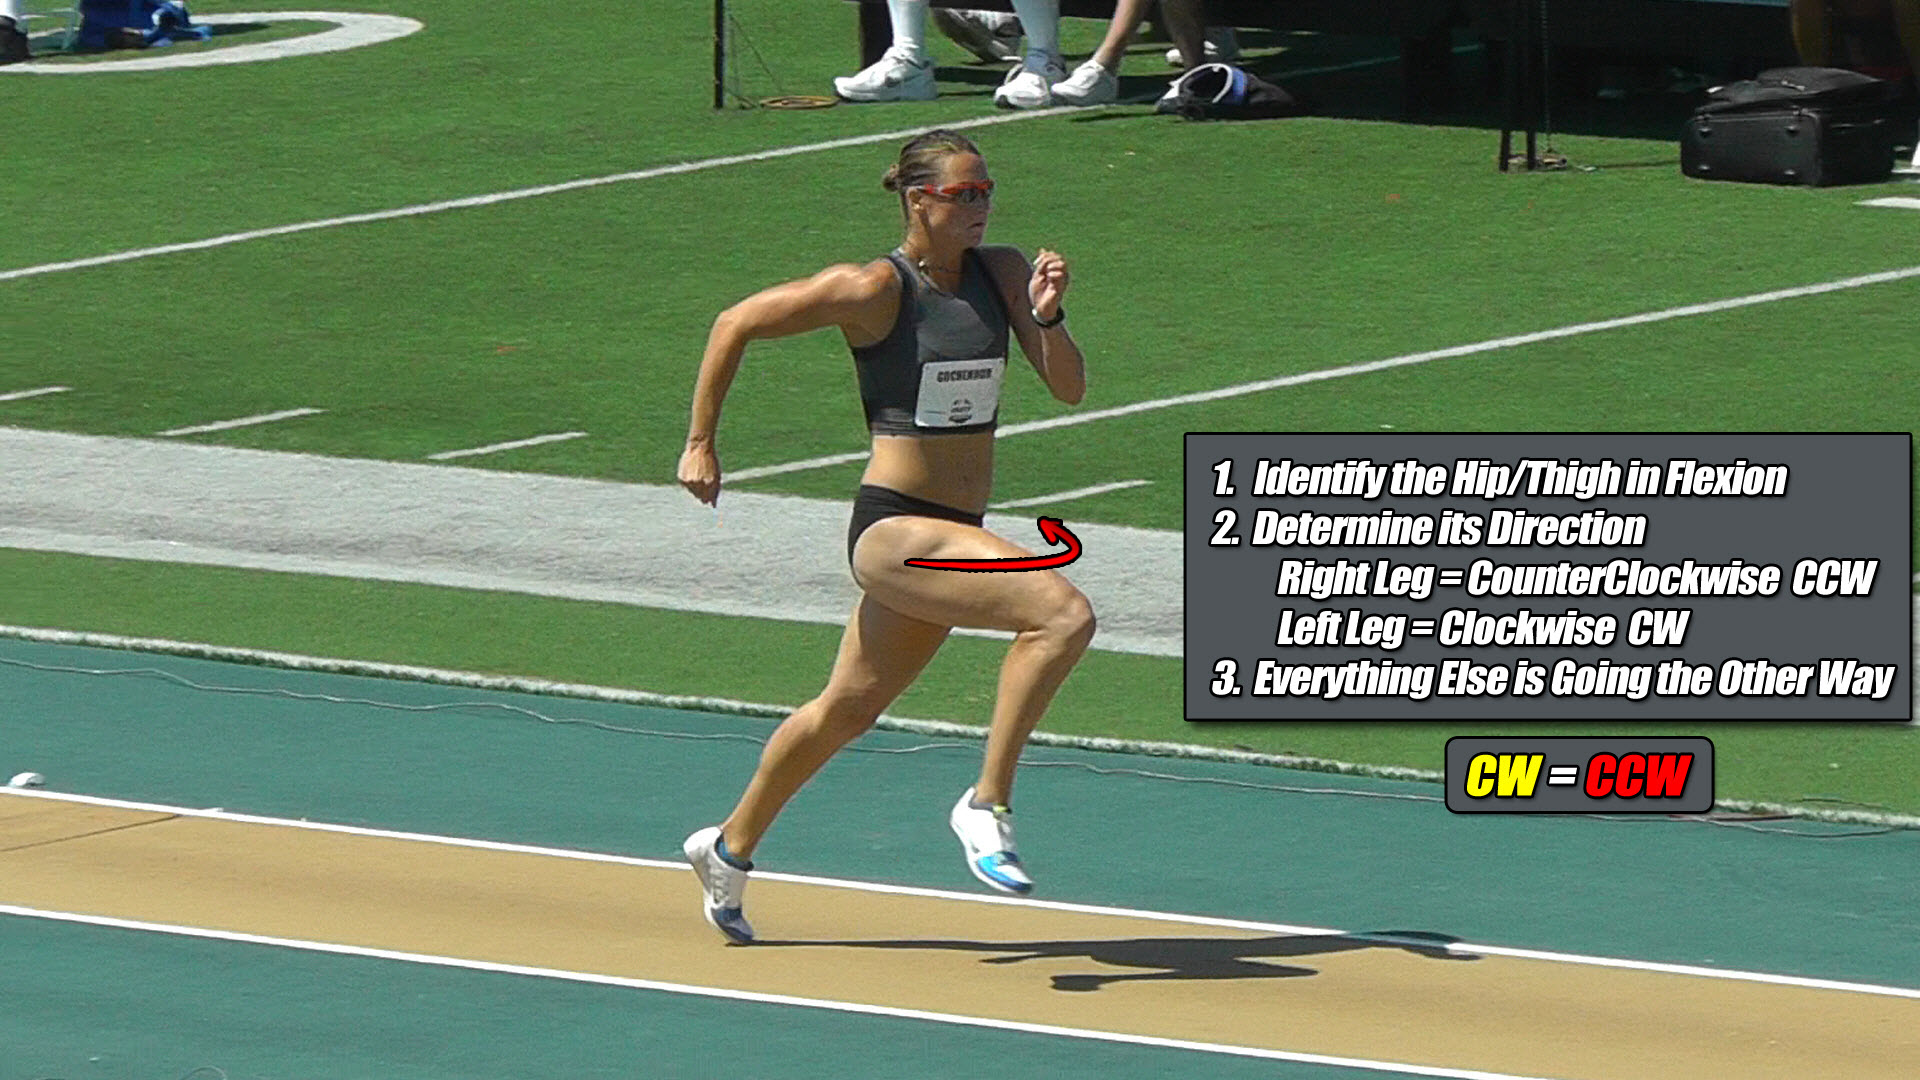
Step 2 says to determine its direction and which way does the right leg always go? If you said, CCW, then good job because you are right again, and let’s draw that on her now, in red. See Figure 12-15 below.
And, Step 3 says that the direction of everything else is going the other way, so, which is it? Clockwise, or, counterclockwise? If you said, CW, then you are correct once more and let’s draw those four torques on her, in yellow. See Figure 12-16 below.
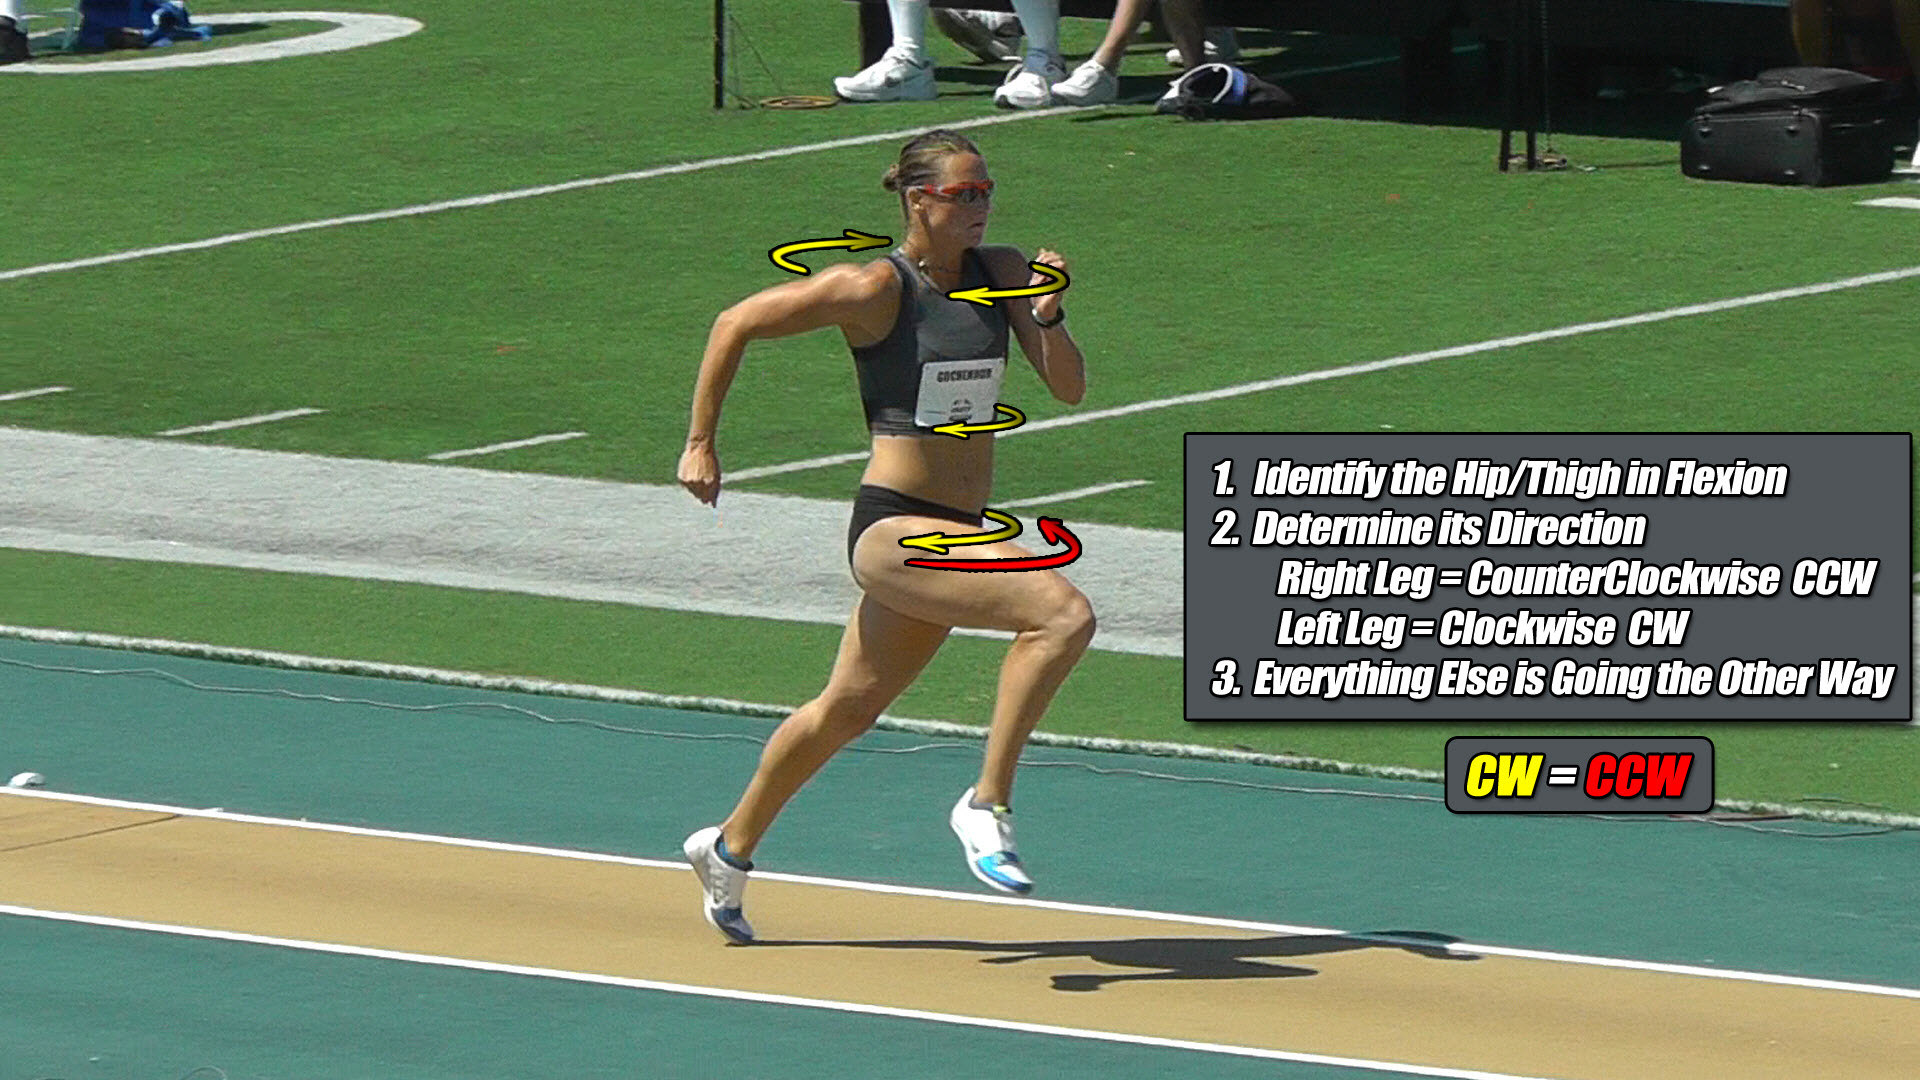
And there is the ultimate running speed equation in action for this long jumper. See Figure 12-17.
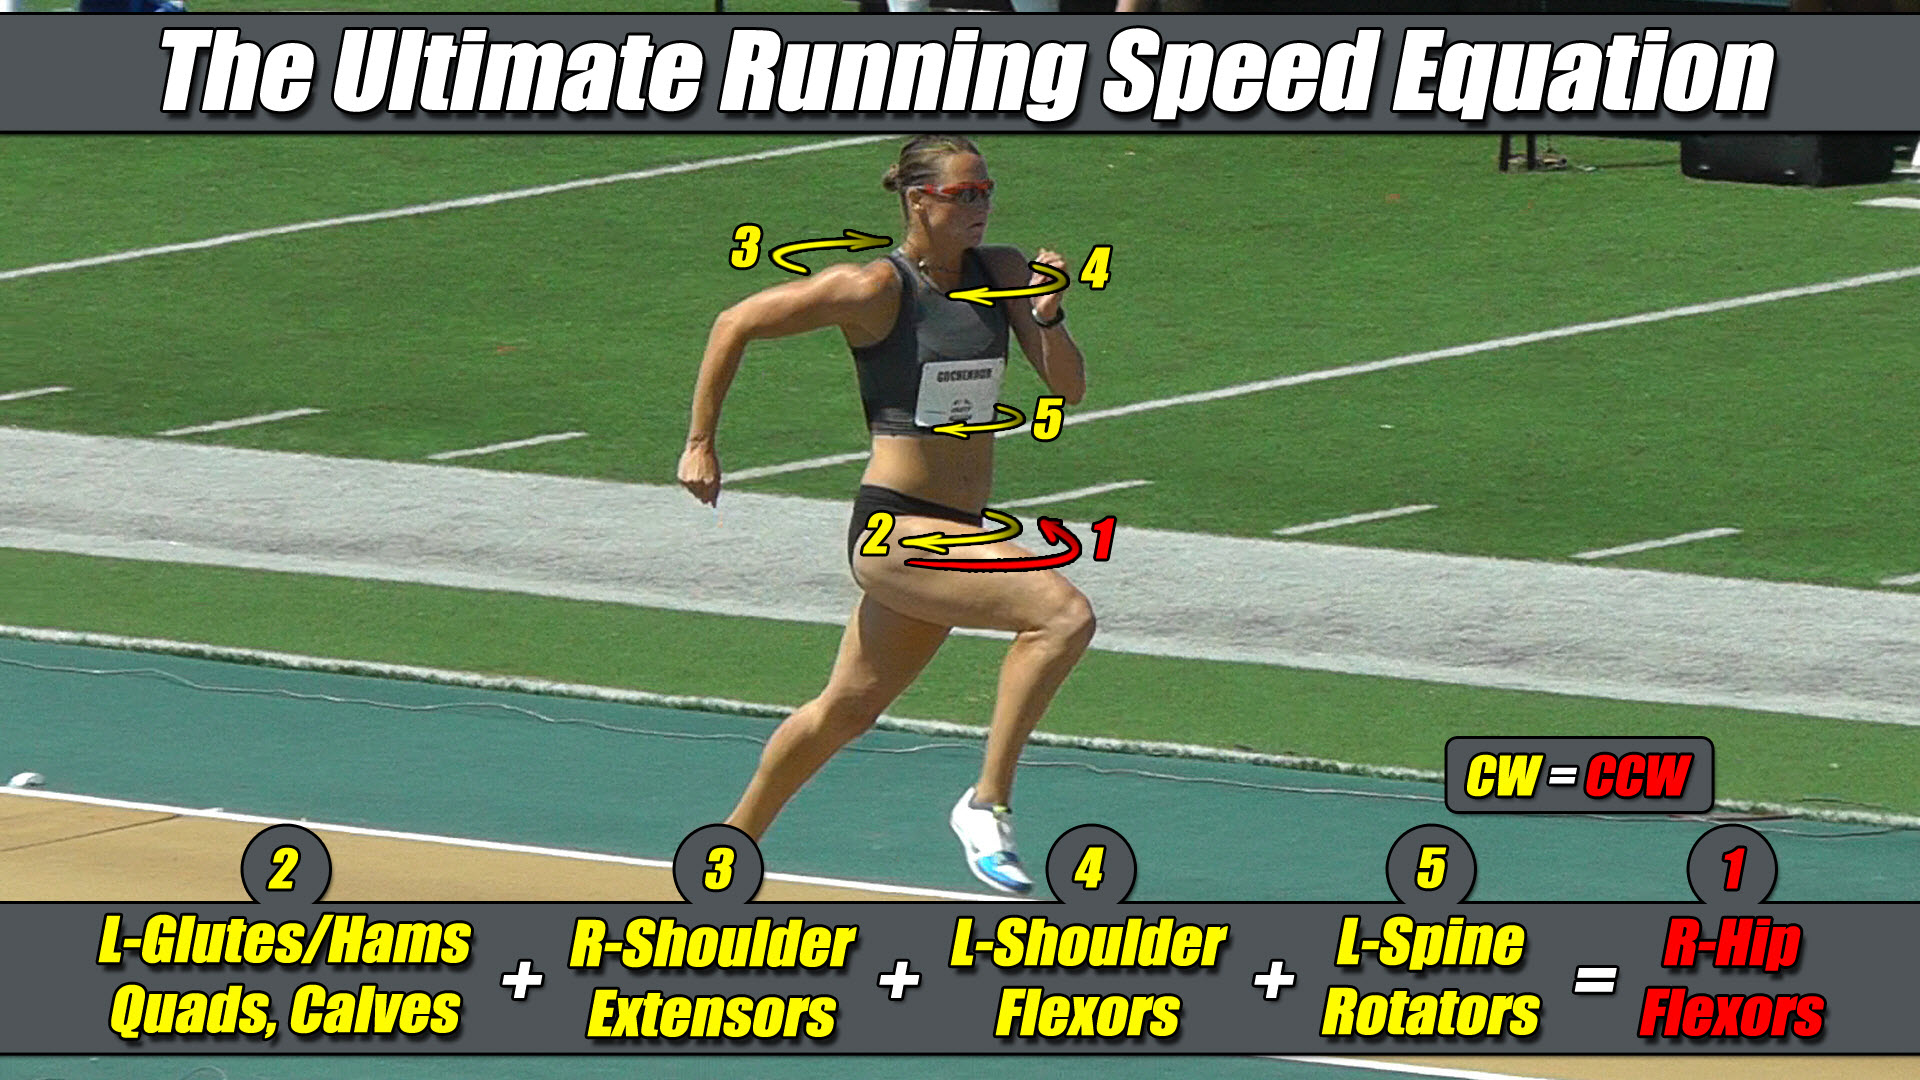
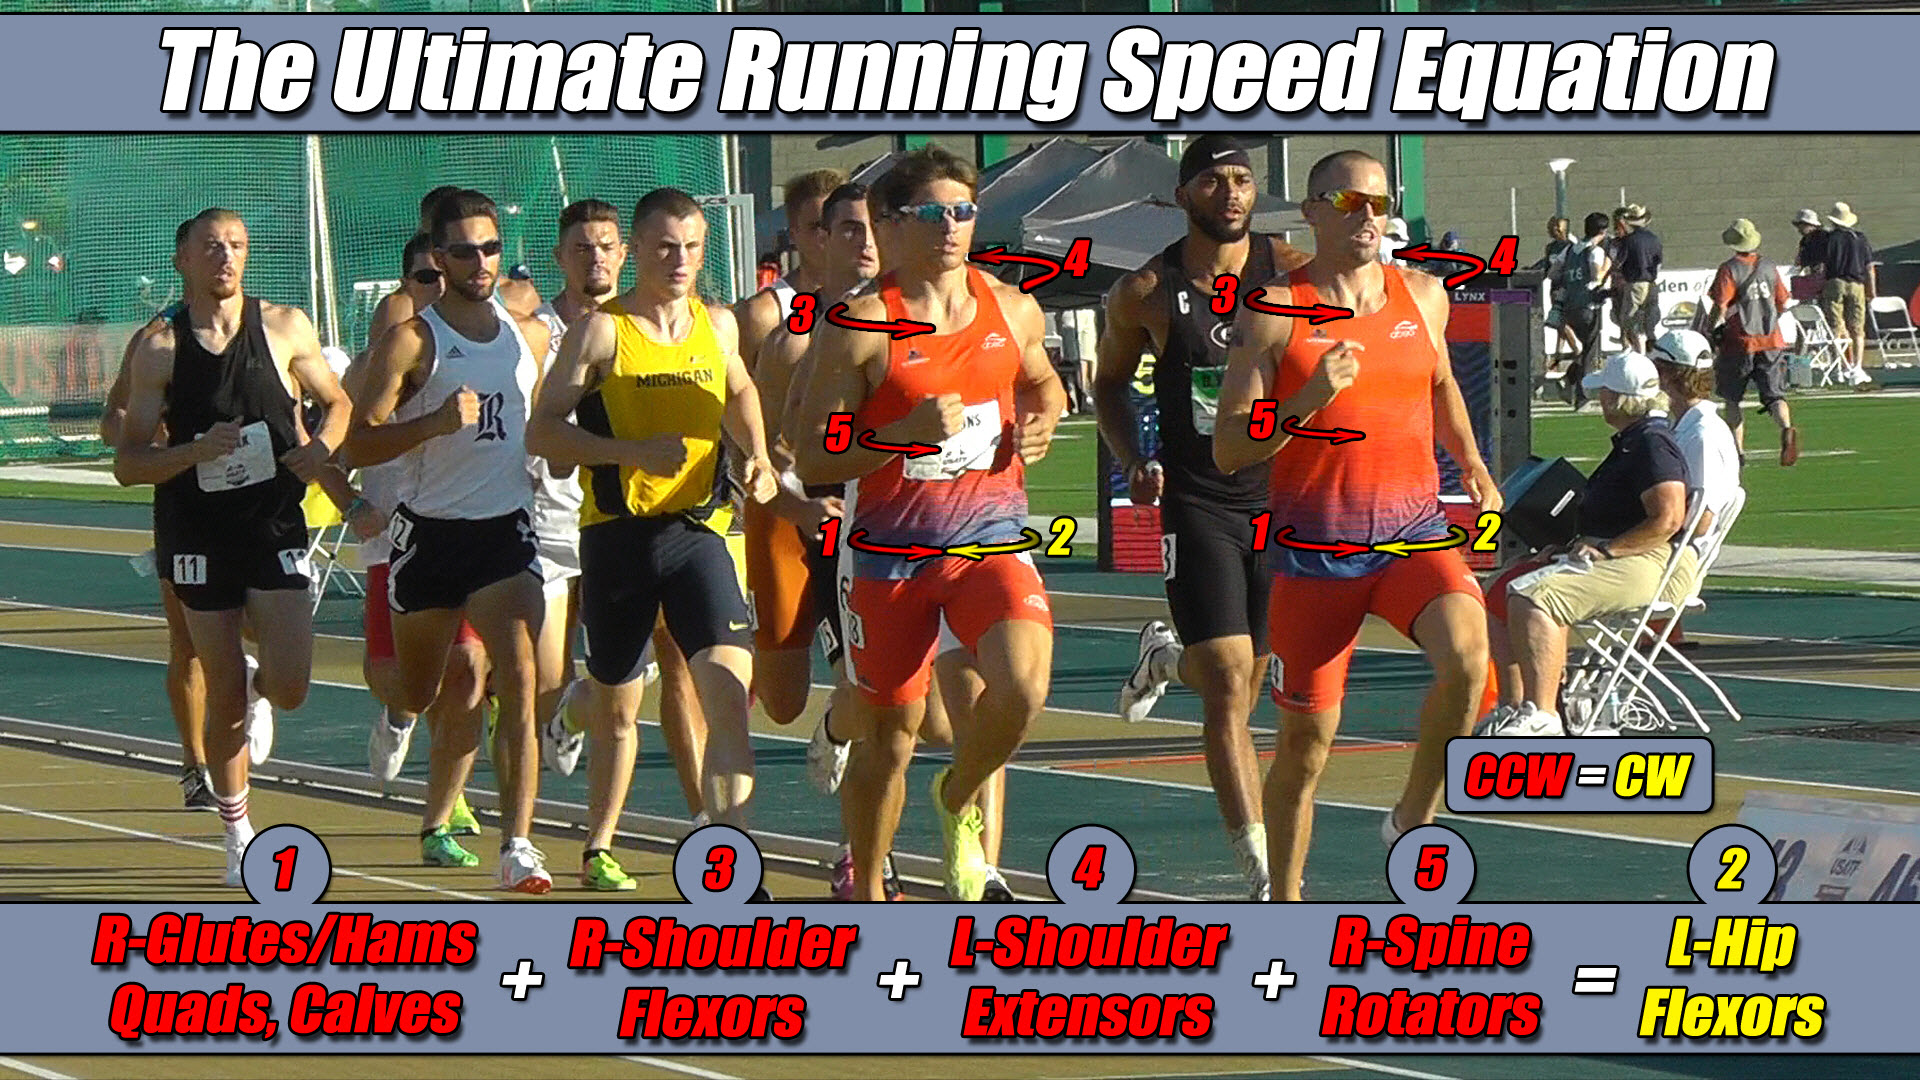
Alright, so for this next image shown in Figure 12-18 below, we are going to be focusing on these two guys in front with the orange jerseys and I’m going to add to the difficulty of trying to figure out their torque patterns for you by not only not placing any lines on them, but also, I am not going to put up our little three-step guide either.
And the reason why is because, just like I did with the long jumper previously, I want you to rely as much upon yourself as you can to figure out these torque patterns and if you can do so with minimal help from me, then you will have proven you are well on your way to becoming an expert in this, yourself.
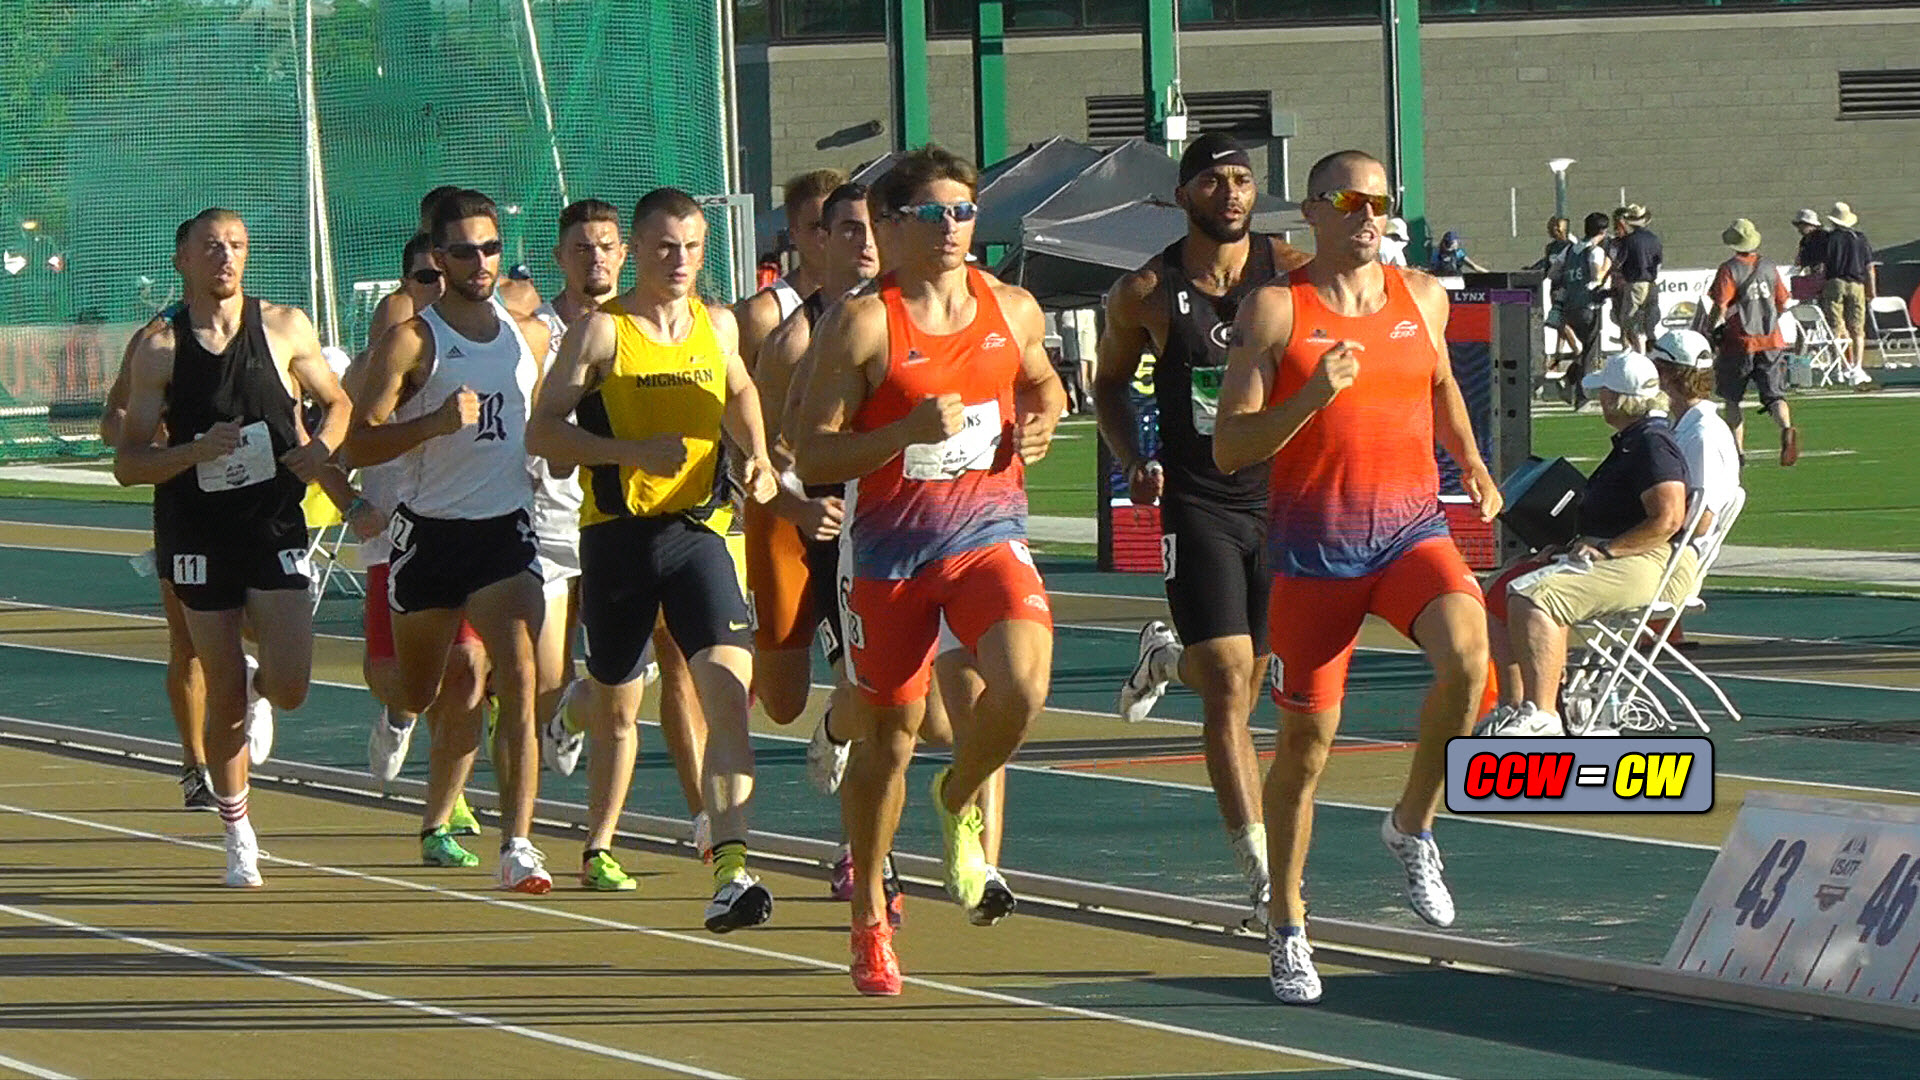
So, lets’ get right to it, then. What is the first thing you need to do to figure out someone’s torque pattern? In other words, when you see these two athletes, what are you keying in on, or looking for? If you said the first thing to do is identify the hip or thigh in flexion, then you are correct.
So, since these two guys are basically running in step with each other, their torque patterns will be the same and so which of their hips, or, thighs is in flexion? Their left ones, or right? If you said their left ones, then you are correct.
Now, what is the next thing to do once you know this? If you said, to determine its direction, then you are correct again. And so, which direction does the left leg always go? If you said clockwise, then good job because you are right again and let’s draw that on both of them, in yellow. See Figure 12-19 below.
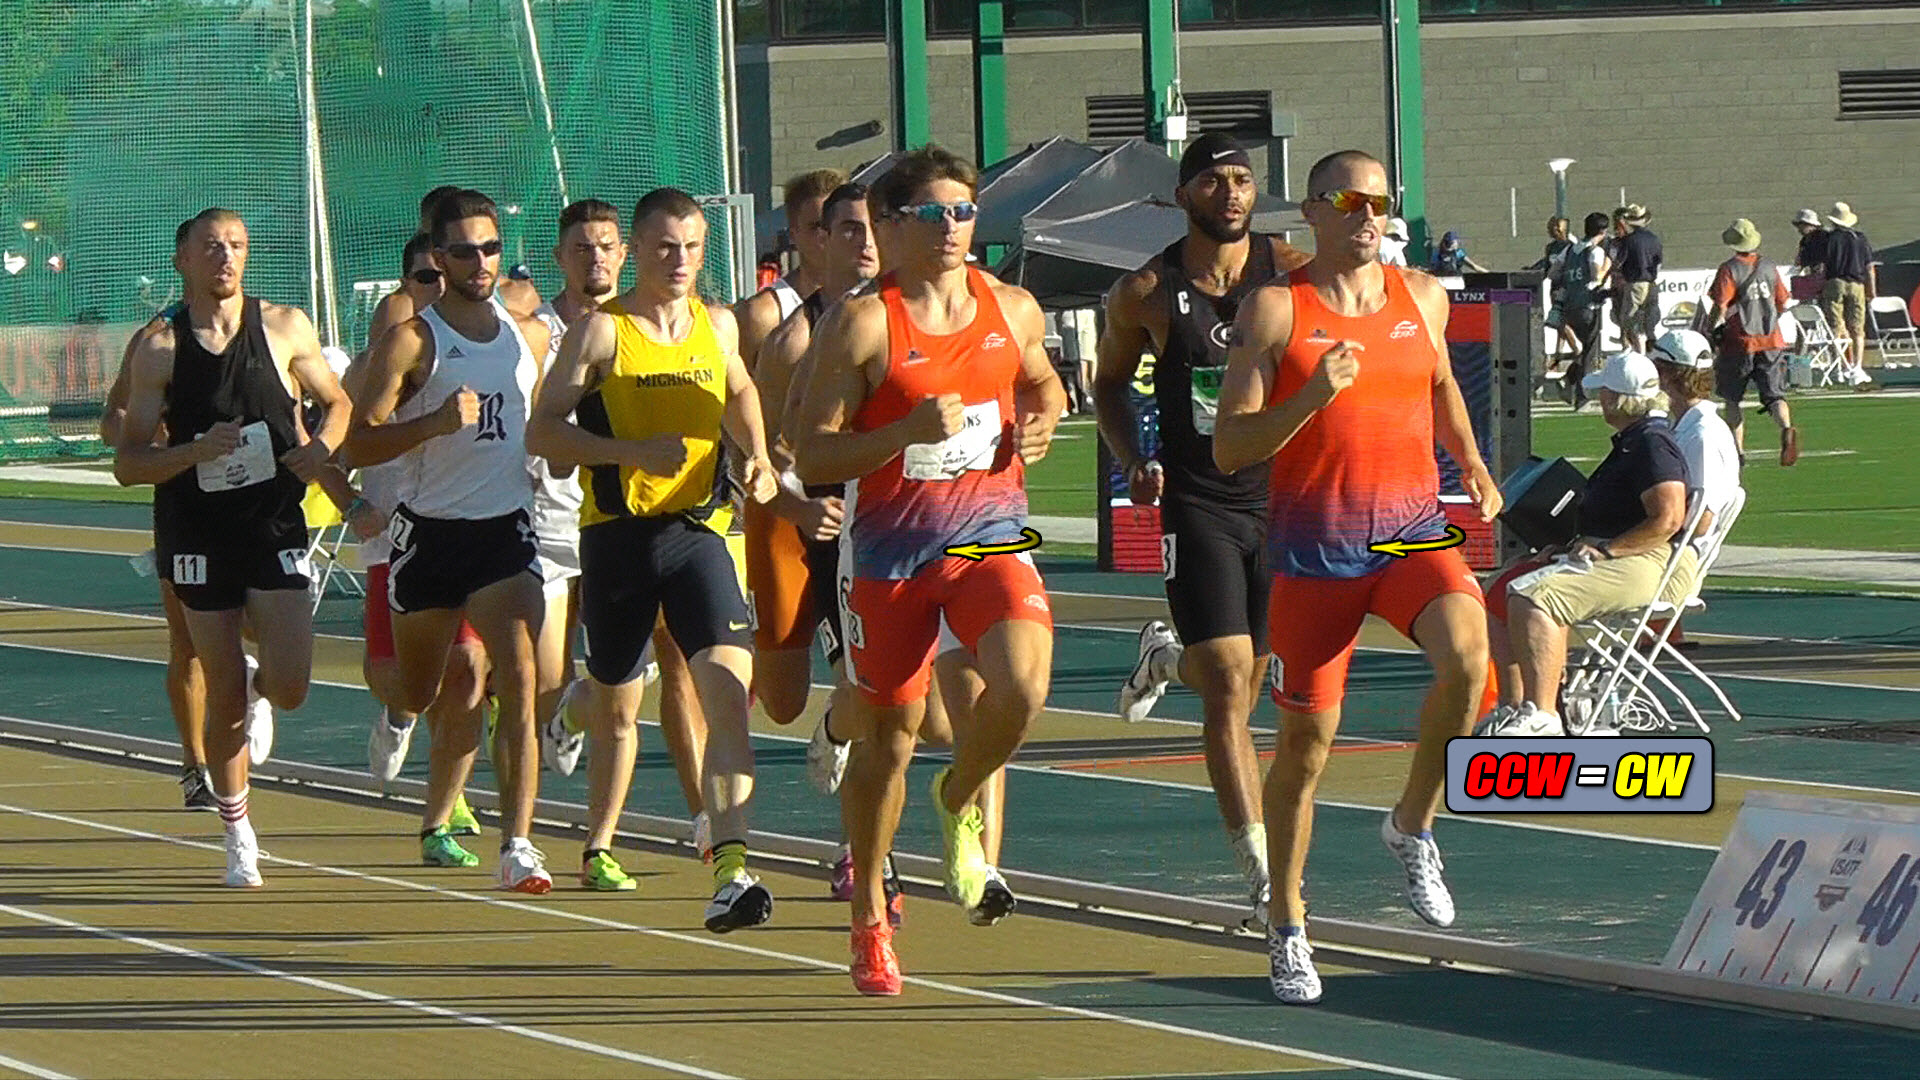
And once you know this, what does it tell about the direction of everything else? If you said, it is going the other way, or more specifically, everything else is going in the counterclockwise direction, then congratulations, I believe you’ve got this figured out now and let’s draw those four torques on each of these athletes, now, in red. See Figure 12-20 below.
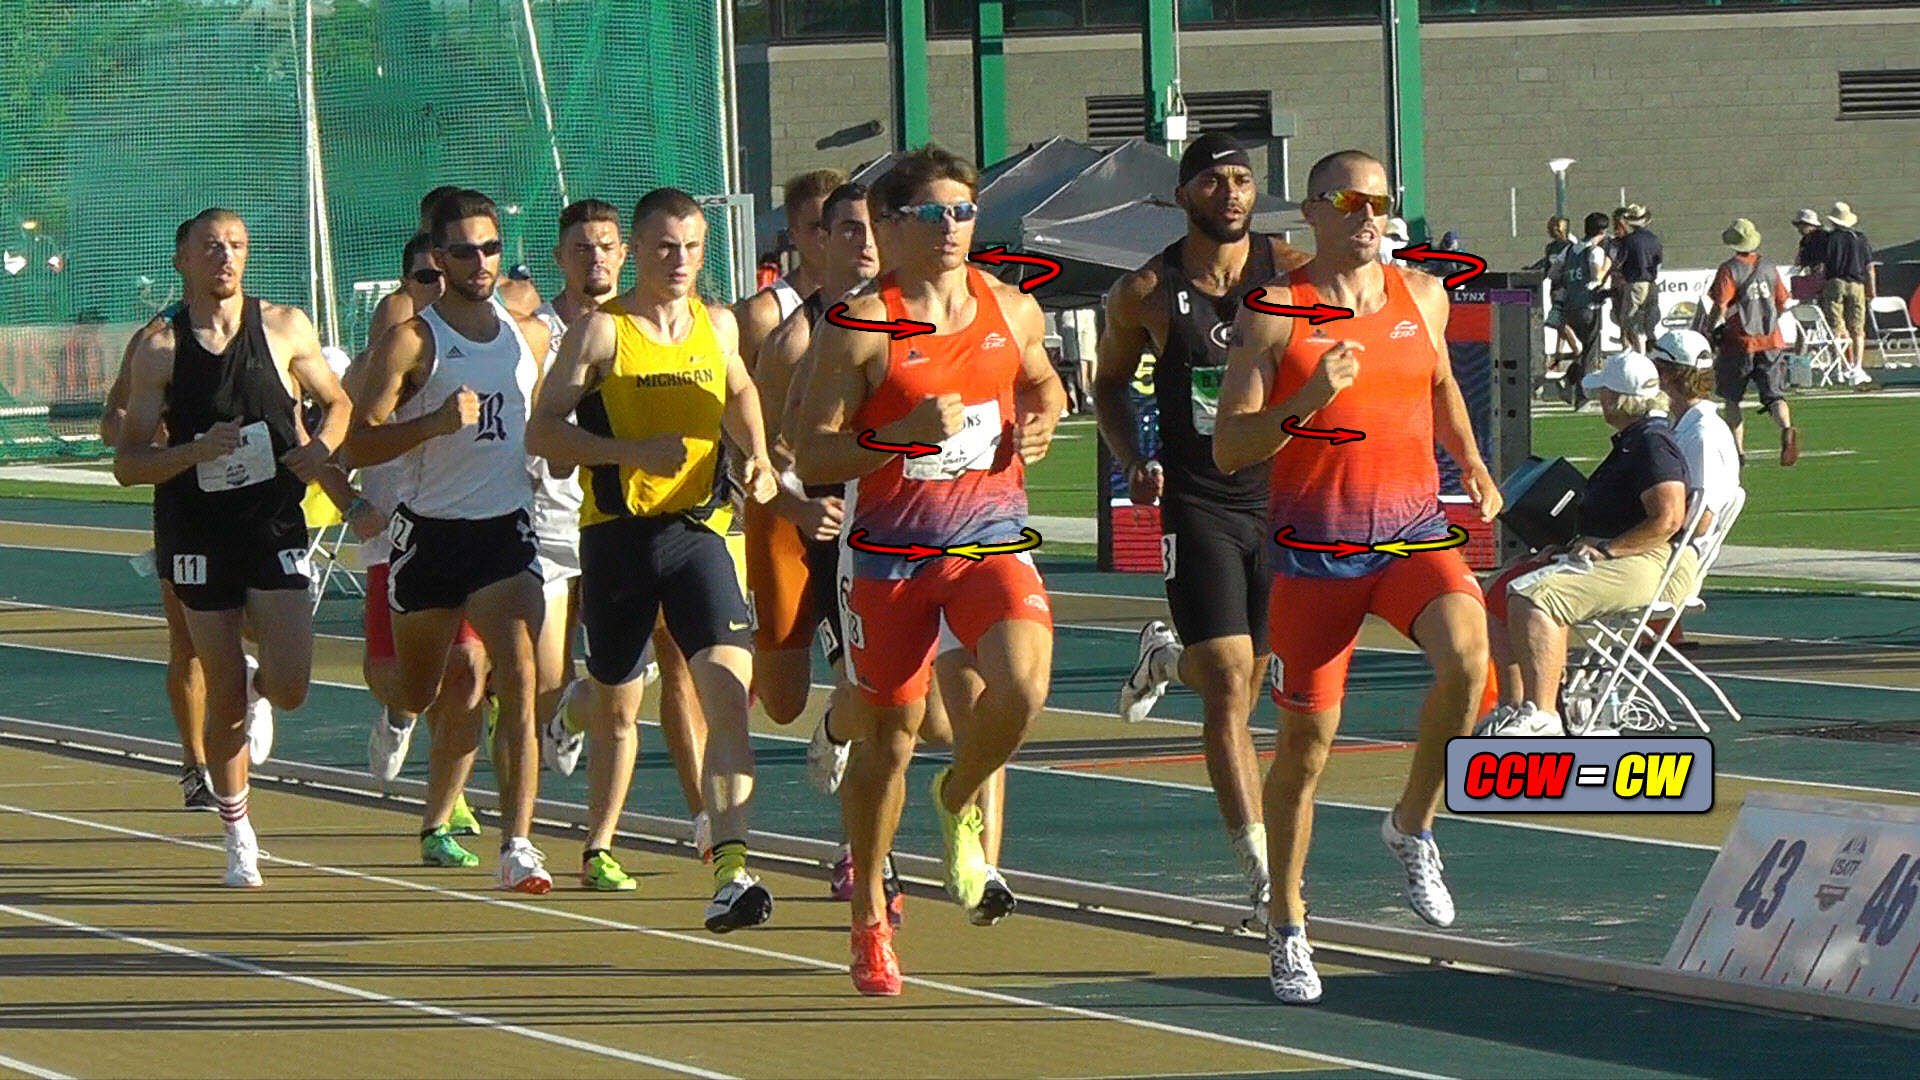
And there is the ultimate running speed equation in action for these two athletes just like I am certain you expected. See Figure 12-21 below.
Alright, for Figure 12-22 below, he will be the last athlete whose torque pattern we are going to look at and for this one, you are going to have to figure it out by yourself. So, I am not going to help you at all.
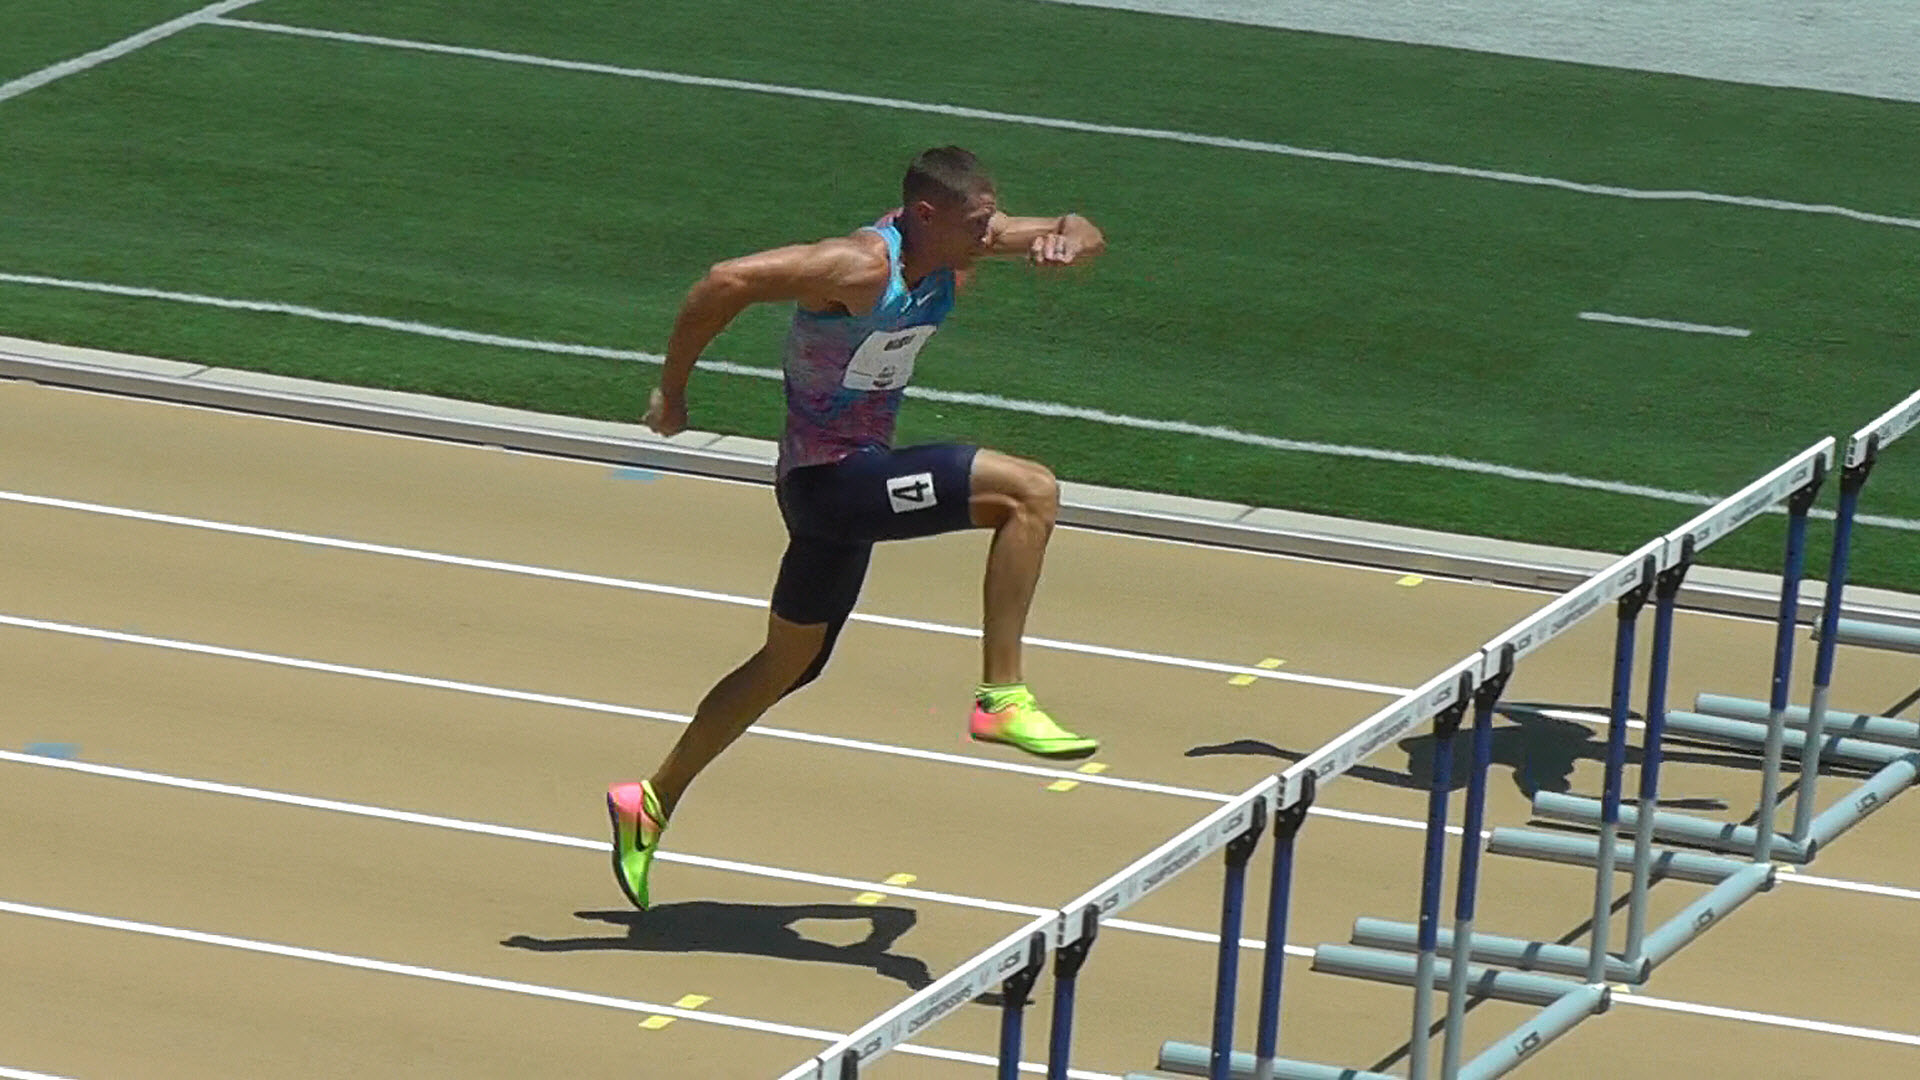
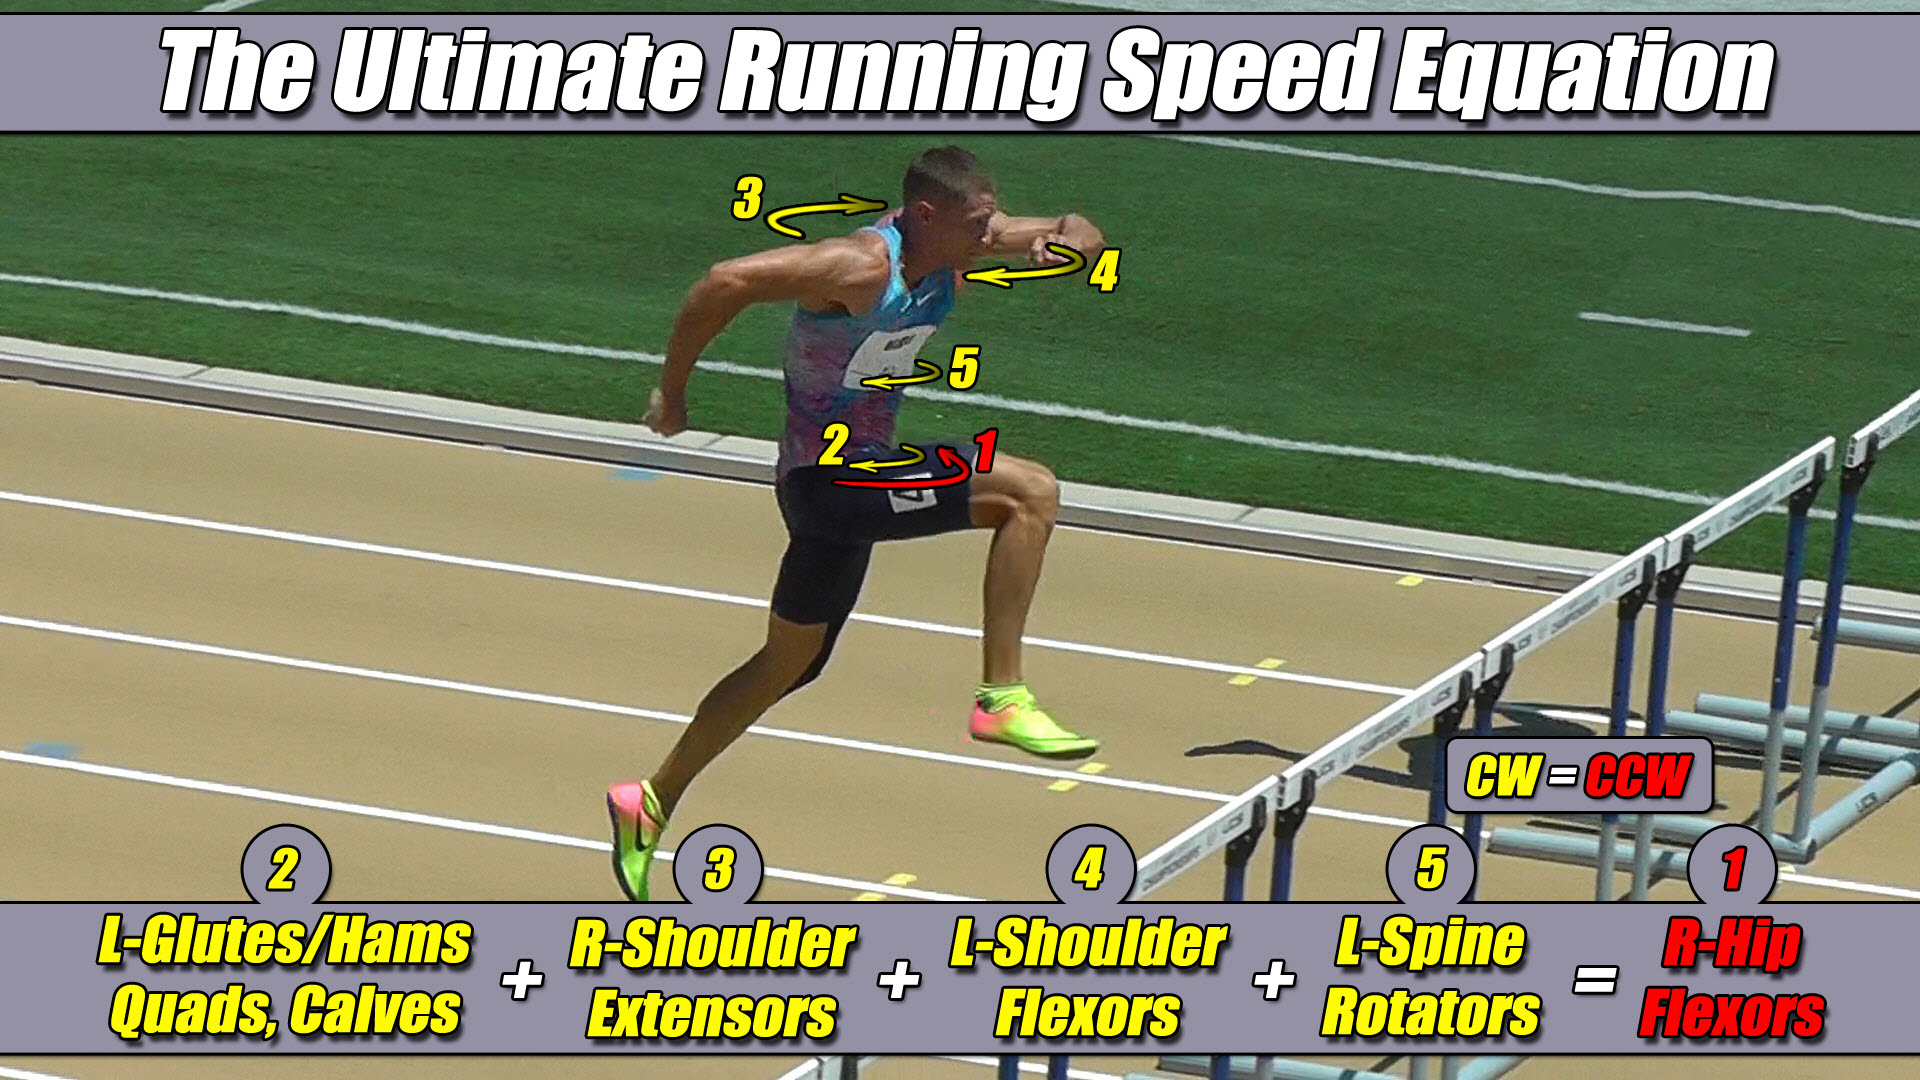
And the way this is going to work is I want you to look at this image, go through the same three-step process I’ve been showing you all along and once you think you know which pattern of torque he’s in, you can then go ahead and look below at Figure 12-23 below to see if you got it right. So, those are your instructions and good luck!
Alright, that’s going to do it for Speed Training Session #2! Now, I want to hear from you! I want to know what you think of The Ultimate Running Speed Equation and the two patterns of torque.
I want to know if this is new information for you, if you found it helpful and if so, how you plan on using it going forward. I would also like to know if you have any specific questions for me that I may not have answered along the way and if you do, you can leave them in the comment section below or send me an email, directly.
And, finally, if you would like to see more content like this, we would certainly appreciate your support and the best way you can show it is simply by heading on over to our website and buying one of our speed training programs.
Most are available for immediate delivery, they are sure to help improve your speed and sports performance and best of all, they cost only about 40 bucks so, it’s a win-win situation for both of us and if you choose to buy, one, then thank you in advance. Okay, that’s all I got! Thanks, for reading and I’ll see you, next time.

