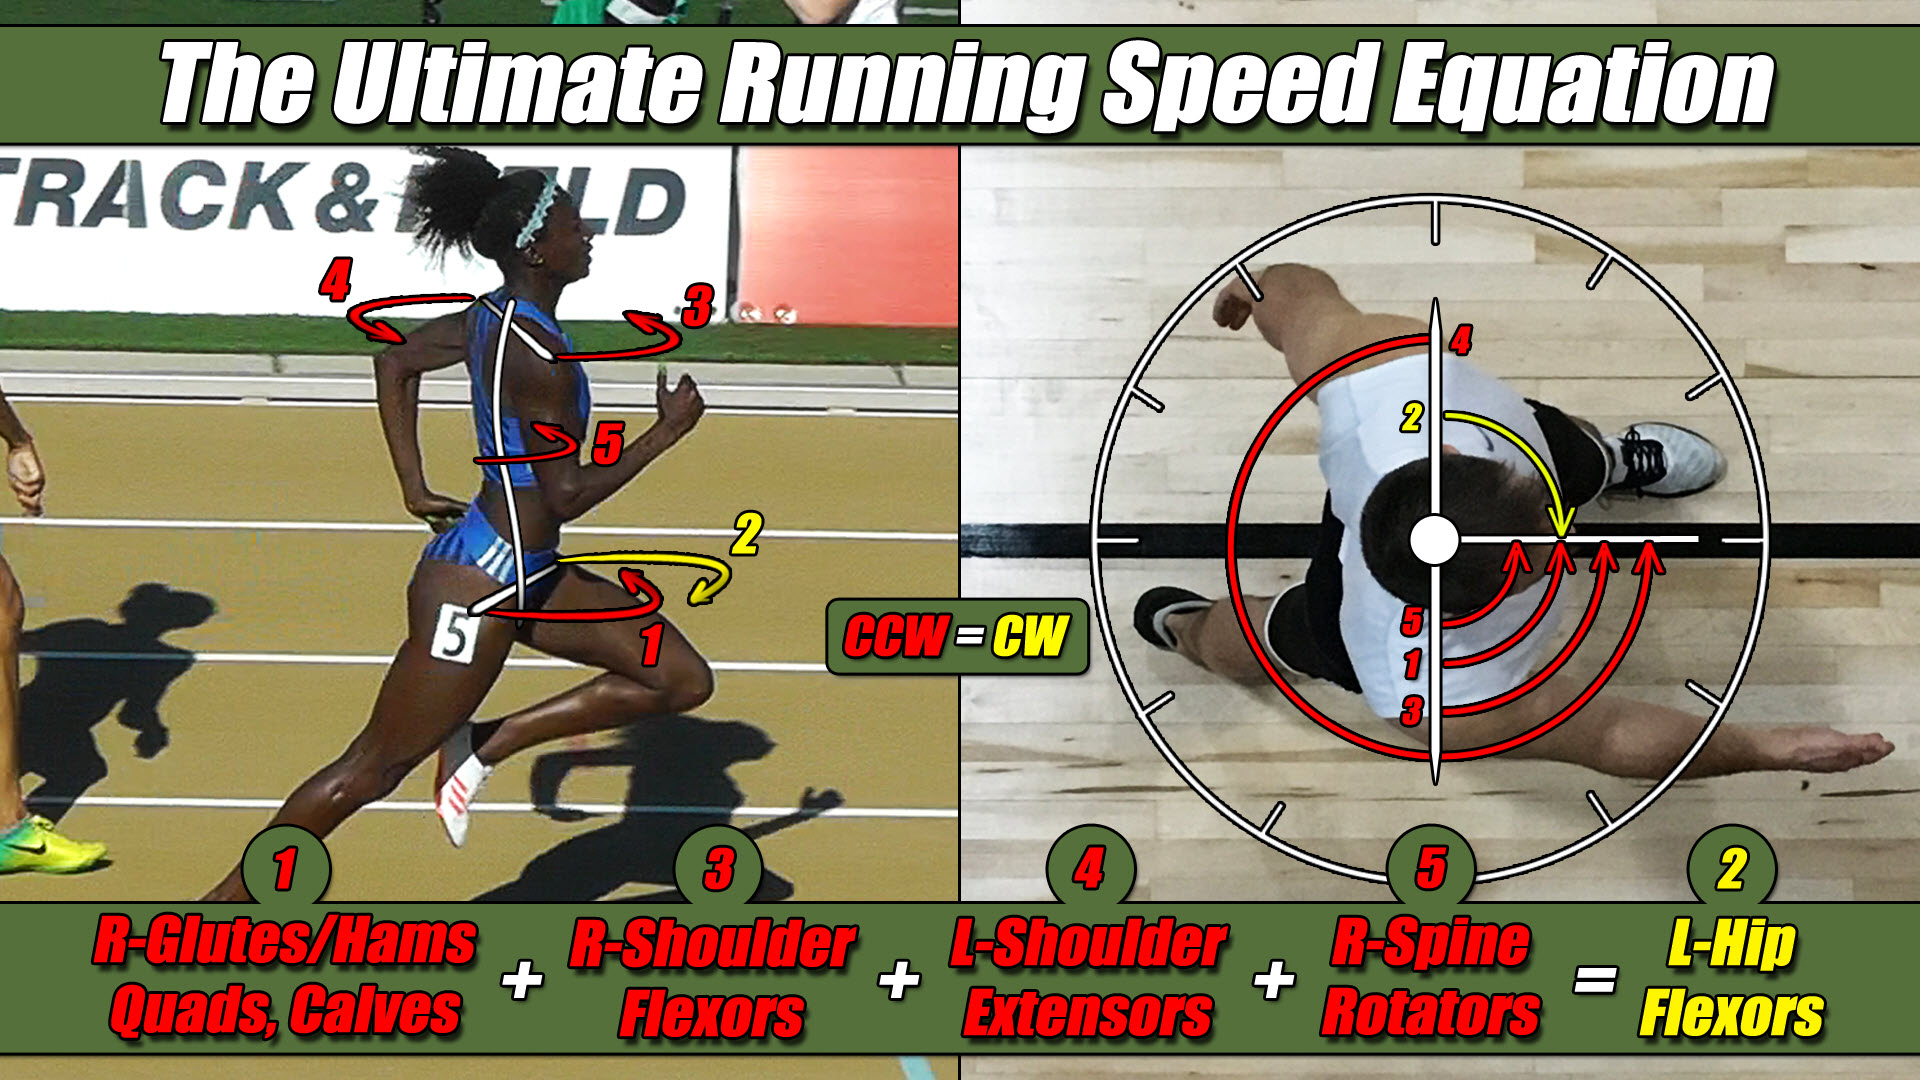
Okay, let’s clear out some of these graphics on our images and replace our male athlete with the female as seen in Figure 10-2 below and you will notice her right hip is now flexed in front, her left leg is now extended behind her, her right shoulder is now extended behind her and her left shoulder is now flexed in front of her. So, she is in the complete opposite position now as the image we started with on the left.
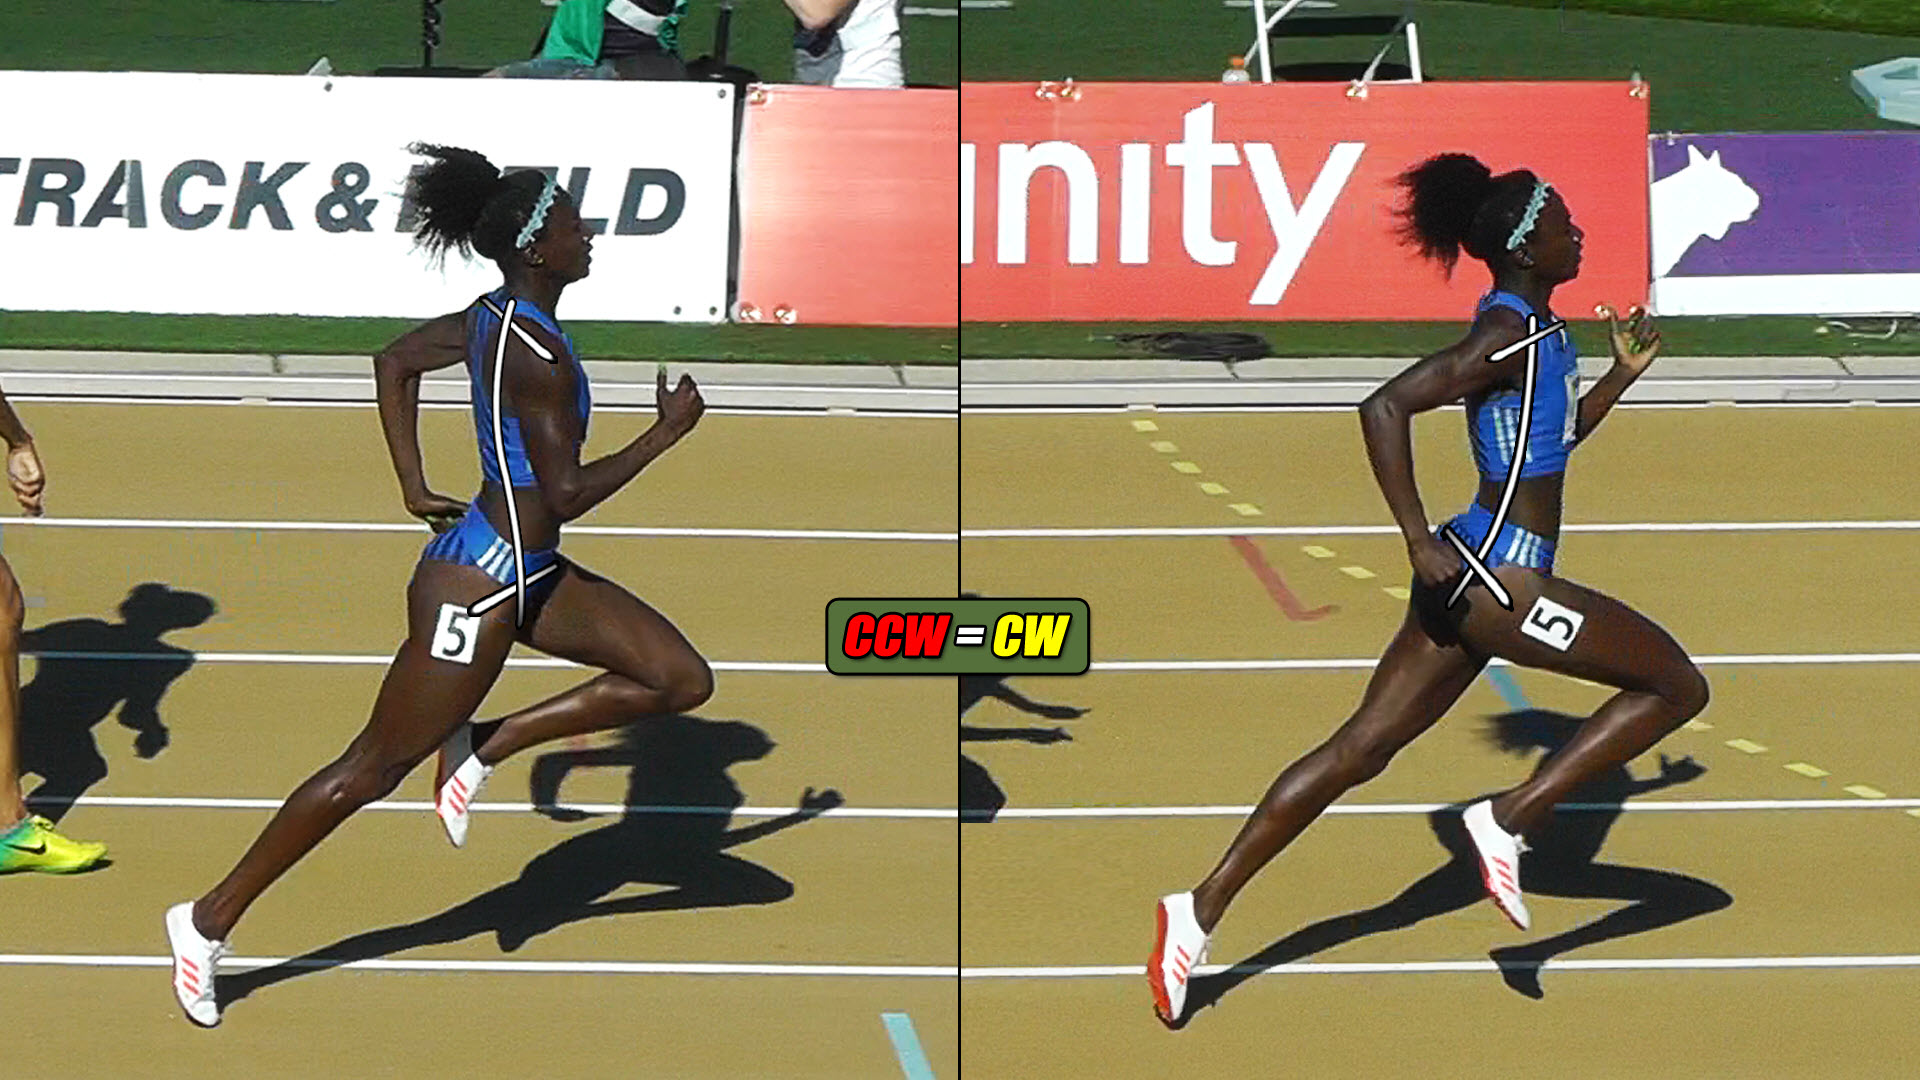
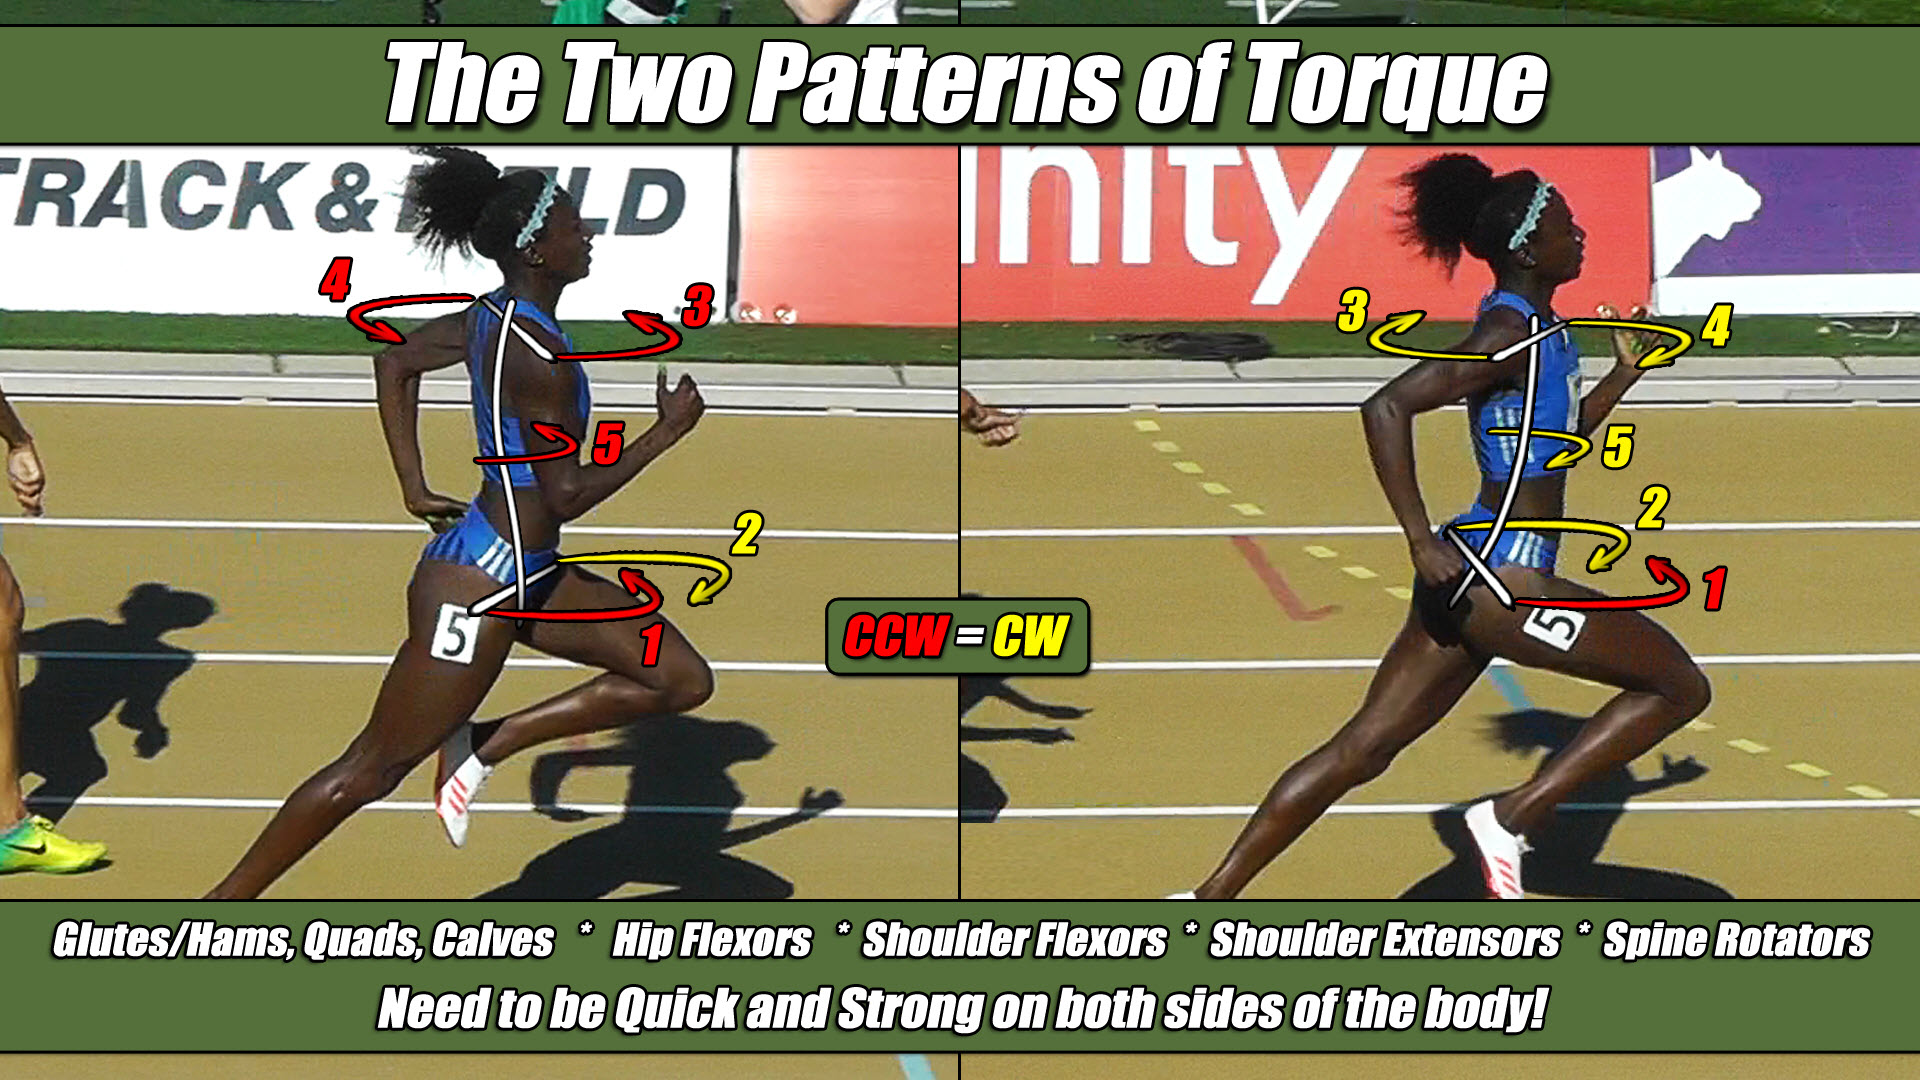
Now, looking at Figure 10-3 below in the image on the left, we saw the right leg, powered by the glutes/hams, quads and calves was pushing from behind and it created a CCW torque shown here in red. In the image on the right, this right hip is flexed, pulling her forward from the front and is also creating a CCW torque shown in red. So, the direction of torque produced by the right leg does not change regardless of which position it’s in, it’s always generating a counterclockwise torque and this is just another little tip to keep in mind.
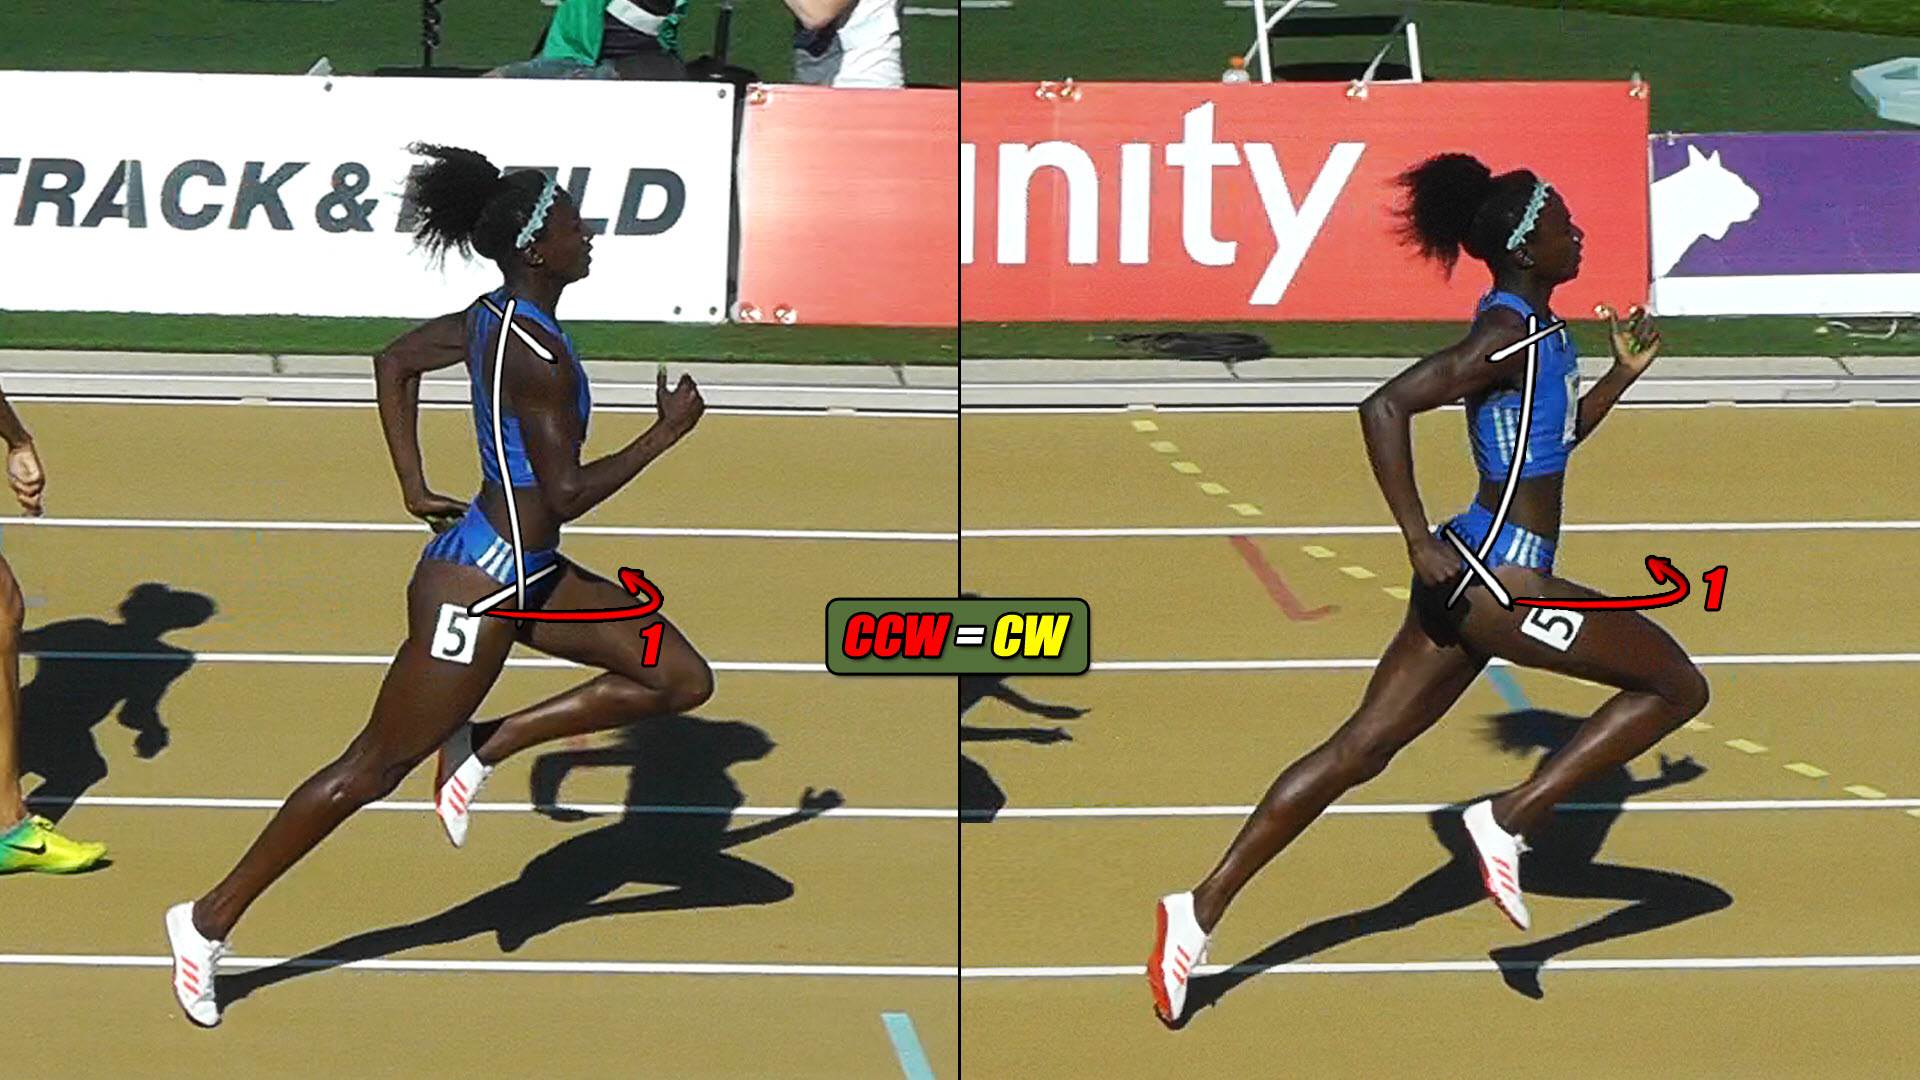
Moving on and looking at Figure 10-4 below, with the image on the left, we saw the left leg, powered by the hip flexors was pulling her forward from the front and it created a CW torque seen here in yellow. In the image on the right, the left leg is now extended and pushing her from behind and is also creating a CW torque shown in yellow. So, the direction of torque produced by the left leg does not change, either, regardless of which position it’s in, it’s always generating a clockwise torque and this also another little tip to keep in mind.
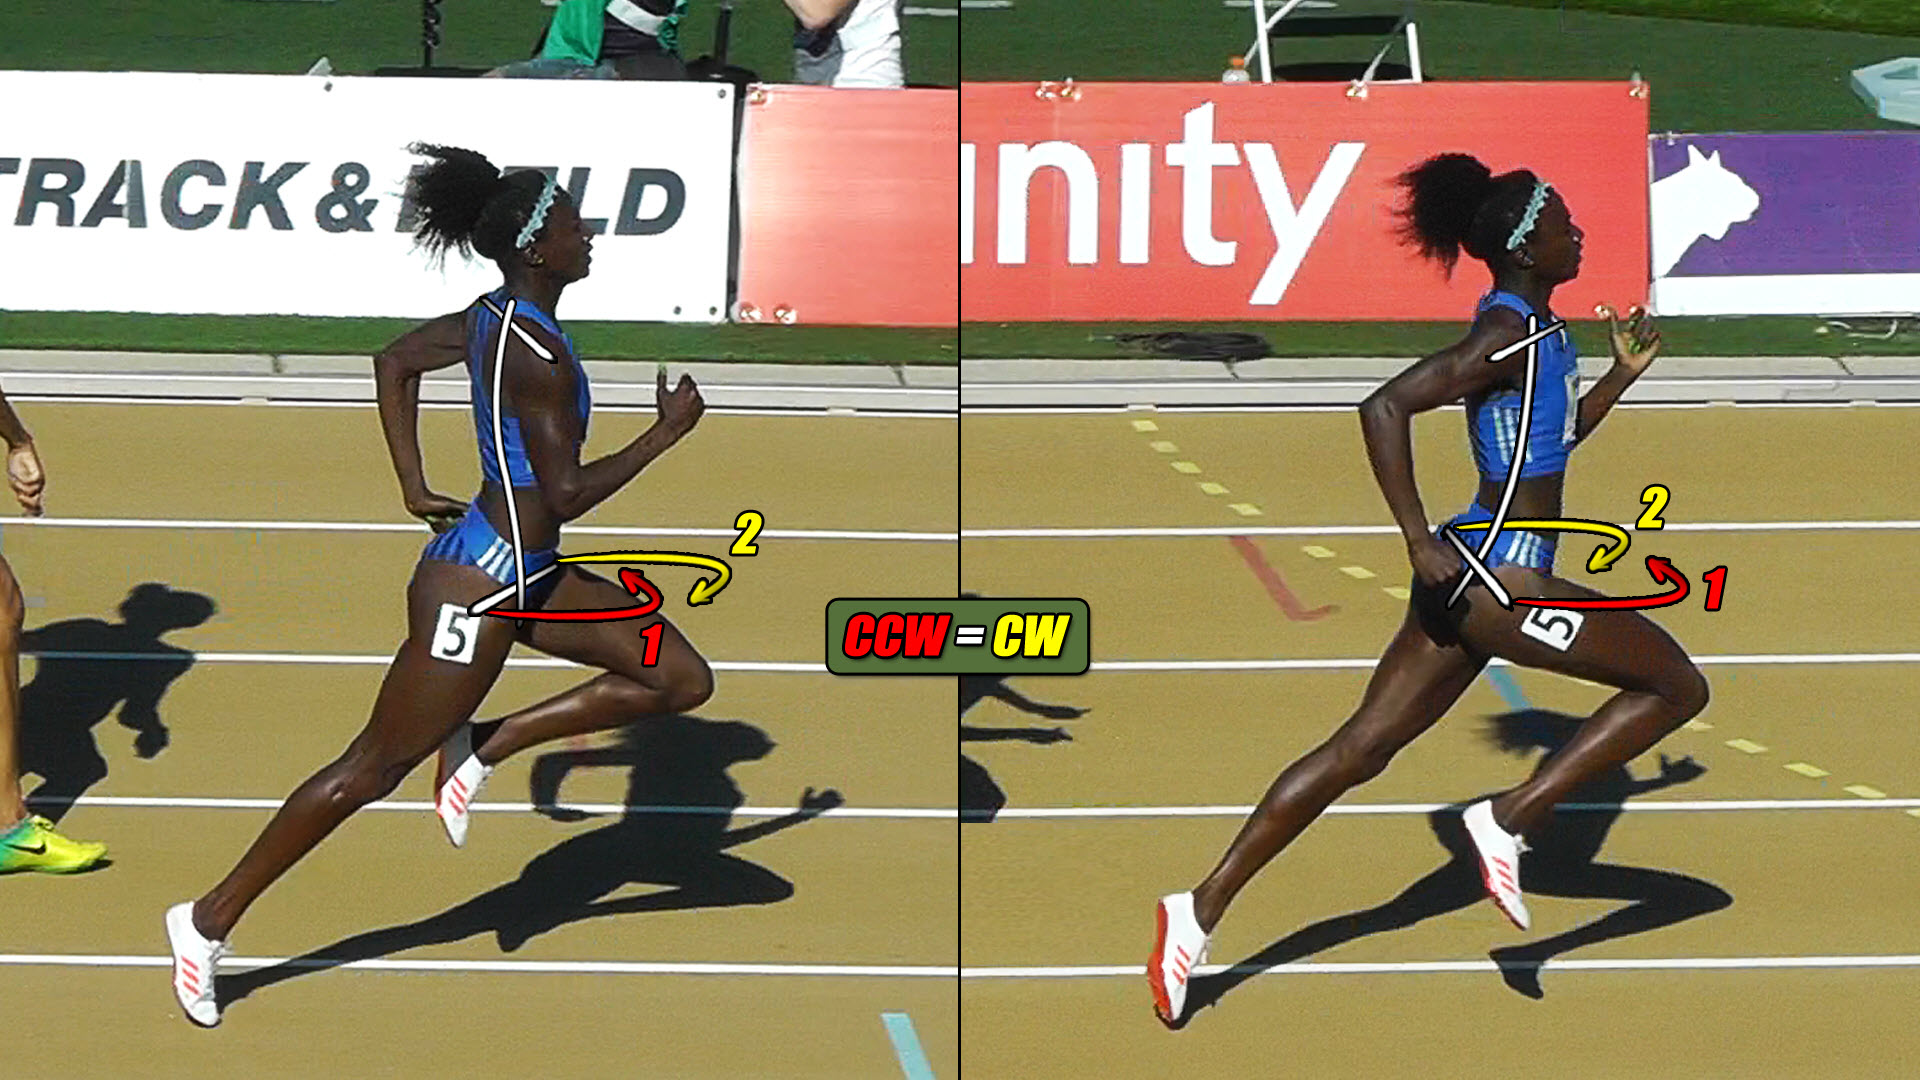
Continuing on and looking at Figure 10-5 below, with the image on the left, we saw the right arm, powered by the shoulder flexors and the left arm, powered by the shoulder extensors, were both pulling on our athlete in what looked to be opposite directions to each other, but in reality, both were twisting her in the same CCW direction shown here in red. See Figure 10-5.
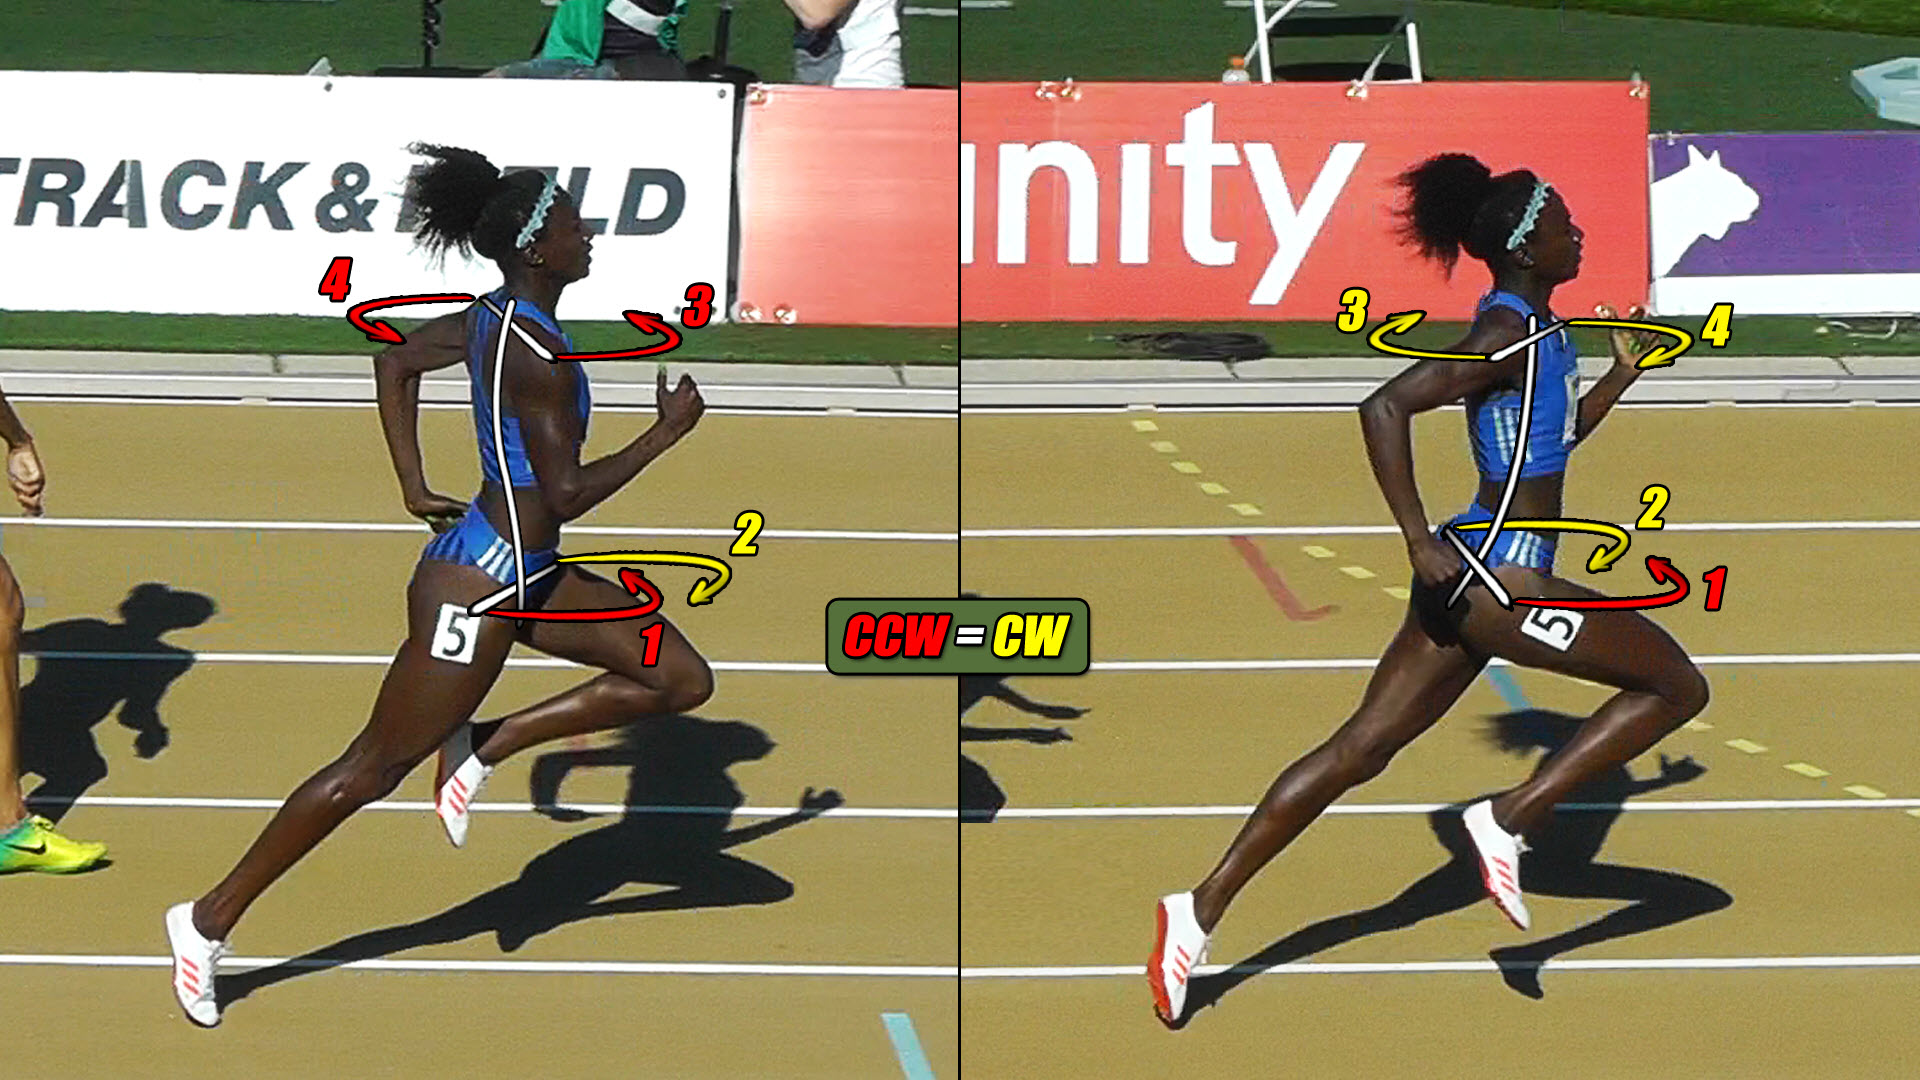
Now, however, and looking ABOVE in Figure 10-5, in the image on the right, her right arm and left arm also look like they are working in opposite directions to each other, but in reality, they are both twisting her in the same direction, but this time it’s in the CW direction shown here now in yellow. See Figure 10-5 ABOVE.
And finally, in Figure 10-6 below, we had the last torque, powered by the lateral rotators of the spine on the right side of the body twisting the torso in the same CCW direction as the arms, but this time, with the arm positions switched, the lateral rotators of the spine on the left side of the body spine are twisting the torso in the CW direction to once again match up with the direction of the arms. See Figure 10-6 below.
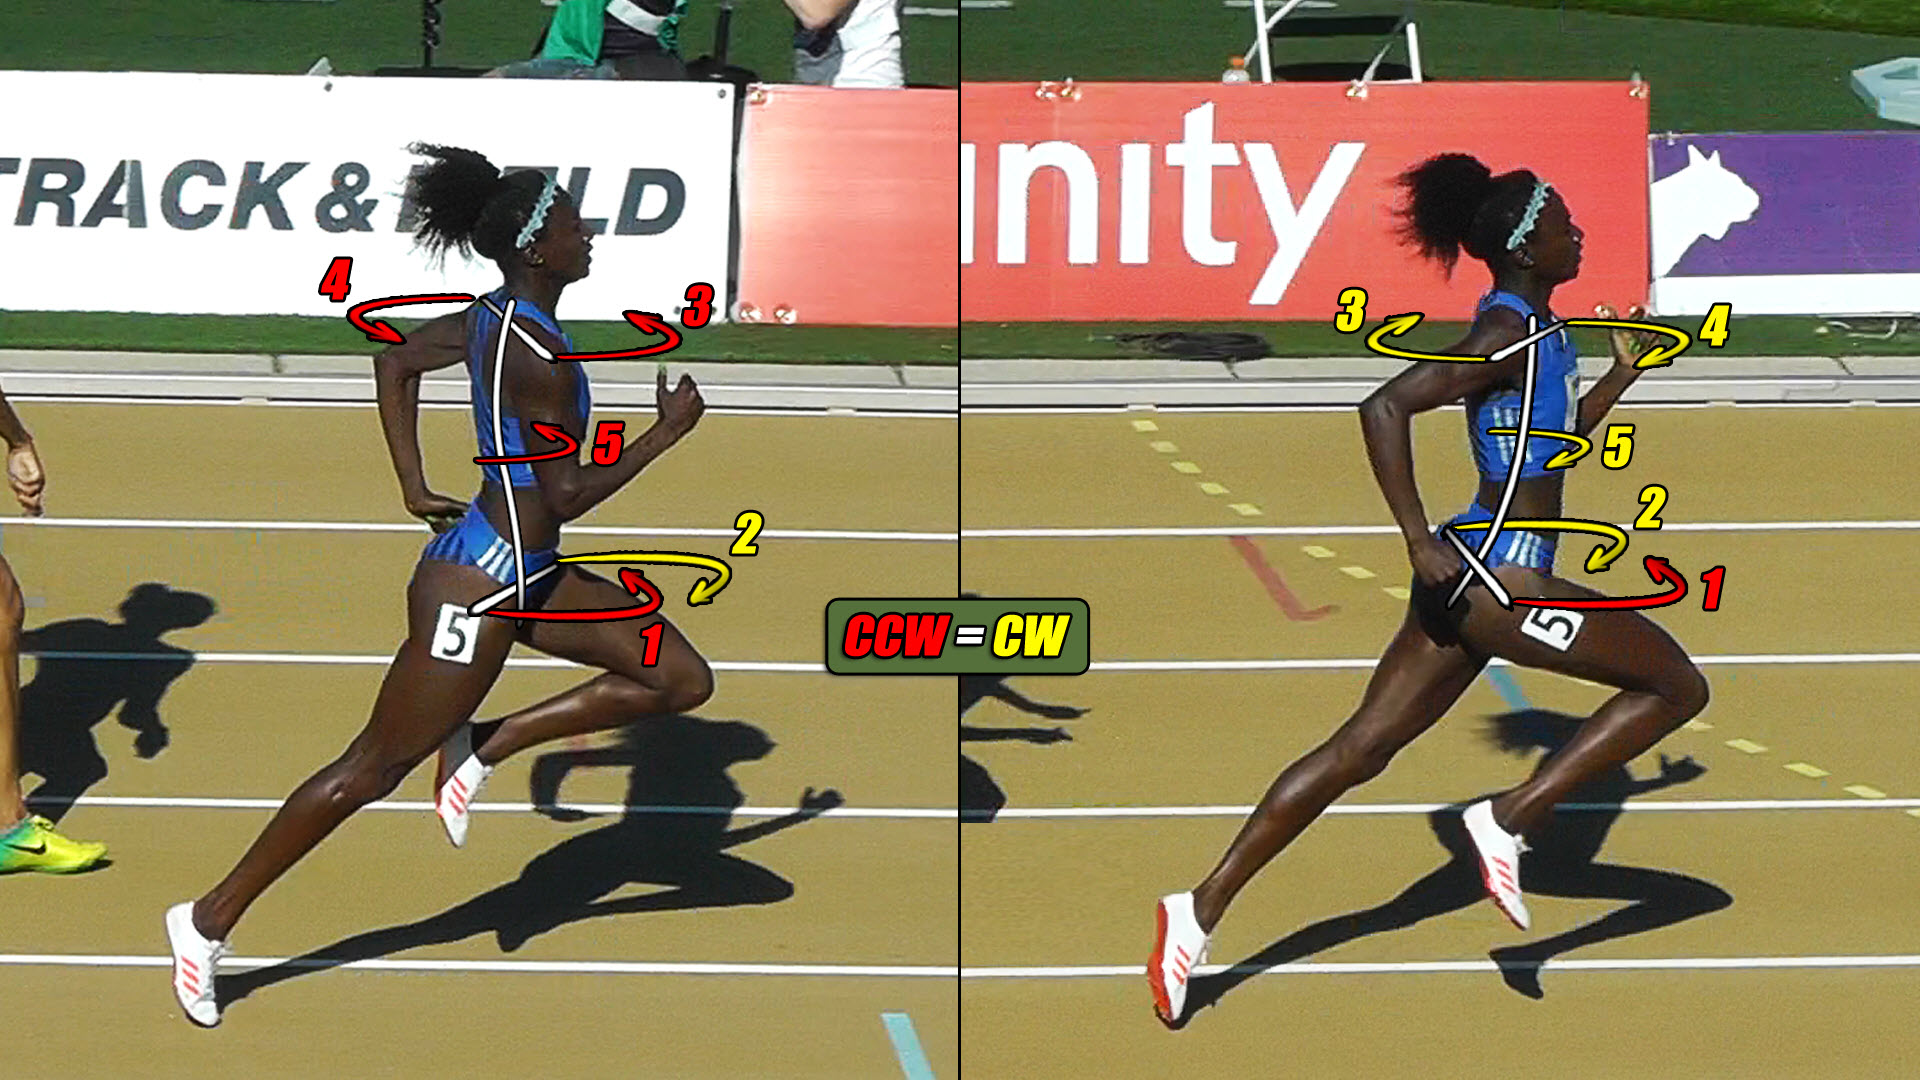
Now, let’s replace the image on the left with the male athlete where his arm and leg positions match up with those of our female athlete. See Figure 10-7 below.
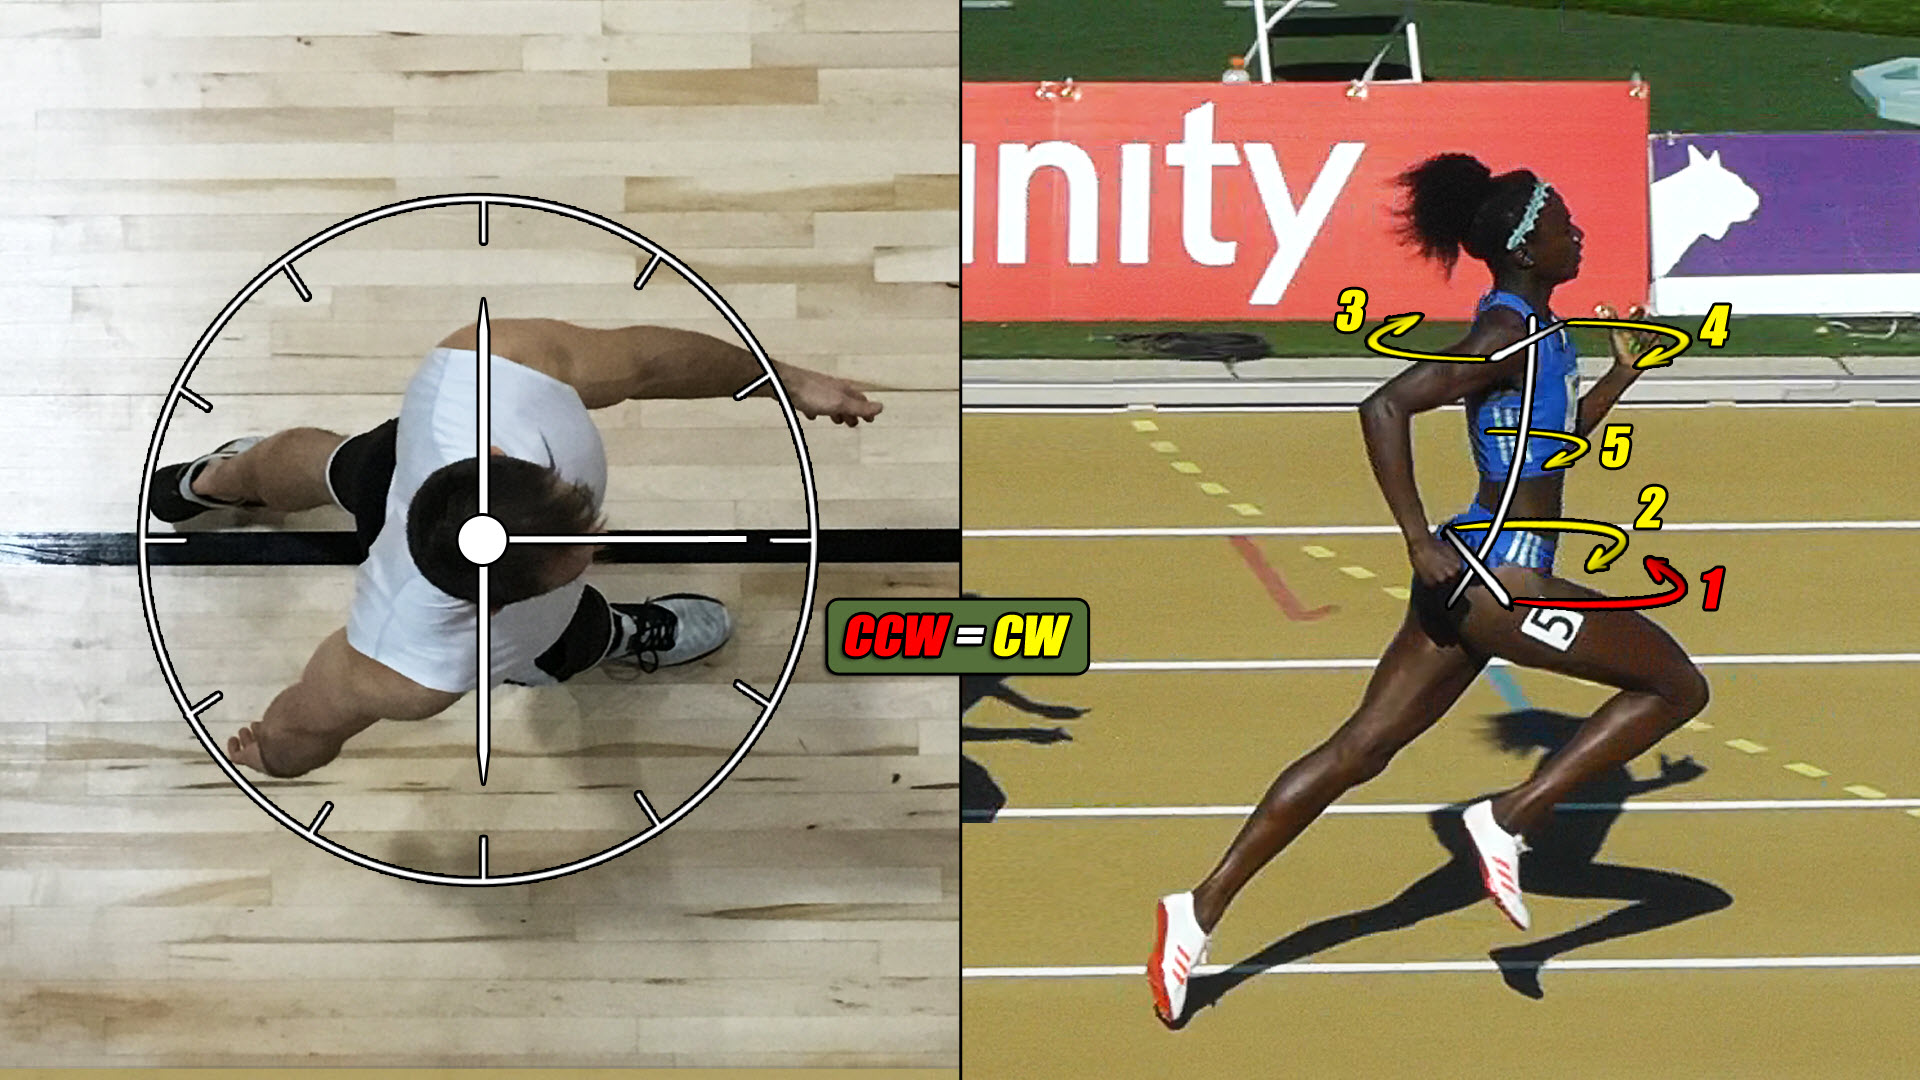
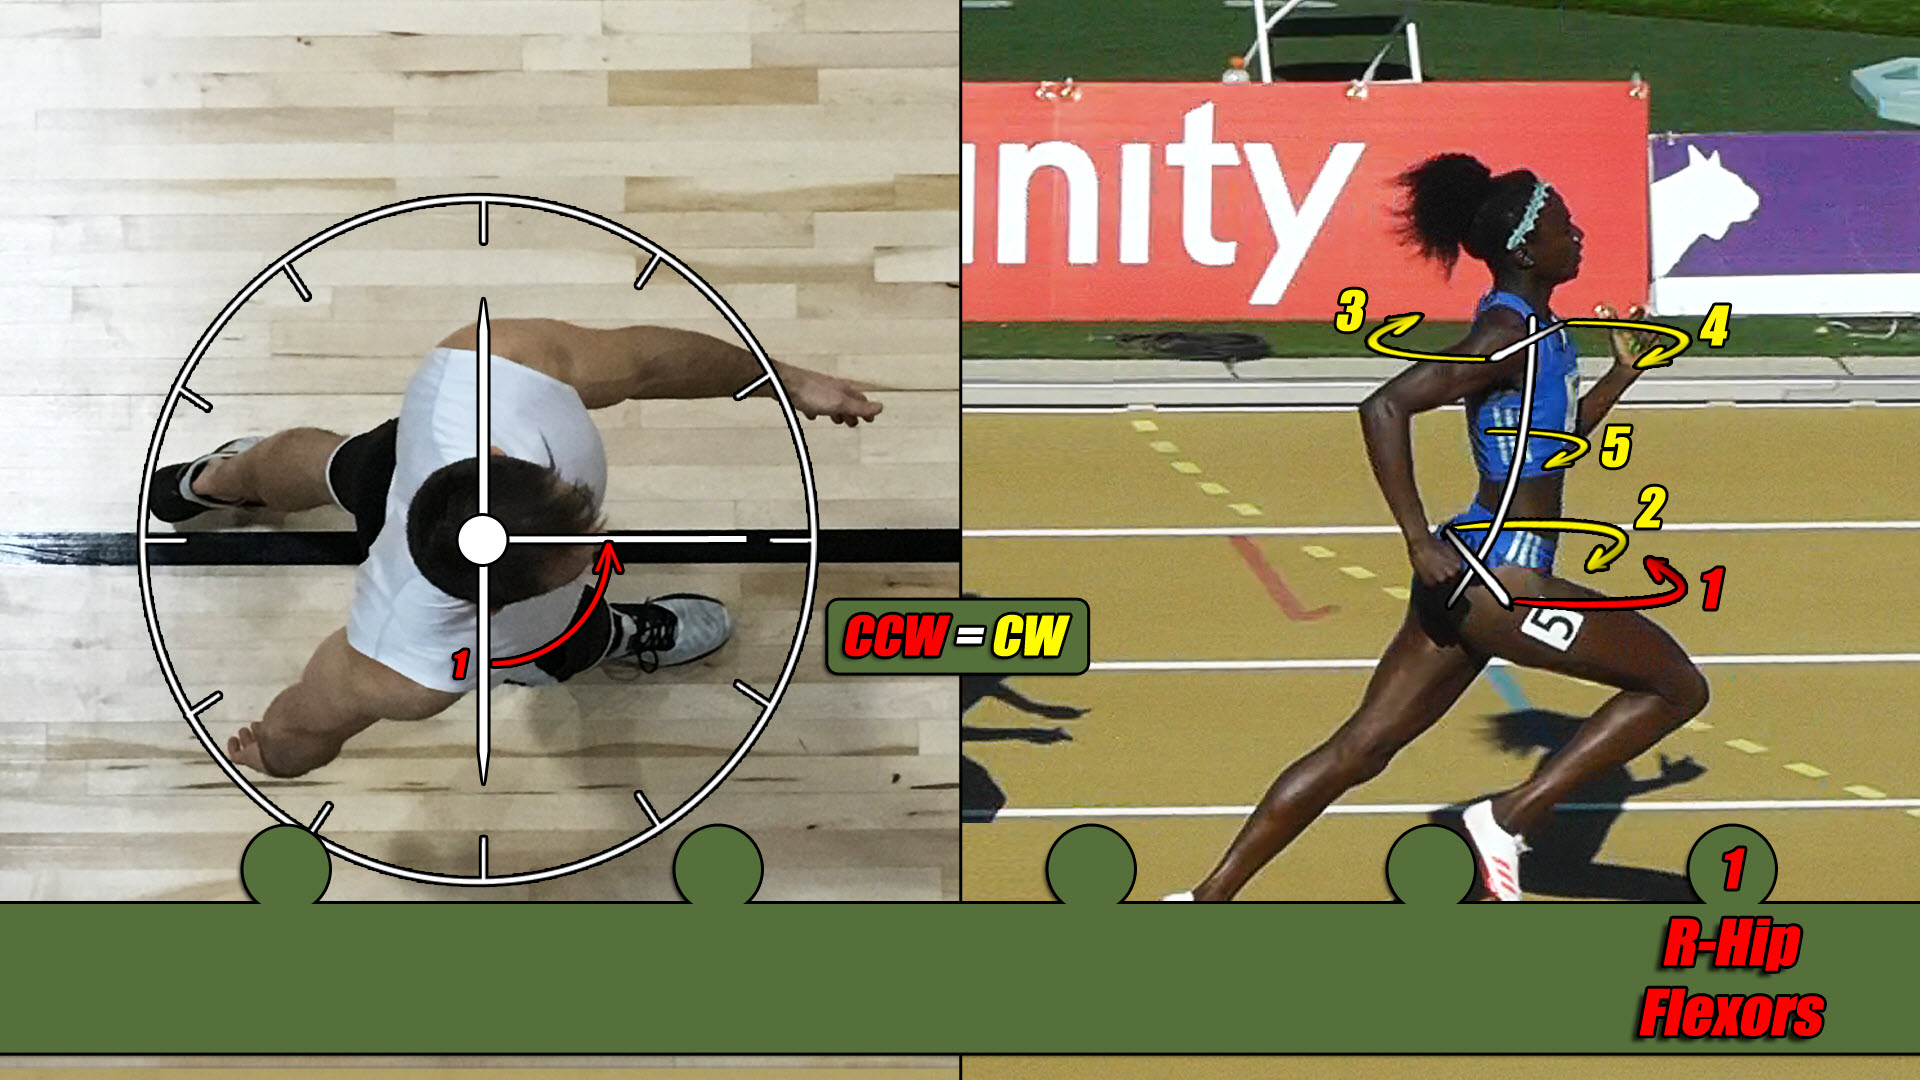
And in doing so we see torque #1 on her is for the right hip flexors, in red for CCW, will be the same for him and let’s write that down below in Figure 10-8.
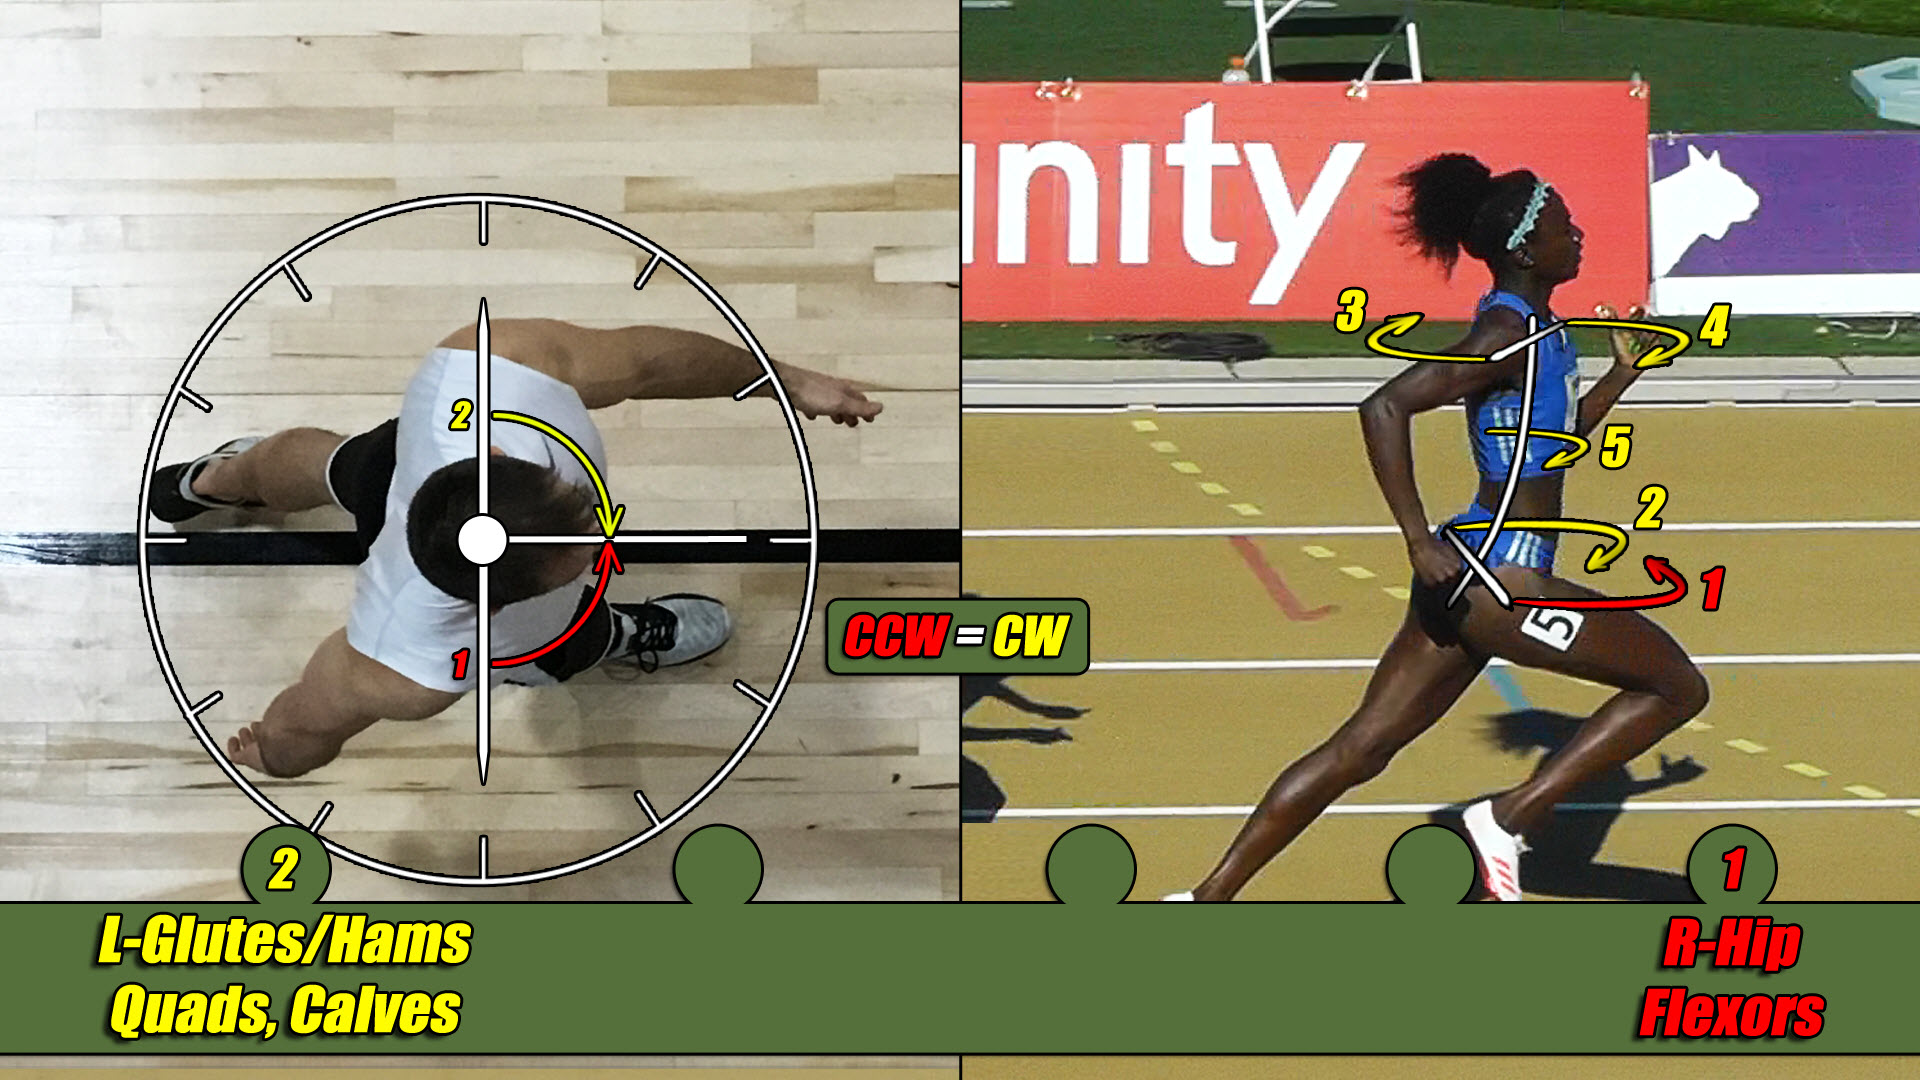
Next, we see torque #2 on her for the left glutes/hams, quads and calves, in yellow for CW, will be the same on him and let’s write that down below in Figure 10-9.
Then we see torque #3, on her for the right shoulder extensors, in yellow for CW, will be the same on him and let’s put that down below in Figure 10-10.
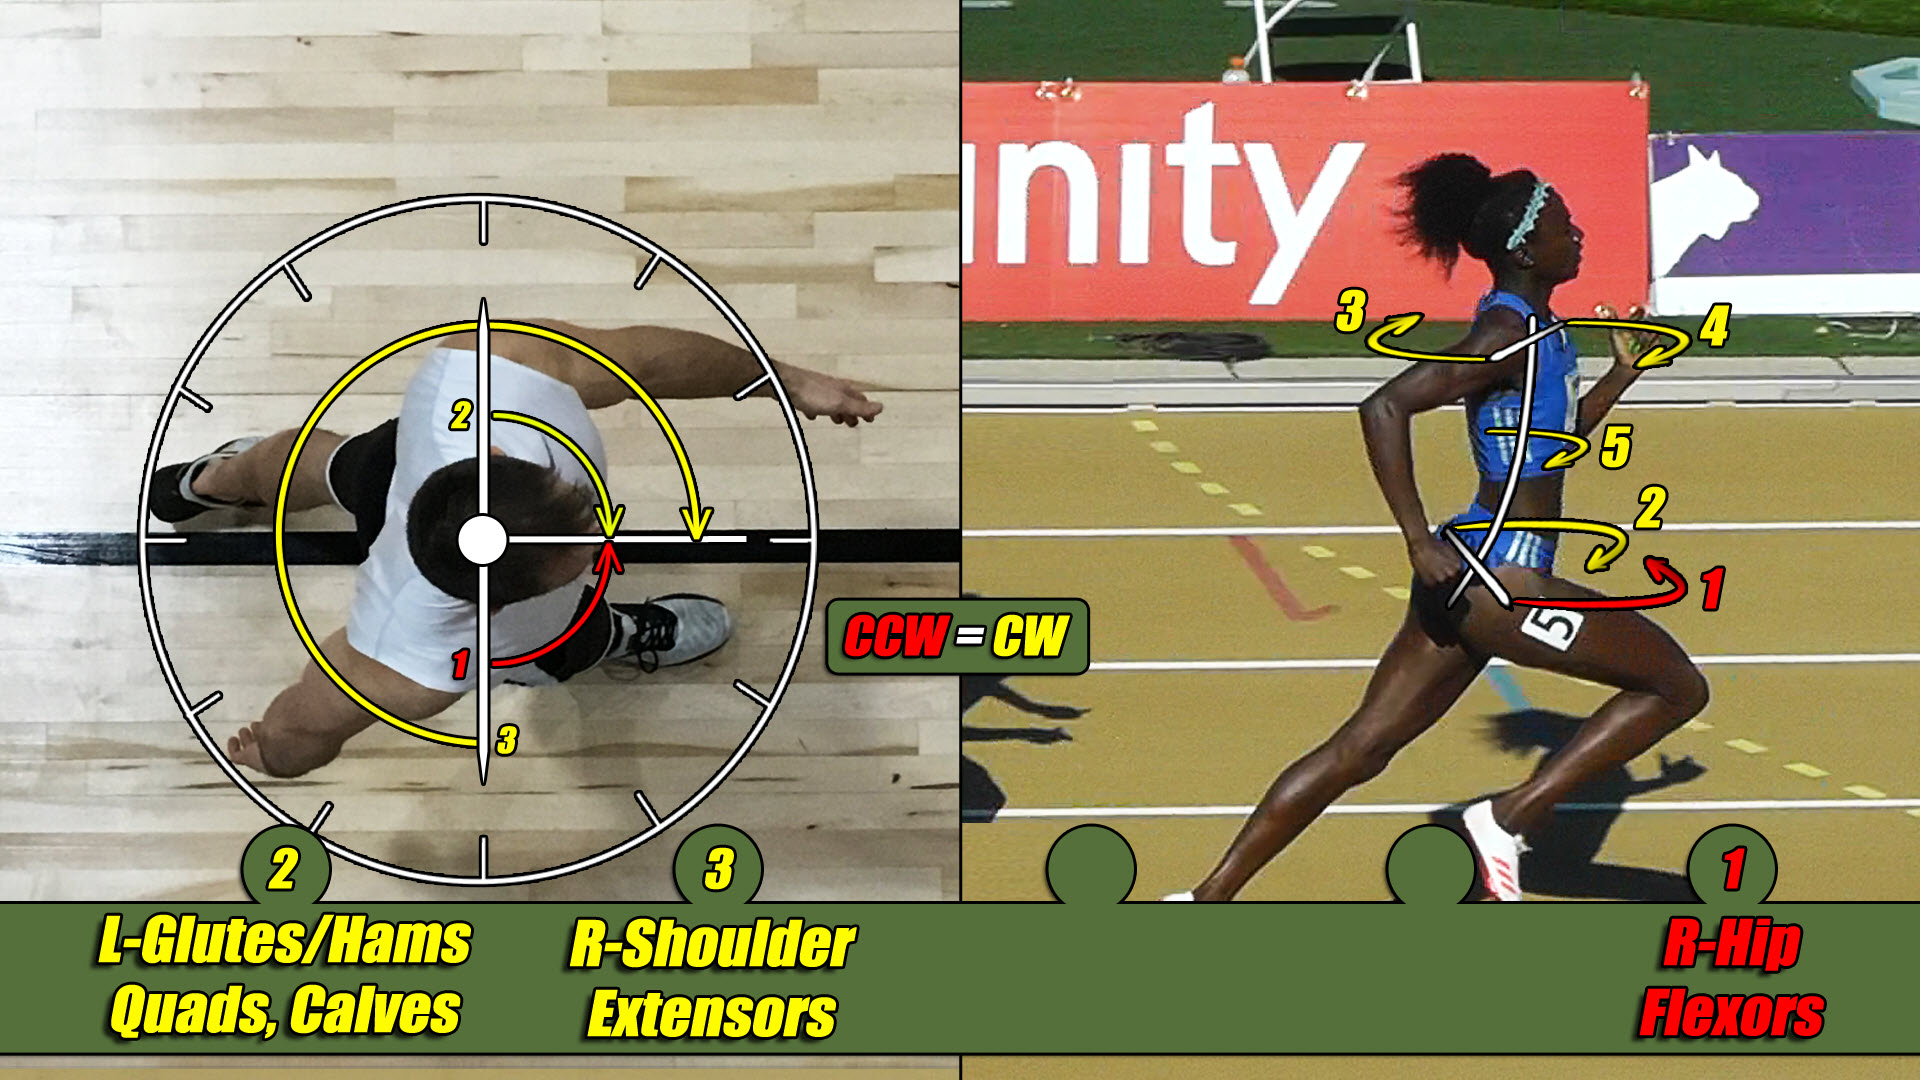
After that we see torque #4, on her for the left shoulder flexors, in yellow for CW, will be the same on him and let’s put that down below in Figure 10-11.
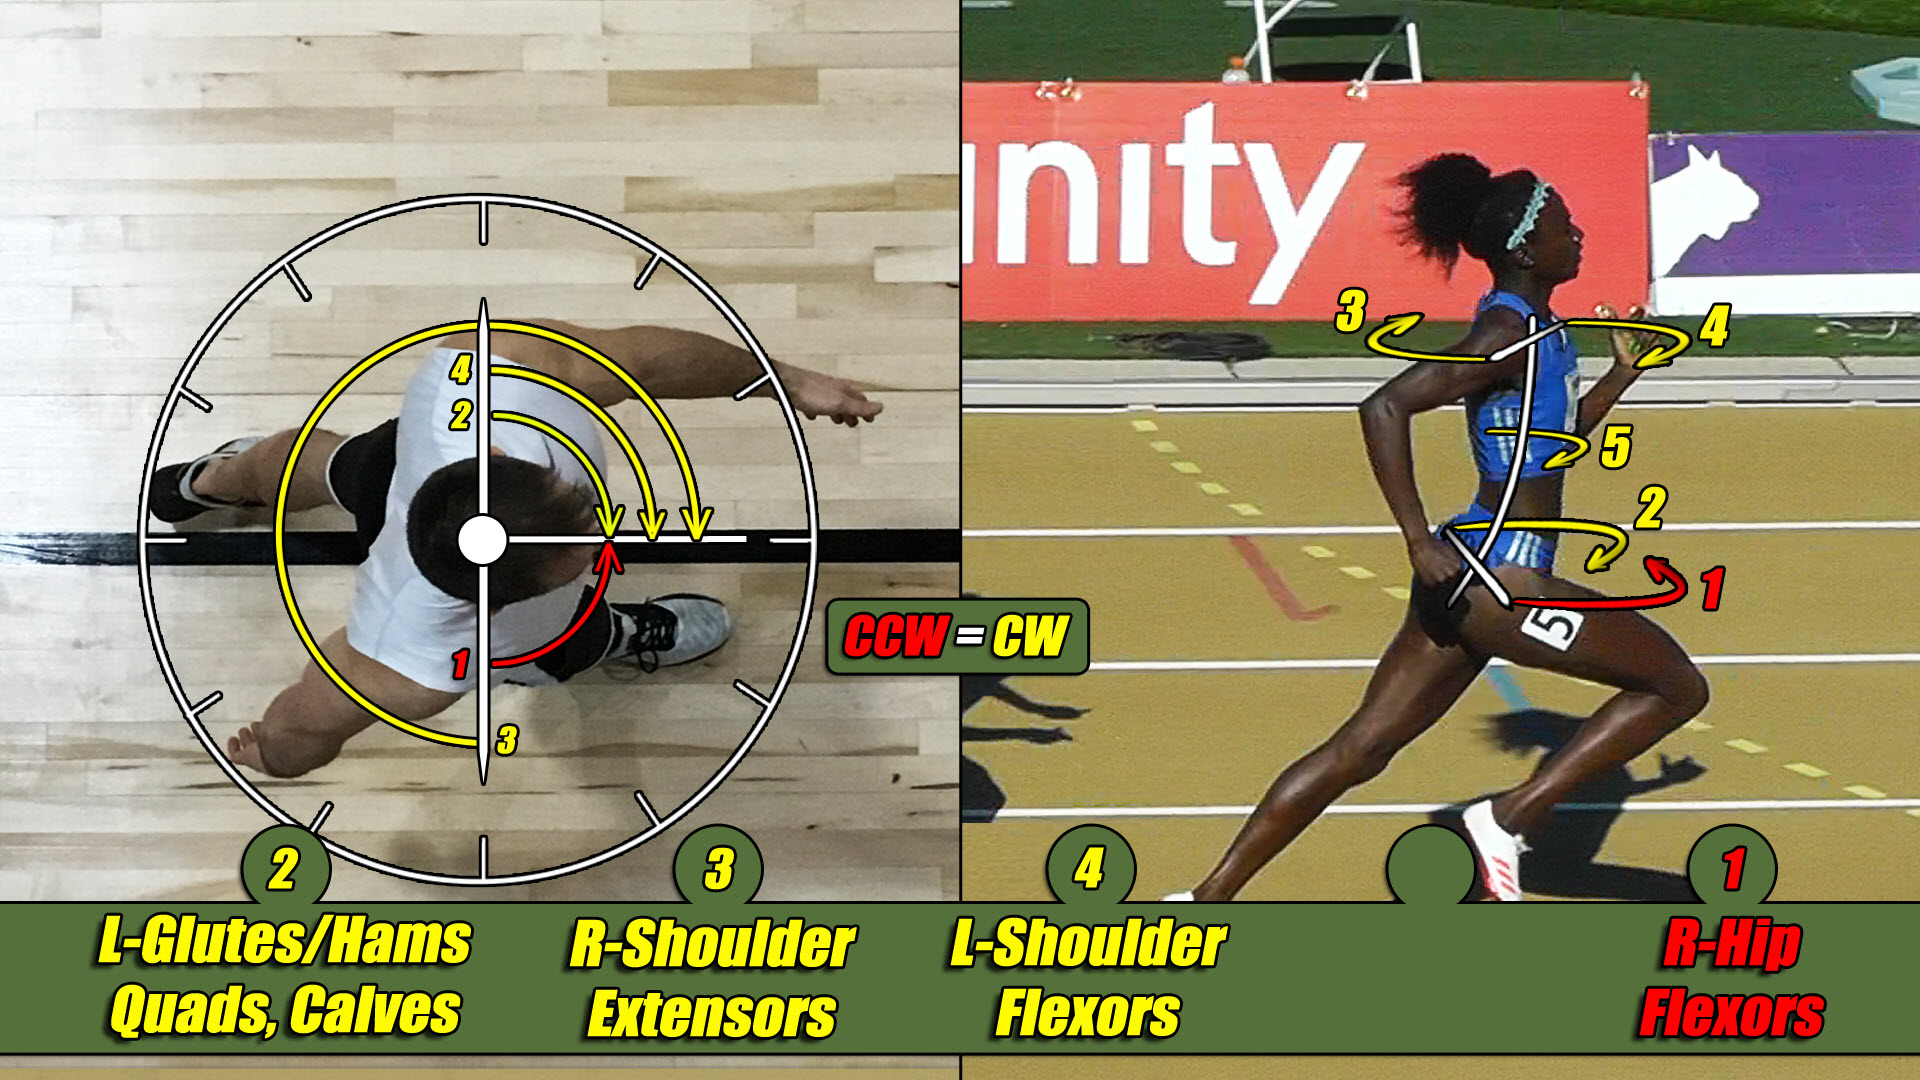
And finally, we see torque #5 on her for the Left spine rotators, in yellow for CW, will be the same on him and let’s write that down below in Figure 10-12.
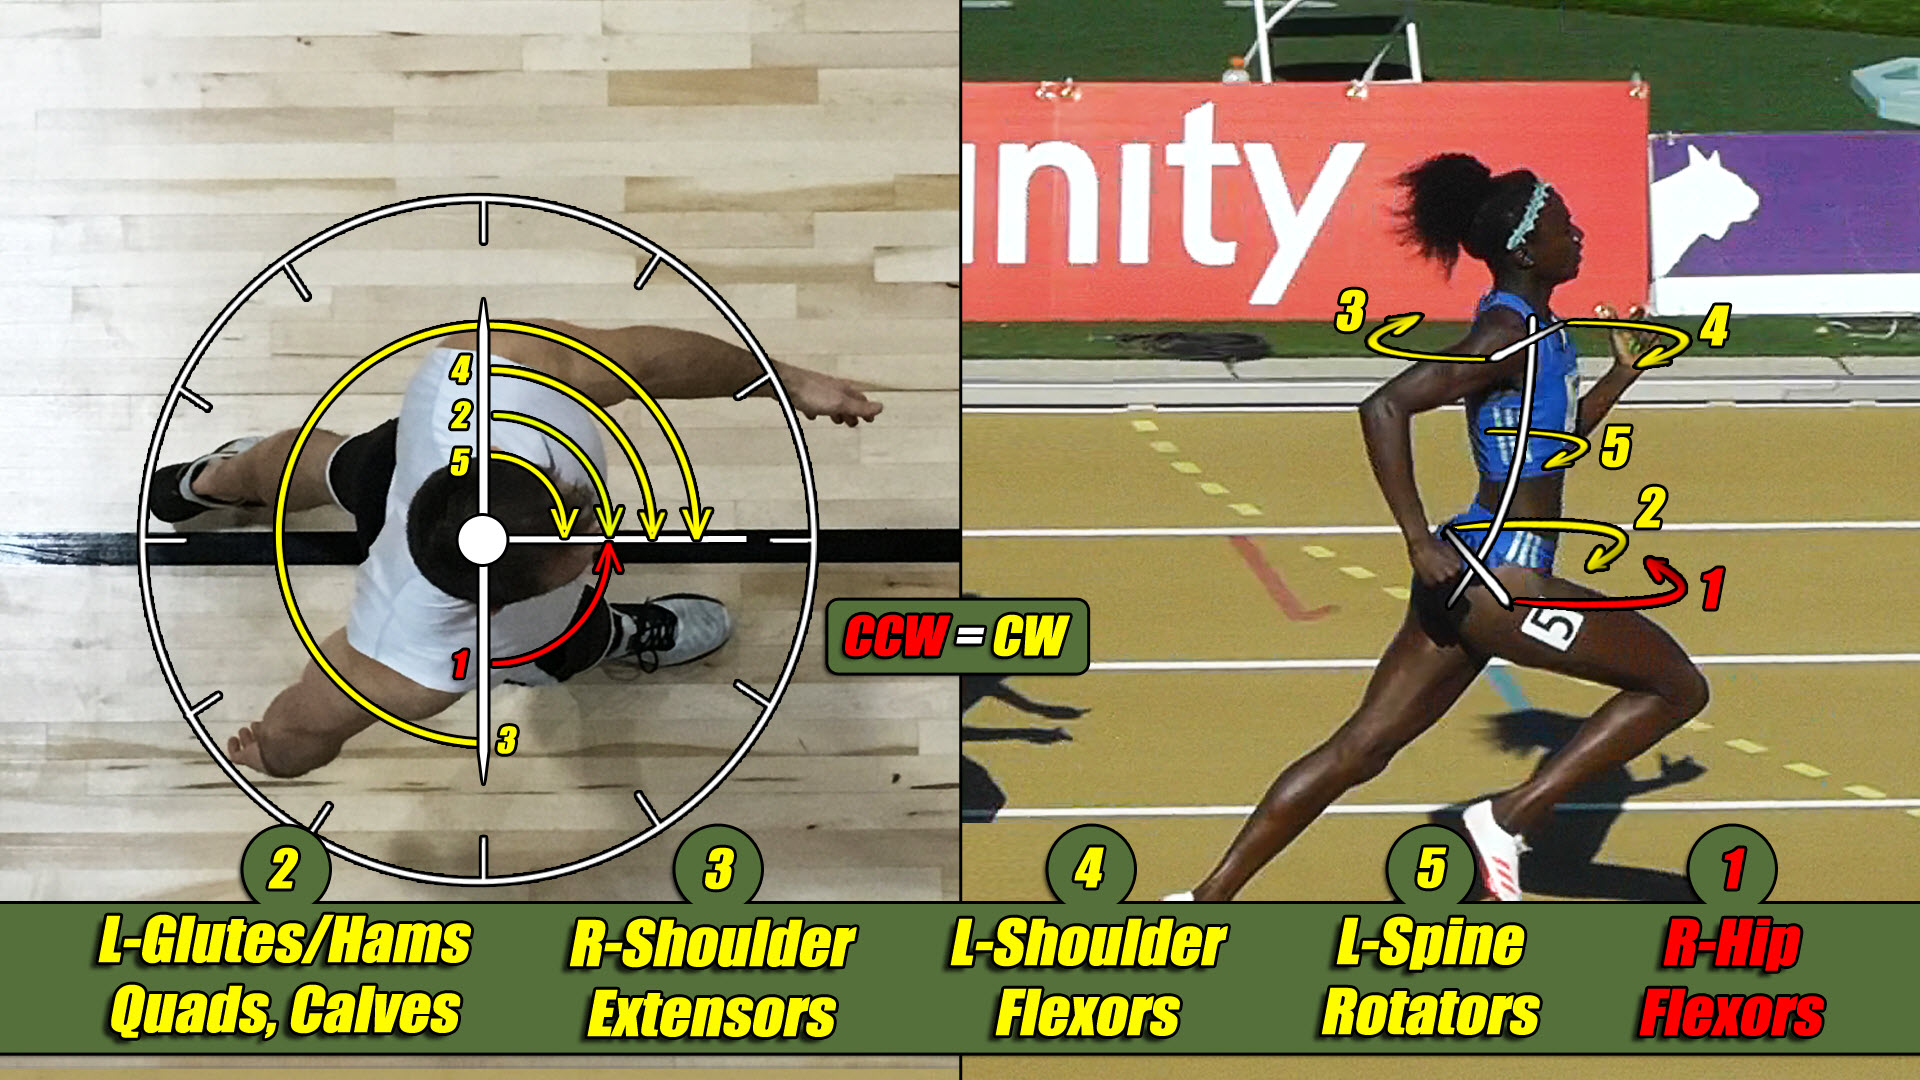
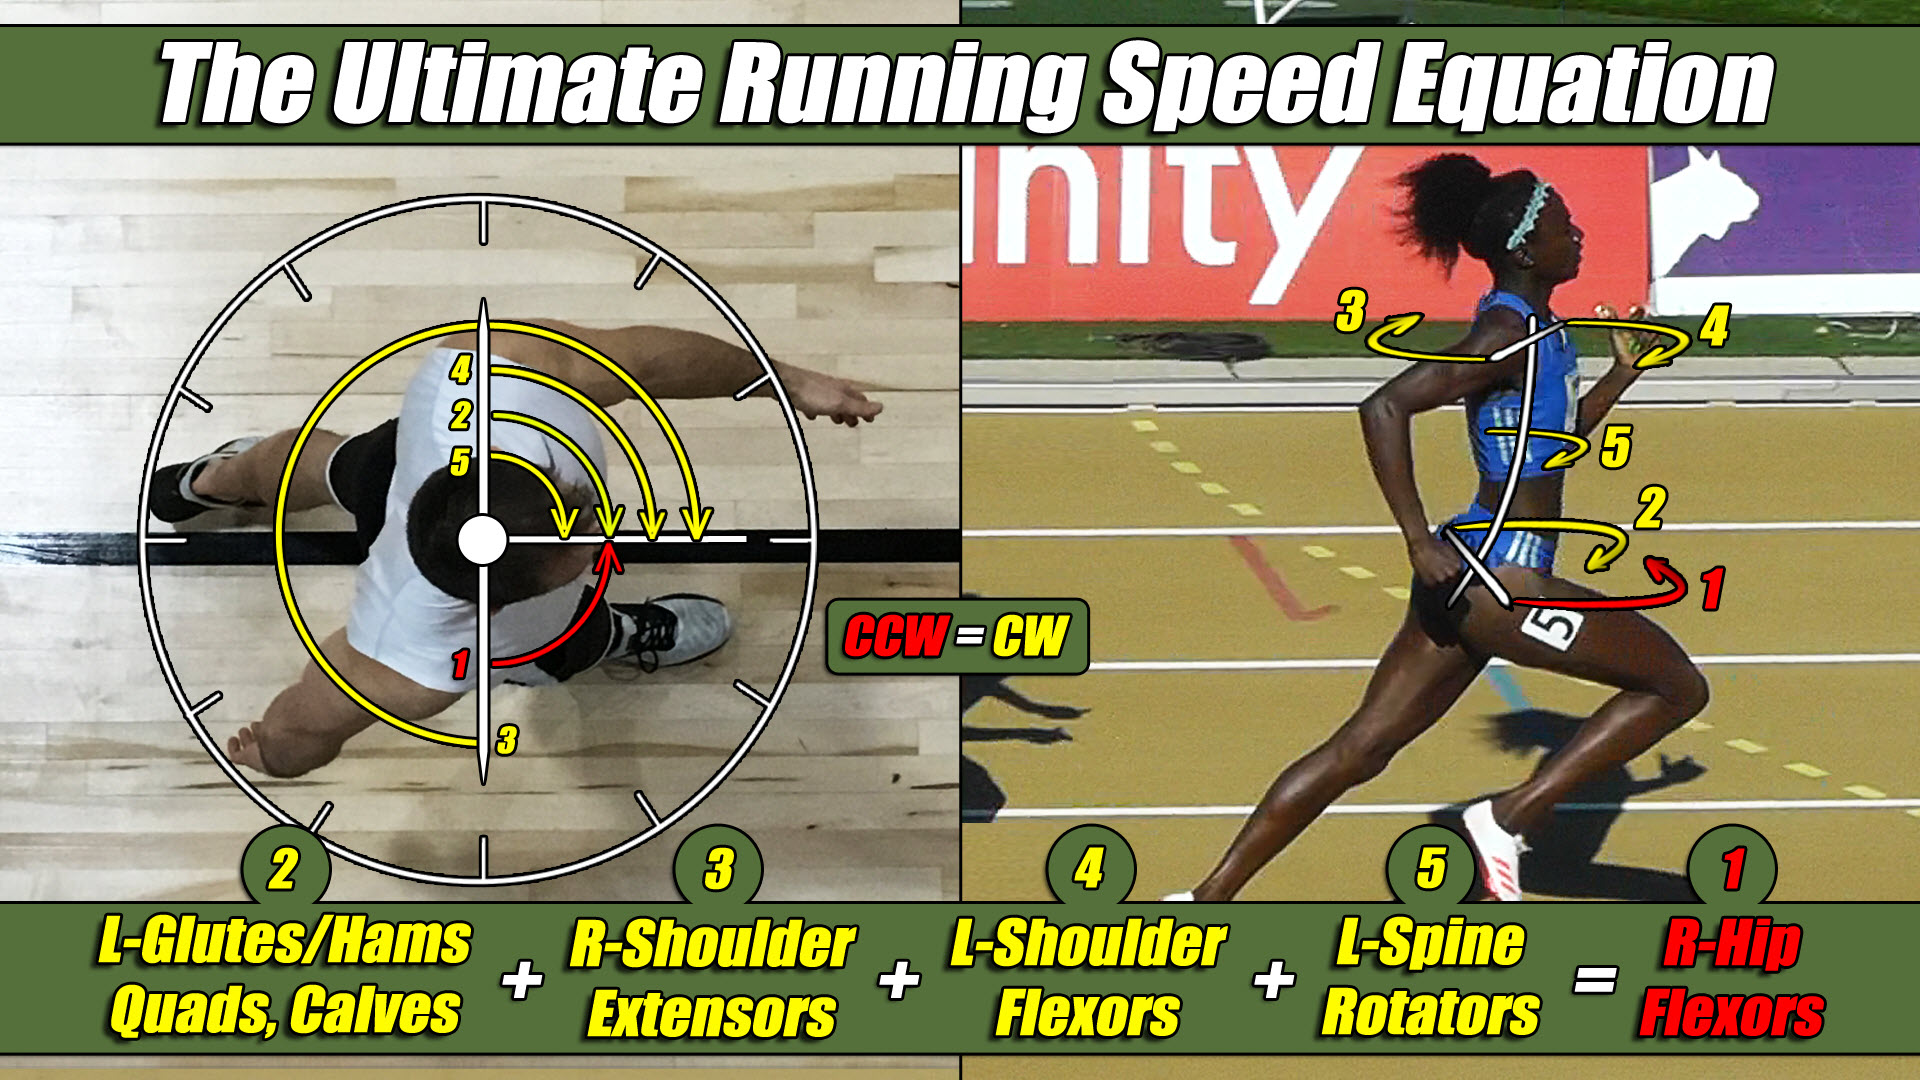
And, looking at our male athlete we see we have four torques working in the same direction, so, we know their effect is once again, cumulative, seen here and so can place a + sign between them all down below in Figure 10-13.
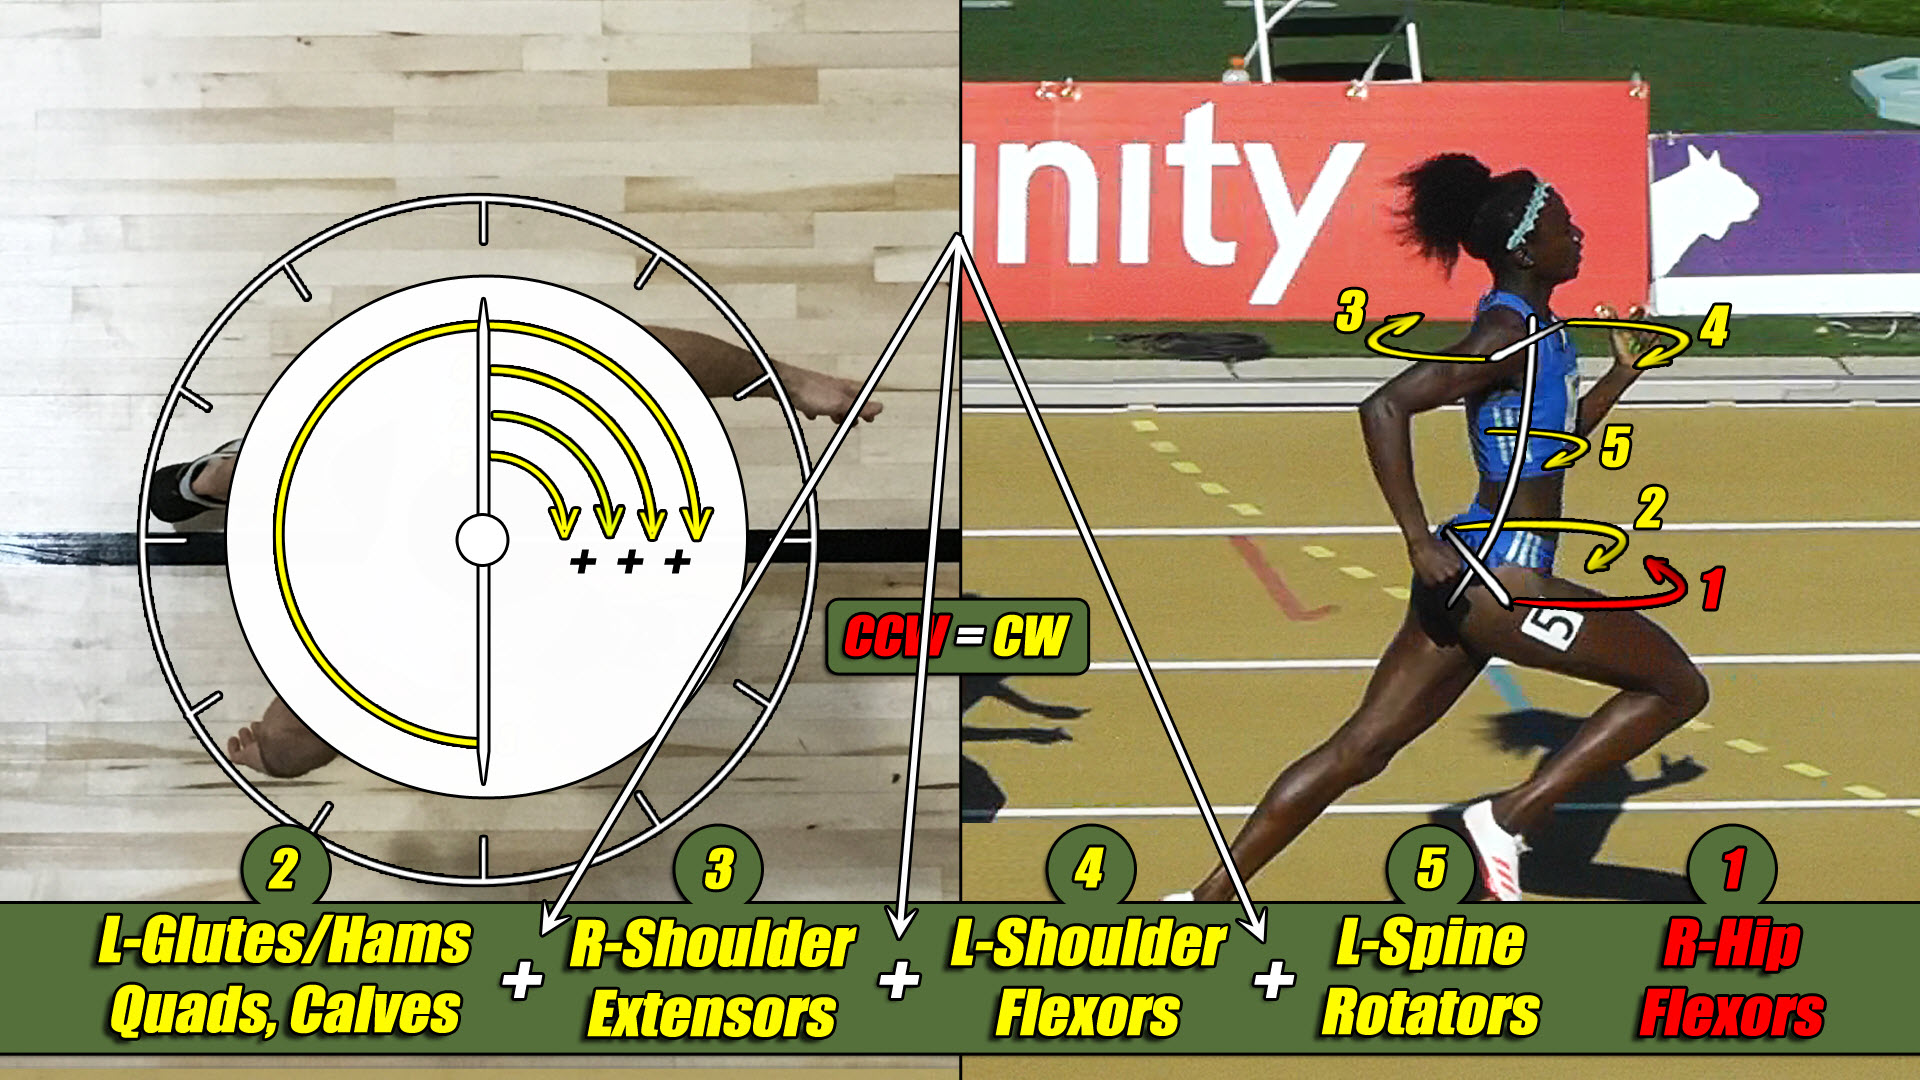
And now, we see the hip flexors on the right side of his body in Figure 10-14 below, this time in red, for CCW, working all alone like I told you previously these muscles did, And, since this is only torque working in this direction, it must be strong enough, all by itself, to push back against the combined strength of the other four with equal strength if the goal of the person is to move in a straight path. See Figure 10-14.
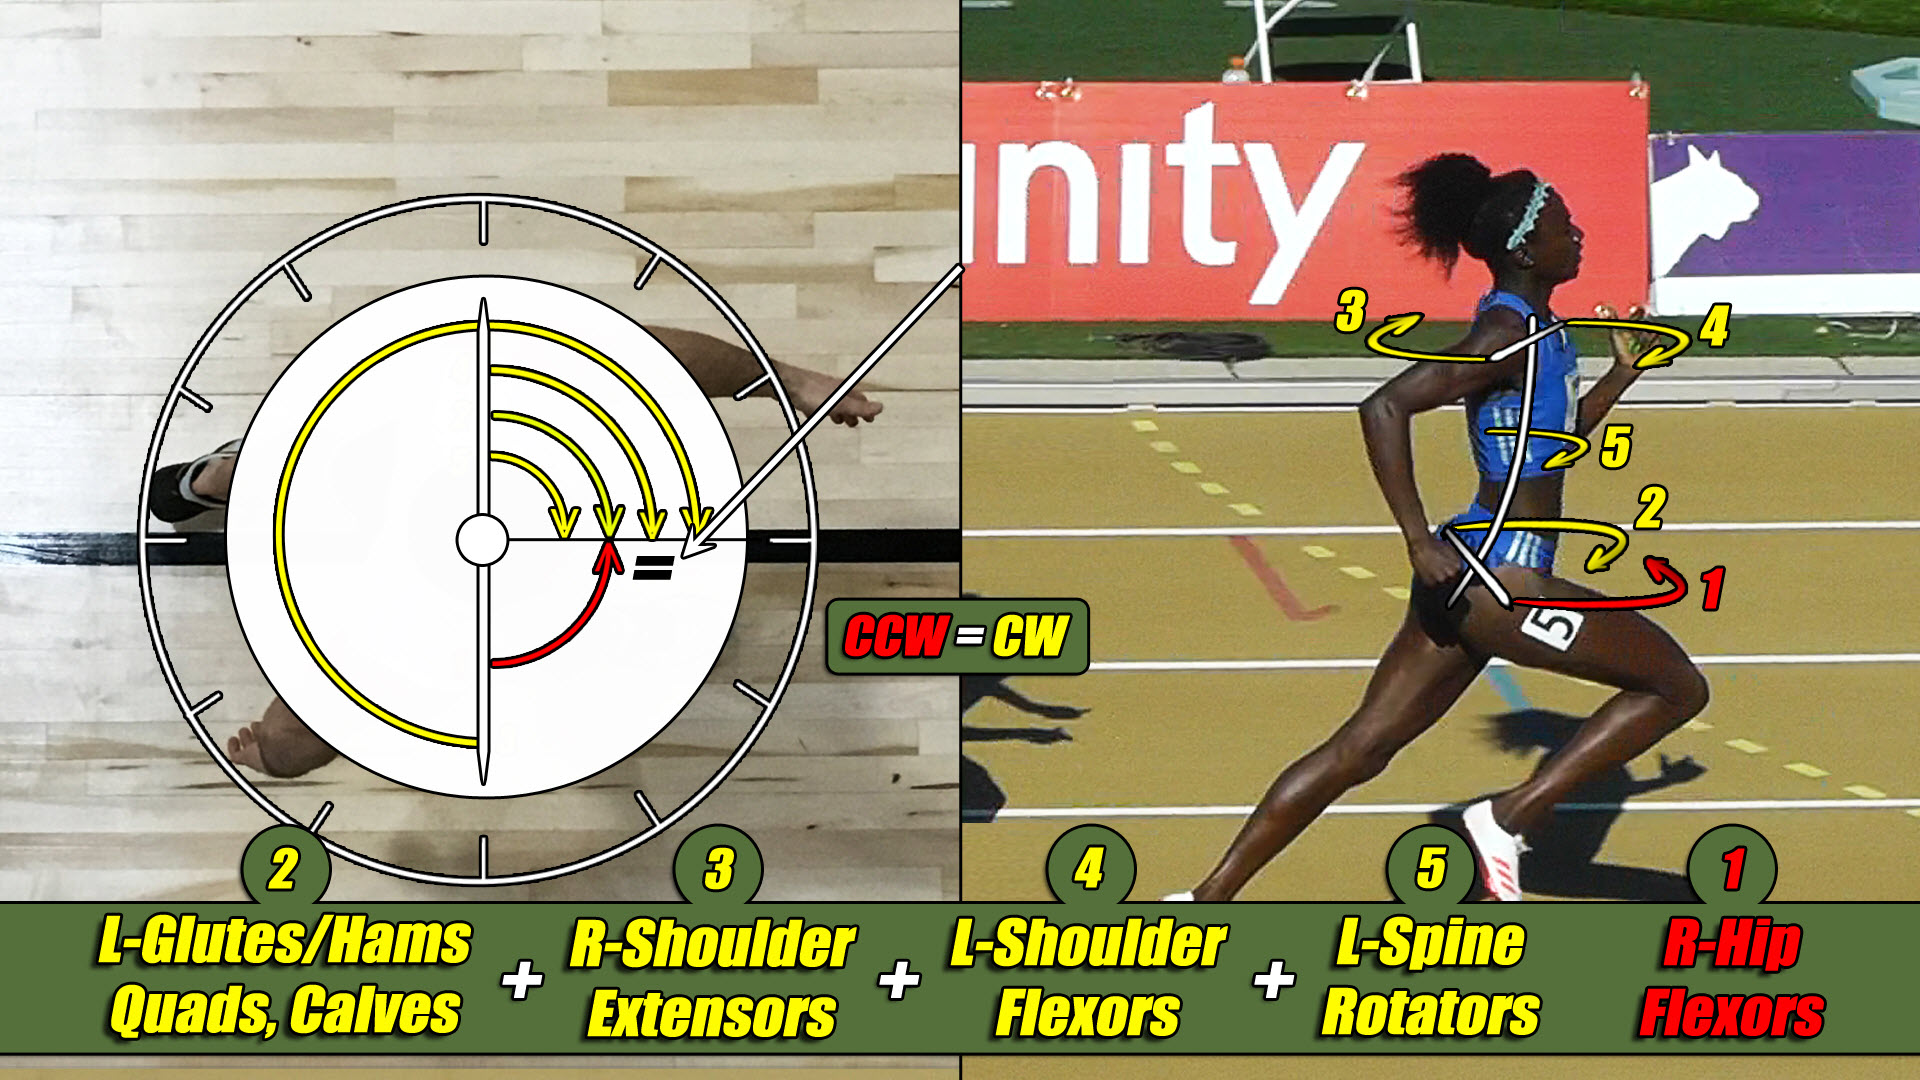
And since this is the case with these athletes, we can then place an equal sign here as well as down below in Figure 10-15 showing this relationship and this is also indicated here in the middle with our key that shows how all of the CCW torques are equal to all of the CW torques.
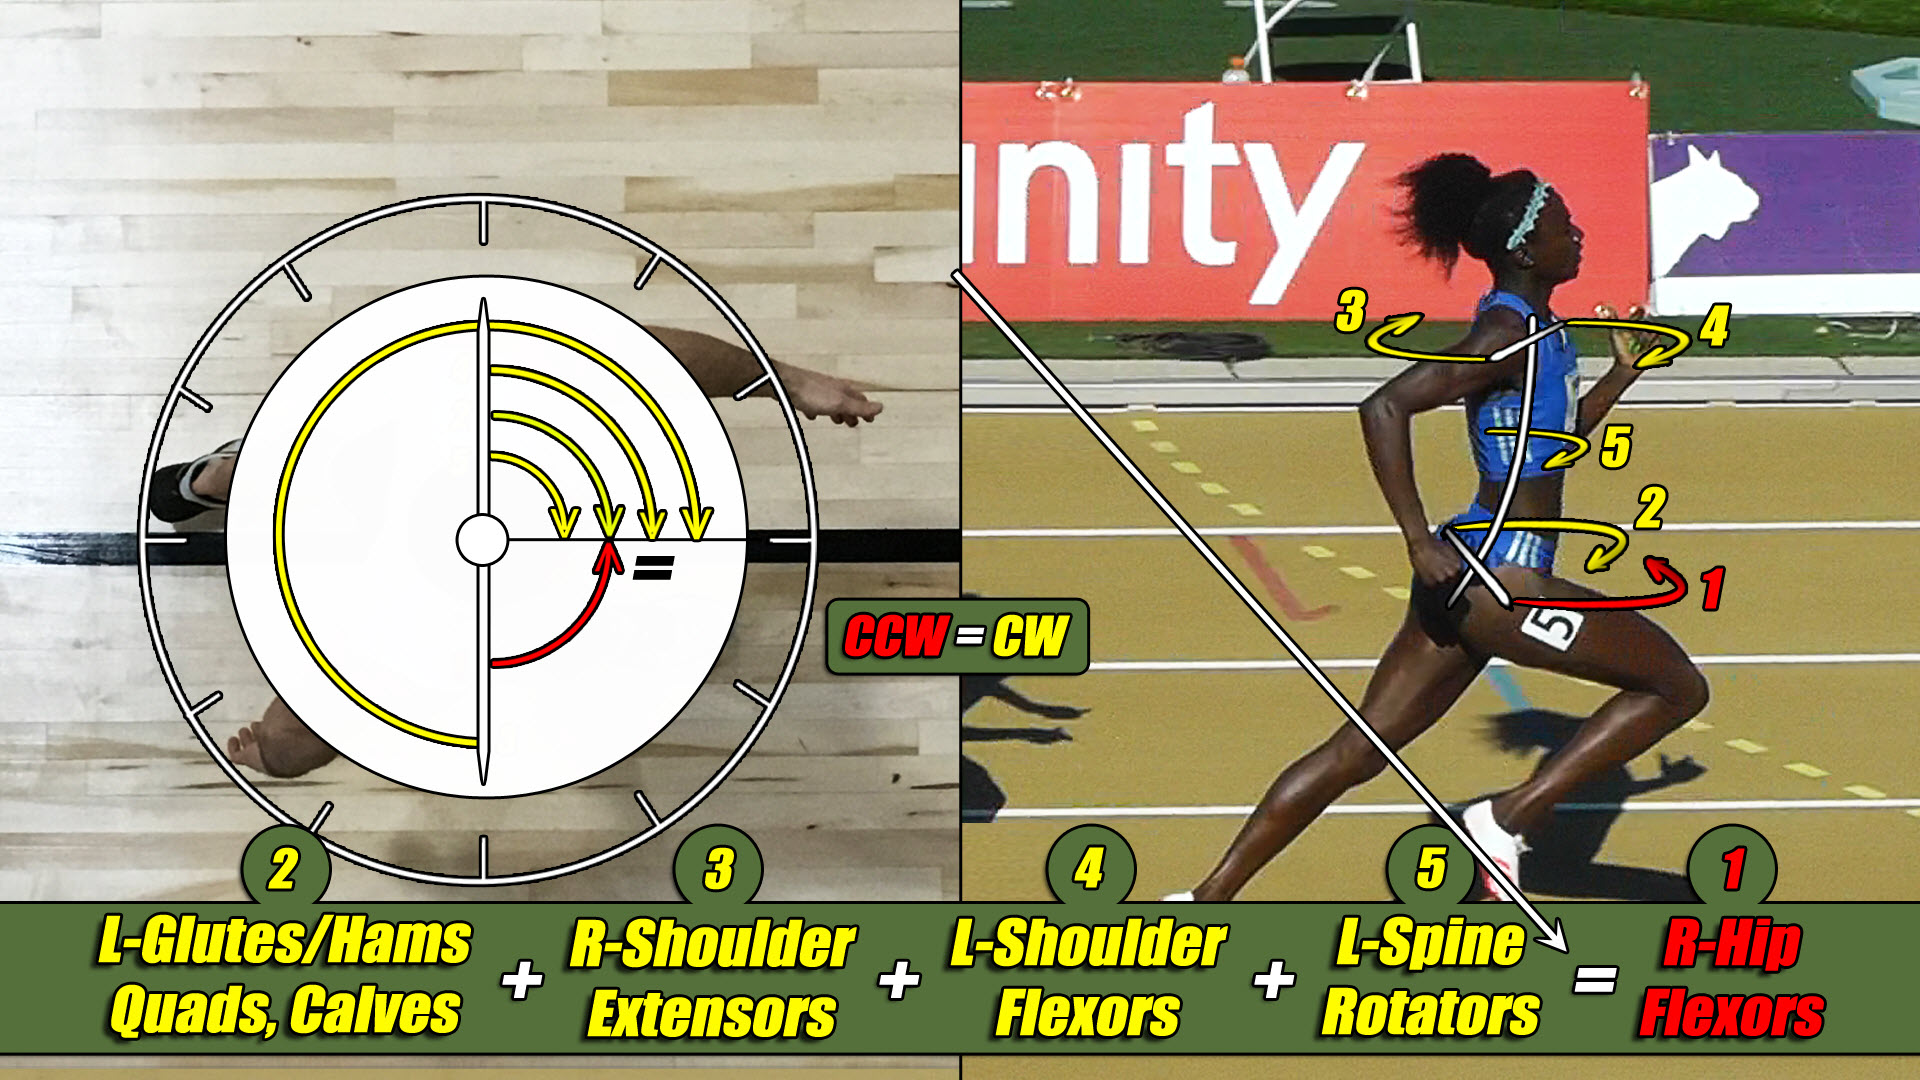
So, this is, the other pattern of torque your body uses when it runs and we can also call this the Ultimate Running Speed Equation. See Figure 10-16 below.
So, these are the two, and only two, patterns of torque shown in Figure 10-17 below that your body generates while running and this is its way of telling you, in plain sight everything it needs to be successful. It’s telling you it needs the glutes/hams, quads and calves, hip flexors, shoulder flexors, shoulder extensors and lateral spine rotators to be strong on both sides of your body.
Now, it is at this point in my training session that I need to stop, take a little break from sharing anything new with the person, or, persons I am working with, and really do my best to solidify their understanding of these torques and how they are needed to help them run faster.
Otherwise, they aren’t going to accept any of my speed training recommendations which, as you might have guessed, are based on improving their torque and end up right back inside a squat rack cranking out as many reps as they can as their only option to get faster and while I fully support that and similar exercises, they absolutely must get it in their heads that the glutes/hams, quads and calves are just one piece of a much larger torque puzzle when it comes to speed training.
So, what I do to really help cement this understanding in their minds is take them through an exercise, a sort of testing procedure, to see if they can simply recognize which pattern of torque an athlete is in and identify the muscles they are using at that moment and I do this by showing them various clips of some of the best sprinters and middle distance runners in the United States because their torque output is really high and once I see where they can quickly spot this in successful athletes, then I know my training recommendations are likely to be followed.
And so, that is what I am going to do with you, right now. I’m going to show you some clips of American athletes running and go through their torque patterns with you, but before I do that, I need to show you a quick and easy way of identifying which torque pattern an athlete is in and it’s based on the understanding of just a couple of key points involving only the legs.

