
Serve With More Speed and Power by Knowing the Mechanics of the Tennis Serve and Which Muscles to Condition
The Tennis Serve consists of three main phases: 1) the backswing, 2) the forward swing and 3) the follow through.
Each phase will be broken down for the right-hand player and the most important muscles contributing to each phase will be identified. However, before any of these phases are performed, getting into the proper stance is required. Therefore, let’s first identify the basic stance position for the right-handed tennis player.
Stance Position
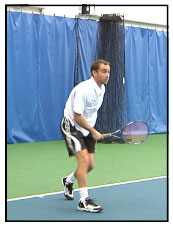
Referring to Figure 1, below, notice the front foot is directly behind the baseline angled diagonally into the court. The back foot is angled less into the court and more toward the sideline, and is situated behind the front foot.
Both feet are about shoulder width apart, and the majority of the weight is on the front foot with the back foot used mainly for balance. The racket is pointing directly at the net and the ball is held against the throat of the racket. This is the basic stance position.
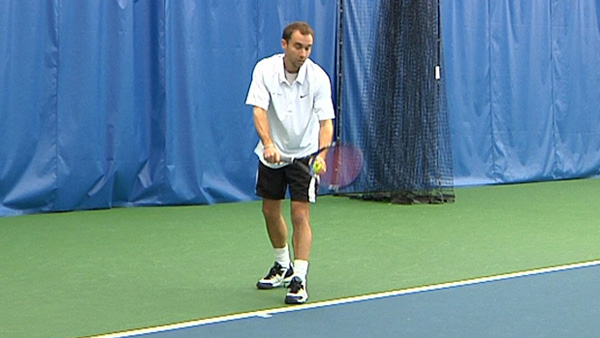
Figure 1. The Stance Position.
Okay, now that the stance position has been properly described, let’s move on to the first phase of the tennis serve, that being the backswing.
Phase 1: The Backswing
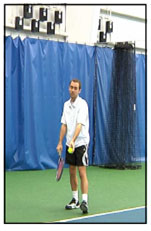
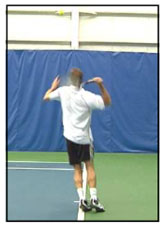
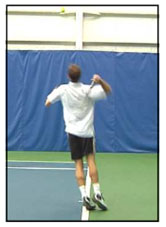
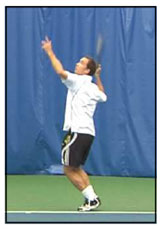
The backswing transitions us from the stance position seen in Figure 2a, below, to the trophy pose position seen in Figure 2d.

During this transition, three noticeable movements take place at the same time:
- motion of the tossing arm
- motion of the racket arm
- transfer of weight between the feet
Movement #1: Motion of the Tossing Arm
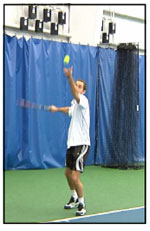
Generally speaking, both arms drop together as seen in Figure 2b, above, and then rise up together as seen in Figure 2d.
Focusing on the tossing (left) arm in Figure 2c, above, the muscles that allow for this upward movement are the Coracobrachialis, Biceps Brachii, Anterior Deltoid and Pectoralis Major.
Movement #2: Motion of the Racket Arm
From the stance position in Figure 2a, above, the racket arm drops down (Figure 2b) and is then abducted out to the side of the body with the palm of the hand facing downward (Figure 2c). The primary muscle responsible for abducting the racket arm out to the side is the Middle Deltoid.
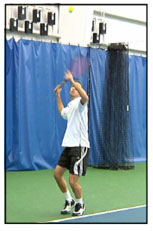
Now if we continue on with the motion of the racket arm, we end up in a position called the “L” position (Figure 2d) because the racket arm and forearm end up making the shape of the letter “L” and this position is necessary to allow you to swing the racket correctly later on in the serve.
The muscles that help get your racket arm into this position are collectively known as the external shoulder rotators and their names are the Teres Minor and the Infraspinatus muscles.
Movement #3: Transfer of Weight Between Feet
The other noticeable movement that occurs in going from the stance position, Figure 2a, to the trophy pose position, Figure 2d, is the transfer of weight that occurs between your feet. Beginning in the stance position in Figure 2a, the majority of weight starts out on the front foot and the back foot is used mainly for balance. Figure 2a shows this with the front foot flat on the ground and the heels of the back foot slightly elevated.
Balancing in this position is a function of the hip stabilizer muscles on the left side of the body. From there, your weight rocks back on to your back foot and then the toes of your front foot come up off the ground (Figure 2b).
Your weight then rocks back forward (Figure 2c) and while this is happening, both knees start to bend – a function of the Quadriceps muscles.
The heels of your feet also start to rise up off the ground – a function of the Ankle Plantar-flexors.
As you continue to rock forward, your back foot is brought inward, or adducted by the Adductor muscles, toward your front foot and you end up in the trophy pose position signifying the end of the backswing (Figure 2d).
Here, the knees are bent, ankles are plantar-flexed, racket arm is in the “L” position and the tossing arm is pointing up.
…………………………………………………….
Only $19.95! PDF Download Immediately After Purchase
 …………………………………………………….
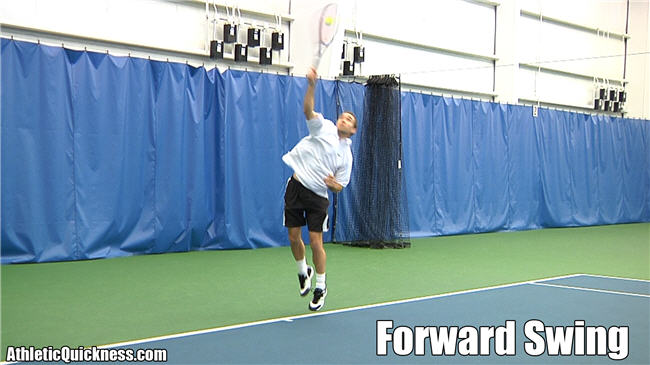
Phase 2: The Forward Swing
The forward swing of the tennis serve has two distinct transitions in body positions as follows:
- Transitioning from the trophy pose position to what is called the racket drop position and
- Transitioning from the racket drop position to the contact with the ball position.
Each of these transitions has three distinct movements of their own.
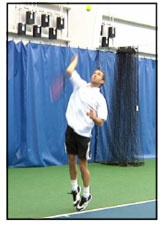
Transition #1 of the Forward Swing – From Trophy Pose to Racket Drop
Movement #1: Racket Drop.
The first noticeable motion that takes place during this first transition of the tennis serve is the dropping of the racket behind the back, which is where the name racket drop comes from.
Starting from the trophy pose in Figure 3a, below, with the racket arm in the “L” position, as the racket begins to drop behind the back, the right upper arm and perhaps more noticeably, the right elbow, starts to rise upward. This can be seen by focusing on the right arm throughout the sequence of images below, Figures 3a through 3d.
This results in maximum external rotation of the racket arm at the shoulder joint seen in Figure 3d, and this external rotation is caused by the action of the Teres Minor and Infraspinatus muscles.


Movement #2: Tossing Arm Drop.
The second noticeable movement that takes place during this first transition of the tennis serve, or, forward swing is the dropping of the tossing arm.
Again, looking at the images above, if you focus your attention on the tossing arm through the progression of images 3a through 3d, we see that it is being pulled down to the side of the body. This drawing down of the tossing arm enables the racket arm shoulder to flow freely over and across the upper body later during the service motion and is what many refer to as the shoulder-over-shoulder motion.
The muscles that draw the tossing arm down to the side of the body during the tennis serve are the Latissimus Dorsi and Teres Major muscles.
Movement #3: Leg Push.
The third noticeable movement that takes place during this first transition of the tennis serve is the leg push.
Looking at the sequence of images below and starting with the first image, Figure 4a, (the trophy pose position), your weight starts out evenly distributed on the balls of each foot and the knees are flexed. Now focus your attention on the knees and ankles though the progression of images, Figures 4a through 4d.
The knees straighten out which is a function of the Quadriceps muscles and the ankles begin to plantar-flex, or point down, which is a function of the Ankle Plantar-flexors.
…………………………………………………….
Only $19.95! PDF Download Immediately After Purchase
…………………………………………………….Transition #2 – From Racket Drop to Contact With the Ball
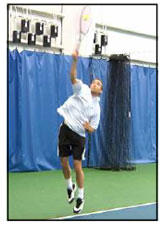
Movement #1: Internal Rotation of Racket Arm Shoulder
The first noticeable movement that takes place during this second transition of the tennis serve is internal rotation of the racket arm shoulder.
Internal rotation, or medial rotation, is the inward turning of the upper arm in toward your body; however, with the racket arm in the drop position, internal rotation is more correctly defined as the upward and then forward rotation of the upper arm at the shoulder joint.
In the racket drop position, Figure 5a below, the shoulder is placed in maximum external rotation, so that the internal rotators of the shoulder can be stretched. This stretching of the internal rotators during the racket-drop is the last group of muscles to undergo an elastic stretch, and it is necessary to complete the loading of the shoulder joint and enable it to deliver maximum speed and power during the serve.
We can see the releasing of these stretched muscles here when you focus your attention on the racket arm through the progression of pictures below from Figure 5a to Figure 5d.

The muscles that allow for this internal rotation of the shoulder from the racket drop position to the contact point of the tennis serve are the Subscapularis, Latissimus Dorsi, Teres Major and Pectoralis Major muscles.
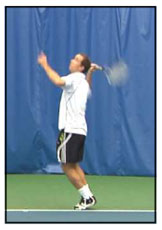
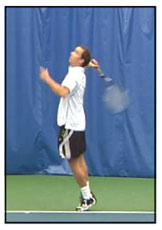
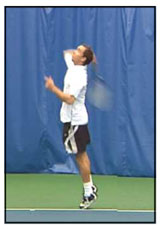
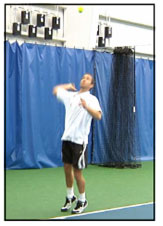
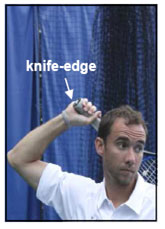
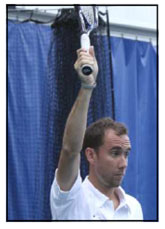
Movement #2: Pronation of Racket-Arm’s Elbow
The second noticeable movement that takes place during this second transition of the tennis serve is pronation of the racket-arm’s elbow.
At the start of this motion, the racket-arm hand is being swung with the knife-edge of the hand pointing upward.
The knife-edge is the side of the hand where the little finger is, Figure 6a below, and it remains facing up in this position until the hand rises above the head, Figure 6b.
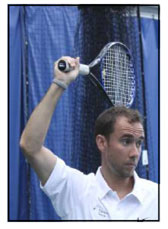
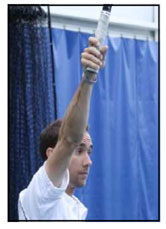
From there the elbow begins to turn or pronate toward the net as in Figure 6c. This causes the palm of the racket hand to face the net, Figure 6d, which opens the strings of the racket just before contact is made with the ball.
You can see this if you focus on the racket hand through the progression of pictures from Figure 6a through 6d. The muscles involved in pronation of the elbow during the tennis serve are the Pronator Teres and Pronator Quadratus.
Movement #3: Upper Body Rotation.
The third noticeable movement that takes place during this second transition of the tennis serve is rotation of the upper body toward the net, and you can see this if you focus your attention on the upper body through the progression of pictures, above, from Figure 5a through 5d
The muscles responsible for this part of the tennis serve are the lateral rotators of the spine and their names are the Multifidus, Rotatores Spinae and External Abdominal Oblique muscles.
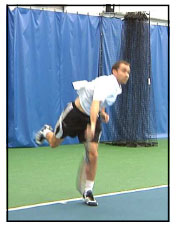
Phase 3: The Follow Through
The follow through occurs after contact with the ball is made beginning with Figure 7a, below. From there, the racket arm continues with internal rotation of the shoulder, Figure 7b, pronation of the elbow, Figure 7b, and flexion of the wrist, Figure 7b. The racket ends up pointing down toward the ground and you land on the front foot, again, Figure 7b.

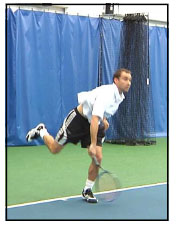
The racket arm then adducts across your body as seen in Figures 7c and 7d. The back foot comes forward, landing in the court going toward the net signifying the end of the serve, Figure 7d.
The muscles that adduct the racket across your body are the Pectoralis Major and Anterior Deltoid.
…………………………………………………….
Only $19.95! PDF Download Immediately After Purchase
…………………………………………………….Best Exercises for Racket Speed & Court Quickness
Always glad to help!
Dr. Larry Van Such